BIG GRIZZ 2.0 Diablo IV Druid Build [RDY-4-Launch]

BIG GRIZZ 2.0 Druid BUILD for Diablo IV [RDY-4-Launch]

(this build’s got that BIG GRIZZ energy & uses two defensive skills, making it beary tanky)

♦ ◊ ♦ ◊ ♦

Diablo IV launches on June 6th, 2023 for PC (Battle.Net), XBOX, & PlayStation with a 4 days Early Access (no wipe) for pre-orders (so kind of really launching June 2nd).

Diablo IV‘s Launch is getting closer and it’s time to make some Ready-For-Launch full Builds/Theorycrafts that should be good for both ‘fresh-into-endgame’ characters as well as late endgame. I’ also plan to evolve them further when the game is released & keep them updated when we get rebalance updates. This is one such build for the Druid Class called BIG GRIZZ 2.0.

I’ve also made spreadsheets for those builds (see the links below) that have shortlisted the active and passive skills + legendary aspect + unique item + gems & sockets + suggested stat rolls + paragon boards that work well with the build which you can use to tinker. Alternatively, i’ve added build calculator links (mostly needed for the paragons)

This build will be updated post-launch to a new & expanded version when I have more in-game information as reference.

Video Version:

Skill Trees

Below you’ll see ONLY the Active & Passive skills that were selected for this build. For additional skills that can be taken + alternative skill options, you can check my RDY-4-Launch Builds spreadsheet on this link. This build (BIG GRIZZ 2.0) is one of the builds on that spreadsheet.

Basic Skill (Resource Generator/Builder) (Required Points: 0 )

  • (active) Storm Strike – Electricity gathers around your weapon, dealing 20% (X-?) damage to your target and chaining to up to 3 surrounding enemies, dealing 20% less damage each time it chains. You gain 25% Damage Reduction for 3 seconds after dealing damage with Storm Strike. Lucky Hit Chance: 25% Type: Storm Magic ; Damage: Lightning Generates: 15 Spirit
    • (1st upgrade) Enhanced Storm Strike – Storm Strike has a 15% chance to Immobilize all enemies hit for 2.5 seconds.
    • (2nd upgrade – my pick of the 2) Fierce Storm Strike – Storm Strike has a 50% chance to make enemies Vulnerable for 3 seconds.

Spirit / Core Skill(s) (Resource Spender) (Required Points: 2 )

  • (active) Pulverize Shapeshift into a Werebear and slam the ground, dealing 50% (X-?) damage to nearby enemies. Lucky Hit Chance: 33% Type: Shapeshifting ; Damage: Physical Spirit Cost: 35
  • (1st upgrade) Enhanced Pulverize – Your next Pulverize will Overpower every 10 seconds while you remain Healthy.
  • (2nd upgrade – my pick of the 2) Raging Pulverize – Enemies are Stunned for 2 seconds when they are Overpowered with Pulverize.
  • (passive) Predatory Instinct Critical Strike Chance against nearby enemies is increased by +3%/+6%/+9%.
    • (upgrade) Iron Fur – You gain 3%/6%/9% Damage Reduction while in Werebear form. This bonus persists for 3 seconds after leaving Werebear form.
    • (upgrade – did NOT take cuz it’s a Werewolf synergy) Digitigrate Gait / Lycanthropic Speed
  • (passive) did not pick other Spirit/Core passives to save points

Defensive Skills (Required Points: 6 ) I took both of the Defensive skills listed below
  • (active) Earthen Bulwark – Rocks surround you for 3 seconds, granting a Barrier that absorbs 45% of your Base Life in damage. Lucky Hit Chance: 50% Cooldown: 16 seconds Type: Earth Magic ; Damage: Physical
  • (1st upgrade) Enhanced Earthen Bulwark Earthen Bulwark makes you Unstoppable while active.
  • (2nd upgrade – my pick of the 2) Preserving Earthen Bulwark – Casting Earthen Bulwark grants 18% Base Life as Fortify.
  • (active) Blood Howl – Shapeshift into a Werewolf and howl furiously, Healing you for 20% of your Maximum Life. Cooldown: 15 seconds Type: Shapeshifting
  • (1st upgrade) Enhanced Blood Howl – Kills reduce the Cooldown of Blood Howl by 1 second.
  • (2nd upgrade – my pick of the 2) Innate Blood Howl Blood Howl also generates 20 Spirit.
  • (passive) Ancestral Fortitude Increase your Non-Physical Resistances by 5%/10%/15%.
    • (upgrade) Vigilance did not take to save points
  • (passive) did not pick other Defensive passives to save points

Companion Skills (Required Points: 11 ) I did NOT take a companion BUT if you want to sacrifice one of the Defensive skills, I recommend the skills & upgrades below

  • (active) DID NOT TAKE a Companion active due to using already full skillbar
  • (1st upgrade)
  • (2nd upgrade – my pick of the 2)
  • (passive) did not pick any Companion passives to save points

Wrath Skills (Required Points: 16 )

  • (active) Hurricane Form a hurricane around you that deals 97% (X-?) damage to surrounding enemies over 8 seconds. Lucky Hit Chance: 33% Cooldown: 20 seconds Type: Storm Magic ; Damage: Physical
  • (1st upgrade) Enhanced Hurricane Enemies who are damaged by Hurricane are Slowed by 25% for 2 seconds.
  • (2nd upgrade – my pick of the 2)Savage Hurricane Enemies affected by Hurricane deal 20% less damage.
  • (passive) Crushing Earth Earth Skills deal 5%/10%/15% (multiplicative) increased damage to Slowed, Stunned, Immobilized or Knocked Back enemies.
    • (upgrade) Stone Guard While Fortified for over 50% of your maximum Life, your Earth Skills deal 4%/8%/12% (multiplicative) increased damage.
    • (upgrade) Safeguard Critical Strikes with Earth Skills Fortifiy you for 2%/4%/7% Base Life.
  • (passive) did not pick any other Wrath passives to save points but there are some worth considering

Ultimate Skills (Required Points: 23 )

  • (active) Grizzly Rage Shapeshift into a Dire Werebear for 10 seconds gaining 20% (multiplicative) bonus damage and 20% damage reduction. Damage bonus is increased by 3% each second while in this form. Kills extend the duration by 1 second up to 10 additional seconds. Cooldown: 60 seconds Type: Shapeshifting
  • (1st upgrade) Prime Grizzly Rage – You are Unstoppable when Grizzly Rage is active.
  • (2nd upgrade) Supreme Grizzly Rage Gain 8% Base Life as Fortify per second while Grizzly Rage is active.
  • (passive) Defiance Nature Magic skills deal 4% (multiplicative) increased damage to Elites.
    • (upgrade) Natural Disaster Your Earth Skills deal 4%/8%/12% (multiplicative) increased damage to Vulnerable enemies. Your Storm Skills deal 4%/8%/12% (multiplicative) increased damage to enemies that are Stunned, Immobilized, or Knocked Back.
    • (upgrade – did NOT pick to save points) Circle of Life Nature Magic skills that consume Spirit restore 1%/2%/3% of your maximum Life.
    • (upgrade) Resonance Nature Magic Skills deal 2%/4%/6% (multiplicative) increased damage. Triple this bonus if an Earth Skill is the next Skill cast after a Storm Skill, or a Storm Skill is the next Skill cast after an Earth Skill.
  • (passive) Defensive Posture – Increases the amount of Fortify you gain from all sources by +5%/+10%/+15%.
    • (upgrade) Thick Hide Whenever you are Stunned, Immobilized, or Knocked Down, Fortify for 6%/13%/19% Base Life.
    • (upgrade – only invested 1 point due to lack of points) Nature’s Resolve – 5%/10%/15% chance when struck to Fortify you for 4% Base Life.
    • (upgrade) Unrestrained – Reduce the duration of control impairing effects by 3%/6%/9%. Triple this effect while you have Fortify for over 50% of your maximum Life.
  • (passive) did not pick other Ultimate passives to save points

Specializations (Required Points: 33 )

  • (passive) Ursine Strength – Gain 20% (multiplicative) additional maximum Life while in Werebear form and for 3 seconds after leaving Werebear form. While Healthy, deal 30% (multiplicative) increased damage.

Class Mechanic (Spirit Boons):

I don’t have much info regarding the Spirit Boons but I think you can pick at least 2 from the same category + maybe 1 more from another. I’d advise getting the following 2 for now.

  • Eagle Category, Scythe Talons: +5% Critical Strike Chance.
  • Eagle Category, Avian Wrath +30% Critical Strike Damage.

Unique Item

In Diablo IV apparently (I have multiple sources that confirmed this) we can equip more than one unique item at the same time (not so ‘unique’ if we can get decked out in full uniques I guess). It seems that the one unique per build idea that Unique inherited from the Mythical gear they supposedly replaced was scrapped even before the closed beta tests. My top pick will be the following one but check the notes under the Aspects list for some additional picks:

Insatiable Fury (Chest Armor)

Werebear form is now your true form, and you gain +2 Ranks to all Werebear Skills.

+[0.07 – 0.14] Physical Damage
+[21 – 42]% Overpower Damage
[7 – 14]% Damage Reduction while Fortified
+[0.07 – 0.14] Armor

When the Days of Ash began, the great druid Nafain reminded his disciples that nothing, not even the loss of their humanity, was too great a sacrifice to protect Túr Dúlra from Astaroth’s flames.

Sockets & Gems

Full Diamonds is a good fit for many builds, including this one. I’ve shortlisted 5 total gems that work well with the build so pick based on your preference. I’d recommend doing for Weps: Diamond, Skull, Saphire, Ruby or Emerald. For Armor: Diamond, Skull, Saphire, or Ruby. For Jewelry: Diamond unless you need specific resistance more than all.

XYZ Diamond (Requires Level XY)

• Weapon: +N% Ultimate Skill Damage
• Armor: +N% Barrier Generation
• Jewelry: N% Resistance to All Elements

+5%/+5%/5 for chipped (the 2nd grade at lvl 20)

XYZ Skull (Requires Level XY)

• Weapon: +N Life On Kill
• Armor: +N% Healing Received • Jewelry: +N Armor

+13/+5%/+170 for chipped (the 2nd grade at lvl 20)

XYZ Saphire (Requires Level XY)

• Weapon: +N% Critical Strike Damage to Crowd-Controlled Enemies
• Armor: N% Damage Reduction While Fortified
• Jewelry: N% Cold Resistance

+7.5%/5%/14.3% for chipped (the 2nd grade at lvl 20)

XYZ Ruby (Requires Level XY)

• Weapon: +N% Overpower Damage

• Armor: +N% Maximum Life
• Jewelry: N% Fire Resistance

+15%/+5.5%/14.3% for chipped (the 2nd grade at lvl 20)

XYZ Emerald (Requires Level XY)

• Weapon: +N% Critical Strike Damage to Vulnerable Enemies
• Armor: +N Thorns
• Jewelry: N% Poison Resistance

+7.5%/39/14.3% for chipped (the 2nd grade at lvl 20)

Legendary Aspects / Powers

I will only list the Legendary Aspects that have been selected for the build and the slots in which I advise putting those. For in-depth information you can check my RDY-4-Launch Builds spreadsheet on this link. This build (BIG GRIZZ 2.0) is one of the builds on that spreadsheet.

  • Helm: Stormshifter’s Aspect
  • Amulet: Ballistic Aspect
  • Chest: *Earthguard Aspect OR Exploiter’s Aspect OR Symbiotic Aspect (see note below)
  • Pants: Mending Stone
  • Gloves: Aspect of The Ursine Horror
  • Boots: *Symbiotic Aspect OR Exploiter’s Aspect (see note below)
  • Ring 1: Aspect of Retaliation
  • Ring 2: Mangled Aspect
  • 1H Weapon (see note below): Aspect of Natural Balance
  • Off-hand (see note below): *Shockwave Aspect (see note below)
  • 2-H Weapon (see note below): Aspect of Natural Balance
NOTE 1: Get rid of 1, keep 1 in the boots, and use temporarily the other between: Earthguard Aspect OR Symbiotic Aspect OR Exploiter’s Aspect. This is a tough choice to make and it's up to you which one you like most to keep in the Boots and which one you want to use until the Unique. We'll need to empty this slot for the awesome unique eventually. You can have 1 here & the other in the Boots before you get the Unique Chest. I'd go Earthguard in the Chest as temp and Exploiter's in the Boots

NOTE 2: You may wanna consider putting Crashstone Aspect in the Off-hand slot or maybe put Aspect of The Rampaging Werebeast there

Paragon Boards:

Use the links below to check the paragon boards selected and the nodes I’ve taken. One link is for what the boards will look like at lvl 92 without any paragon points from renown (so more paragon points will be obtained on the way to 100 as well as from renown. The other link will be what the boards will look like when fully maxed out on paragon points.

Suggested Gear Rolls to look out for (NOT in order of priority):

I’ve shortlisted 37 different affixes that work well with the build of almost 300 total. I’ll highlight in Orange the ones I think should get higher priority

Bonus to All Damage
Critical Strike Damage Bonus
Critical Strike Chance
Critical Strike Damage with Core Skills
Damage with Core Skills
Lucky Hit Chance
Earth/Lightning Damage Bonus
Earth/Lightning Critical Strike Damage Bonus
Resistance to All Elements
Cooldown Reduction
+ % Critical Strike Chance with Earth/Lightning Damage
+ % Damage to Elites
+ % Earth/Lightning Damage to Elites
Damage Upon Killing an Elite
+ % Critical Strike Chance with Earth/Lightning Damage Against Elites
Damage Reduction for X Seconds After Killing an Elite
+ % Damage for X Seconds After Killing an Elite
Damage Reduction from Elites
Vulnerable Damage
Critical Strike Damage to Close Enemies
Critical Strike Damage to Vulnerable Enemies
Critical Strike Damage to Crowd Controlled Enemies
Critical Strike Damage with Nature/Earth/Shapeshifting/Storm Skills
Damage while Healthy
Damage to Vulnerable Enemies
Damage to Close Enemies
Damage to Crowd Controlled Enemies
Damage while Fortified
High Priority
+ All Stats
Damage vs Injured Enemies
Damage vs Healthy Enemies
Weapon Damage (not sure if there are any bonuses to that as rolls)
Spirit Generation / Regeneration / On Kill
Movement Speed
Attack Speed
Willpower
Resource Cost Reduction
Low Priority

Useful Links (Spreadsheets & more):

For all of my Diablo IV RDY-4-Launch Theorycrafts/Builds: This Spreadsheet

For my Diablo IV Pre-Launch Class Skill Trees (can be used as mini-calculator): This Spreadsheet

For all of my Diablo IV Pre-Launch Theorycrafts/Builds: This Spreadsheet

♦ ◊ ♦ ◊ ♦

This concludes the BIG GRIZZ 2.0 Druid Build for Diablo IV. If you’re interested in the game, below are links to the various platforms where one can buy it (you can just click the links to open a new tab):

PC (Battle.Net)

XBOX

PlayStation

Official Website

Reaping Army 2.0 Diablo IV Necromancer Build [RDY-4-Launch]

Reaping Army 2.0 Necromancer BUILD for Diablo IV [RDY-4-Launch]

(control an Army of Undead and get bonuses based on the number of summoned Minions)

♦ ◊ ♦ ◊ ♦

Diablo IV launches on June 6th, 2023 for PC (Battle.Net), XBOX, & PlayStation with a 4 days Early Access (no wipe) for pre-orders (so kind of really launching June 2nd).

Diablo IV‘s Launch is getting closer and it’s time to make some Ready-For-Launch full Builds/Theorycrafts that should be good for both ‘fresh-into-endgame’ characters as well as late endgame. I’ also plan to evolve them further when the game is released & keep them updated when we get rebalance updates. This is one such build for the Necromancer Class called Reaping Army 2.0.

I’ve also made spreadsheets for those builds (see the links below) that have shortlisted the active and passive skills + legendary aspect + unique item + gems & sockets + suggested stat rolls + paragon boards that work well with the build which you can use to tinker. Alternatively i’ve added build calculator links (mostly needed for the paragons)

This build will be updated post-launch to a new & expanded version when I have more in-game information as reference.

Video Version:

Skill Trees

Below you’ll see ONLY the Active & Passive skills that were selected for this build. For additional skills that can be taken + alternative skill options, you can check my RDY-4-Launch Builds spreadsheet on this link. This build (Reaping Army 2.0) is one of the builds on that spreadsheet.

Basic Skill (Resource Generator/Builder) (Required Points: 0 )

  • (active) DecomposeTear the flesh from the enemy, dealing 30% (X) damage per second and forming a usable corpse with the flesh every 2.5 seconds. Lucky Hit Chance: 40% Generates: 7 Essence per second Damage: X ; Tags:
    • (1st upgrade) Enhanced Decompose – If an enemy dies while being Decomposed, you gain 10 Essence.
    • (2nd upgrade – my pick of the 2) Acolyte’s Decompose – You and your Minions deal 10% (multiplicative) increased damage to enemies who are being Decomposed.

Core Skill(s) (Resource Spender) (Required Points: 2 )

  • (active) Sever – A spectre of you charges forward and attacks with its scythe for 42% (X) damage then returns to you and attacks again for 21% (X-?) damage. Lucky Hit Chance: 20% Essence Cost: 20 Damage: X ; Tags:
    • (1st upgrade) Enhanced Sever – Sever damages enemies along its path for 25% of its damage.
    • (2nd upgrade – my pick of the 2) Supernatural Sever – Sever deals 2% (multiplicative) increased damage for each Minion you have upon cast.
  • (passive) Hewed Flesh Lucky Hit: Your damage has up to a 4%/8%/12% chance to create a corpse at the target’s location.
  • (passive) DID NOT INVEST in other Core passives to save points

Macabre Skills (Required Points: 6 )

  • (active) Corpse Explosion – Detonate a Corpse, dealing 75% (X-XX) damage to nearby enemies. Lucky Hit Chance: 40% Damage: X ; Tags:
    • (1st upgrade) Enhanced Corpse – Corpse Explosion’s radius is increased by 15%.
    • (2nd upgrade – my pick of the 2) Blighted Corpse Explosion – Corpse Explosion becomes a Darkness Skill and, instead of exploding, releases a vile miasma dealing 110% (X-?) Shadow Damage over 6 seconds.
  • (passive) Grim Harvest Consuming a Corpse generates 3/6/9 Essence.
    • (upgrade) Fueled by Death You deal 4%/8%/12% (multiplicative) increased damage for 4 seconds after consuming a Corpse.
  • (passive) Skeletal Warrior Mastery Increase the damage and Life of your Skeletal Warriors by 15%/30%/45% (multiplicative).
  • (passive) DID NOT INVEST in other Macabre passives to save points

Corruption Skills (Required Points: 11 )

  • (active) DID NOT TAKE a Corruption active due to using 2 minions on the skillbar
    • (1st upgrade)
    • (2nd upgrade – my pick of the 2)
  • (passive) Skeletal Mage Mastery – Increase the damage and Health of your Skeletal Mages by 15%/30%/45% (multiplicative).
  • (passive) DID NOT INVEST in other Corruption passives to save points

Summoning Skills (Required Points: 16 )

  • (active) DID NOT TAKE a Summoning active due to using 2 minions on the skillbar
    • (1st upgrade)
    • (2nd upgrade – my pick of the 2)
  • (passive) Reaper’s Pursuit – Damaging enemies with Darkness Skills increases your Movement Speed by +5%/+10%/+15% for 3 seconds.
    • (upgrade) Crippling Darkness – DID NOT INVEST in this to save points
    • (upgrade) Gloom – When you damage enemies with Darkness Skills, they take 2%/4%/6% (multiplicative) increased Shadow Damage from you and your Minions for 2 seconds, stacking up to 3 times.
    • (upgrade) Terror – Darkness Skills deal 3%/6%/9% (multiplicative) bonus damage to enemies who are Slowed, and 3%/6%/9% (multiplicative) bonus damage to enemies who are Stunned or Immobilized. These bonuses stack and apply to Shadow Damage dealt by your Minions.
  • (passive) Necrotic Carapace – When a Corpse is formed from your Skills or your Minions, Fortify for 2%/4%/6% Base Life.
  • (passive) DID NOT INVEST in other Summoning passives to save points

Ultimate Skills (Required Points: 23 )

  • (active) Army of the Dead – Call forth the deep buried dead. Volatile Skeletons emerge over the next 7 seconds that explode when around enemies, dealing 30% (X-?) damage. Lucky Hit Chance: 54% Cooldown: 90 Seconds. Damage: X ; Tags:
    • (1st upgrade) Prime Army of the Dead – When Army of the Dead’s Volatile Skeletons explode, they have 15% chance to leave behind a Corpse.
    • (2nd upgrade) Supreme Army of the Dead – Army of the Dead also raises your Skeletal Warriors and Skeletal Mages.
  • (passive) Bonded in Essence Every 5 seconds, your Skeletal Priest’s Healing will Heal your skeletons for 20%/40%/60% of their Maximum Life.
    • (upgrade) Death’s Defense Your Minions can’t lose more than 75%/50%/25% of their maximum Life from a single damage instance.
  • (passive) Golem Mastery Increase the damage and Life of your Golem by 15%/30%/45% (multiplicative).
  • (passive) Inspiring Leader After you have been Healthy for at least 4 seconds, you and your Minions gain +4%/+8%/+12% Attack Speed. (seems to need a point in Death’s Defene to unlock this)
    • (upgrade) Hellbent Commander Your Minions deal 10%/20%/30% (multiplicative) increased damage while you are near them.
  • (passive) DID NOT INVEST in other Ultimate passives to save points

Specializations (Required Points: 33 )

  • (passive) Kalan’s EdictAfter you have not taken damage in the last 3 seconds, your Minions gain +15% Attack Speed. While you have at least 7 Minions, this bonus is doubled.

Book of the Dead (Class Mechanic):

This build is all about taking as many summons as possible without sacrificing any of them for passive bonuses. I’d advise taking all minions for this build and the types + upgrades are: Skeletal Skirmishers: Upgrade 1 + Shadow Mages: Upgrade 2 + Bone Golem: Upgrade 2 (OR Iron Golem – Sacrifice):

  • Skeletal Skirmishers + Upgrade 1 so that we get and extra minion to boost the damage of Sever and other things that scale from the number of minions
    • Description: You can raise an additional Skirmisher
  • Shadow Mages + Upgrade 2 is a good dps increase & goes especially well with Minion Attack Speed bonuses
    • Description: Shadow Mages fire an additional shadow bolt every 6th attack.
  • Bone Golem + Upgrade 2 will let big boi tank for us and keep the aggro away from us oftentimes. Alternatively, if you want even more DPS, Iron Golem – Sacrifice can help
    • Description: Your Golem gains 10% maximum Life and the amount of Thorns they inherit from you is increased from 30% to 50%.

Unique Item

In Diablo IV apparently (I have multiple sources that confirmed this) we can equip more than one unique item at the same time (not so ‘unique’ if we can get decked out in full uniques I guess). It seems that the one unique per build idea that Unique inherited from the Mythical gear they supposedly replaced was scrapped even before the closed beta tests. My top pick will be the following one but check the notes under the Aspects list for some additional picks:

Ring of Mendeln (Ring)

[6 – 35]% Cold Resistance
[6 – 35]% Shadow Resistance

While you have 7 or more Minions you gain: Lucky Hit: Up to a 10% chance to empower all of your Minions, causing the next attack from each to explode for N Physical damage.

+[4 – 10]% Lucky Hit Chance
+[7 – 14]% Minion Attack Speed
[17.5 – 31.5]% Maximum Minion Life
+[0.14 – 0.28] Thorns

The signet of Mendeln ul-Diomed, the founder of the Priests of Rathma and the first Necromancer, was lost for over 3,000 years. The immense power over death held within, however, has not diminished.

Sockets & Gems

Full Diamonds is a good fit for many builds, but this one doesn’t do much barrier. I’d recommend doing for Weps: Diamond, Skull, Amethyst or Emerald. For Armor: Skull, Amethyst or Emerald. For Jewelry: Diamond unless you need specific resistance more than all.

XYZ Diamond (Requires Level XY)

• Weapon: +N% Ultimate Skill Damage
• Armor: +N% Barrier Generation
• Jewelry: N% Resistance to All Elements

+5%/+5%/5 for chipped (the 2nd grade at lvl 20)

XYZ Skull (Requires Level XY)

• Weapon: +N Life On Kill
• Armor: +N% Healing Received
• Jewelry: +N Armor

+13/+5%/+170 for chipped (the 2nd grade at lvl 20)

XYZ Amethyst (Requires Level XY)

• Weapon: +N% Damage Over Time

• Armor: N% Damage Taken Over Time Reduction
• Jewelry: N% Shadow Resistance

+5%/+8.2%/+14.3% for chipped (the 2nd grade at lvl 20)

XYZ Emerald (Requires Level XY)

• Weapon: +N% Critical Strike Damage to Vulnerable Enemies
• Armor: +N Thorns
• Jewelry: N% Poison Resistance

+7.5%/39/14.3% for chipped (the 2nd grade at lvl 20)

Legendary Aspects / Powers

I will only list the Legendary Aspects that have been selected for the build and the slots in which I advise putting those. For in-depth information you can check my RDY-4-Launch Builds spreadsheet on this link. This build (Reaping Army 2.0) is one of the builds on that spreadsheet.

  • Helm: Viscous Aspect
  • Amulet: Aspect of Empowering Reaper
  • Chest: Blood Getter’s Aspect
  • Pants: Aspect of Hardened Bones
  • Gloves: Cadaverous Aspect
  • Boots: Exploiter’s Aspect
  • Ring 1: Aspect of Frenzied Dead
  • Ring 2: *Aspect of Reanimation Until *The Unique goes here
  • 1H Weapon: Unyielding Commander’s Aspect
  • Off-hand: Rotting Aspect
  • 2-H Weapon (if you decide to use one):Unyielding Commander’s Aspect
NOTE: Aspect of Reanimation is a great choice for Until The Unique goes on that 2nd ring slot. Alternatively, you can put another Resource generation or Offensive Aspect such as: Aspect of Flesh-Rending, Requiem Aspect, Hulking Aspect, Edgemaster's Aspect, Aspect of Inner Calm 

Paragon Boards:

Use the links below to check the paragon boards selected and the nodes I’ve taken. One link is for what the boards will look like at lvl 99 without any paragon points from renown (so more paragon points will be obtained on the way to 100 as well as from renown. The other link will be what the boards will look like when fully maxed out on paragon points.

Suggested Gear Rolls to look out for (NOT in order of priority):

I’ve shortlisted 38 different affixes that work well with the build of almost 300 total. I’ll highlight in Orange the ones I think should get higher priority

Bonus to All Damage
Critical Strike Damage Bonus
Critical Strike Chance
Critical Strike Damage with Core Skills
Damage with Core Skills
Lucky Hit Chance
Shadow Damage Bonus
Shadow Critical Strike Damage Bonus
Resistance to All Elements
Cooldown Reduction
+ % Critical Strike Chance with Shadow Damage
+ % Damage to Elites
+ % Shadow Damage to Elites
Damage Upon Killing an Elite
+ % Critical Strike Chance with Shadow Damage Against Elites
Damage Reduction for X Seconds After Killing an Elite
+ % Damage for X Seconds After Killing an Elite
Damage Reduction from Elites
+ % Minion Damage
+ % Damage to Enemies affected by Shadow DoT
+ % Minion Resistance to All Elements
+ % Minion Attack Speed
+ % Maximum Minion Life
High Priority
Amplify_Damage_From_Pets_Per_Player_Percent
(Struck’s note: my guess is this is + % Minion Damage based on the player’s % Damage)
Lucky Hit: Critical Strikes From Your Minions Have up to a 5% Chance to Reduce Enemy Damage Dealt by X% for N Seconds
+ All Stats
Damage while Healthy
Damage vs Healthy Enemies
Damage vs Injured Enemies
Damage vs Close Enemies
Weapon Damage (not sure if there are any bonuses to that as rolls)
Essence Generation
Essence Regeneration
Essence On Kill
Movement Speed
Attack Speed
Intelligence
Resource Cost Reduction
Low Priority

Useful Links (Spreadsheets & more):

For all of my Diablo IV RDY-4-Launch Theorycrafts/Builds: This Spreadsheet

For my Diablo IV Pre-Launch Class Skill Trees (can be used as mini-calculator): This Spreadsheet

For all of my Diablo IV Pre-Launch Theorycrafts/Builds: This Spreadsheet

♦ ◊ ♦ ◊ ♦

This concludes the Reaping Army 2.0 Necromancer Build for Diablo IV. If you’re interested in the game below are links to the various platforms where one can buy it (you can just click the links to open a new tab):

PC (Battle.Net)

XBOX

PlayStation

Official Website

Chaining Thunder 2.0 Diablo IV Sorcerer Build [RDY-4-Launch]

Chaining Thunder 2.0 Sorcerer BUILD for Diablo IV [RDY-4-Launch]

(be the Master of Thunder & Storms that shocks & electrifies enemies while zapping around the map)

♦ ◊ ♦ ◊ ♦

Diablo IV launches on June 6th, 2023 for PC (Battle.Net), XBOX, & PlayStation with a 4 days Early Access (no wipe) for pre-orders (so kind of really launching June 2nd).

Diablo IV‘s Launch is getting closer and it’s time to make some Ready-For-Launch full Builds/Theorycrafts that should be good for both ‘fresh-into-endgame’ characters as well as late endgame. I’ also plan to evolve them further when the game is released & keep them updated when we get rebalance updates. This is one such build for the Sorcerer Class called Chaining Thunder 2.0.

I’ve also made spreadsheets for those builds (see the links below) that have shortlisted the active and passive skills + legendary aspect + unique item + gems & sockets + suggested stat rolls + paragon boards that work well with the build which you can use to tinker. Alternatively i’ve added build calculator links (mostly needed for the paragons)

This build will be updated post-launch to a new & expanded version when I have more in-game information as reference.

Video Version:

Skill Trees

Below you’ll see ONLY the Active & Passive skills that were selected for this build. For additional skills that can be taken + alternative skill options, you can check my RDY-4-Launch Builds spreadsheet on this link. This build (Chaining Thunder 2.0) is one of the builds on that spreadsheet.

Minor Destruction / Basic Skill (Resource Generator/Builder) (Required Points: 0 )

  • (active) Arc Lash – Unleash arcing lightning that shocks enemies in front of you for 42.00% (X- ?). Every 10 times Arc Lash swipes, it Stuns all enemies hit for 2 seconds. Lucky Hit Chance: 30% Damage: Lightning ; Tags: Basic, Shock
    • (1st upgrade) Enhanced Arc Lash If Arc Lash’s initial swipe Critically Strikes, it swipes and additional time.
    • (2nd upgrade – no point invested here but it’s my pick of the 2) Glinting Arc Lash Hitting a Stunned enemy with Arc Lash reduces your Cooldowns by 0.25 seconds.

Major Destruction / Core Skill(s) (Resource Spender) (Required Points: 2 )

  • (active) Chain Lightning Unleash lightning that deals 42% (X-?) damage and chains and chains between Nearby enemies and you up to 6 times. Lucky Hit Chance: 25% Mana Cost: 35 Damage: Lightning ; Tags: Core, Shock
  • (1st upgrade) Enhanced Chain Lightning Chain Lightning gains a +3% increased Critical Strike Chance per bounce.
  • (2nd upgrade – my pick of the 2) Greater Chain Lightning When Chain Lightning Critically Strikes, it has a 25% chance to form a Crackling Energy.
  • (passive) did not pick any Core passives to save points

Defensive Skills (Required Points: 6 )

  • (active) Teleport Transform into lightning becoming Unstoppable and surging to the target location dealing 25% (X -?) damage around you upon arrival. Lucky Hit Chance: 40% Cooldown: 11 Damage: Lightning ; Tags: Defensive, Shock
  • (1st upgrade) Enhanced Teleport Teleport’s cooldown is decreased by 0.5 seconds per enemy hit, up to 3 seconds.
  • (2nd upgrade – my pick of the 2) Mystical Teleport For 4 seconds after Teleporting, Crackling Energy deals 40% (multiplicative) more damage.
  • (passive) Elemental Attunement Elemental Critical Strikes have a 5%/10%/15% chance to reset the Cooldown of one of your Defensive Skills. Can only happen once every 10 seconds.
  • (passive) did not pick any other Defensive passives to save points

Conjuration Skills (Required Points: 11 )

  • (active) Lightning Spear Conjure a crackling spear of lightning that seeks out enemies for 6 seconds, dealing 15% (X – ?) damage per hit. Lucky Hit Chance: 35% Cooldown: 20 Damage: Lightning ; Tags: Conjuration, Shock
  • (1st upgrade) Enhanced Lightning Spear After Critically Striking, Lightning Spear has a 5% increased stacking Critical Strike Chance for its duration.
  • (2nd upgrade – my pick of the 2) Invoked Lightning Spear Lightning Spear Stuns enemies for 2 seconds when Critically Striking.
  • (passive – i only put 1 point here to unlock the next passives) Align the Elements You gain 5%/10%/15% Damage reduction against Elites for each second you don’t take damage from any of these sources, up to 50%.  
    • (1st upgrade – not a must have but I maxed it) Mana Shield – Every time you spend 100 Mana, you gain 5%/10%/15% Damage Reduction for 5 seconds.
    • (2nd upgrade – TOP TIER PASSIVE & MUST HAVE) Protection Using a cooldown grants 10%/20%/30% of your maximum Life as a Barrier for 5 seconds.
  • (passive) Precision Magic Your Lucky Hit Effect Chance is increased by up to 5%/10%/15%.
  • (passive) did not pick any more Conjuration passives to save points

Mastery Skills (Required Points: 16 )

  • (active – did not invest points into it but good to consider) Ball Lightning – Conjure a ball of lightning that slowly moves forward, continually zapping enemies for 18% (X -?) damage. Lucky Hit Chance: 20% Mana Cost: 50 Damage: Lightning ; Tags: Mastery, Shock
  • (1st upgrade – no need to get upgrades if only getting it for the Enchantment) Enhanced Ball Lightning Ball Lightning’s damage rate is increased by 200% of your Attack Speed Bonus.
  • (2nd upgrade – my pick of the 2) Wizard’s Ball Lightning If an enemy is hit at least 4 times by a cast of Ball Lightning, a Crackling Energy is formed. Can only happen once per cast.
  • (passive) Static Discharge Critical Strikes with Shock Skills have a 5% chance to form a Crackling Energy.
    • (upgrade) Shocking ImpactEvery time you Stun an enemy, you deal 15%/30%/45% Lightning Damage to them. [this is further boosted by the Unique Item]
    • (upgrade) Regenerative ConduitCrackling Energy restores 4/8/12 Mana upon pickup.
  • (passive) Ice Veil Your Barriers have a +5%/+10%/+15% increased duration. (Barriers absorb damage from all sources up to a specified amount.)
    • (upgrade) Snap Freezedid NOT take this one
    • (upgrade) Cold frontdid NOT take this one

Ultimate Skills (Required Points: 23 )

  • (active) Unstable Currents Lightning surges within you for 10 seconds. Whenever you cast a Shock Skill, a random Core, Conjuration, or Mastery Shock Skill is also cast. Cooldown: 70 Damage: Lightning ; Tags: Ultimate, Shock
  • (1st upgrade) Prime Unstable Currents – Unstable Currents increases your Attack Speed by +25% while active.
  • (2nd upgrade) Supreme Unstable Currents While Unstable Currents is active, Crackling Energy continually pulses and consumes no charges.
  • (passive) Coursing Currents – Hitting enemies with Shock Skills increases your Critical Strike Chance by +1%/+2%/+3%. Resets upon getting a Critical Strike.
    • (upgrade- did NOT take to save points) Conduction – Critical Strikes with Shock Skills increase your Movement Speed by +3%/+6%/+9% for 3 seconds.
    • (upgrade) Electrocution – Enemies deal 5%/10%/15% less damage for 5 seconds after being Critically Struck by your Shock Skills.
    • (upgrade) Convulsions – Lucky Hit: Shock Skills have a 3%/6%/9% chance to Stun enemies for 3 seconds.

Specializations (Required Points: 33 )

  • (passive) Overflowing Energy Crackling Energy hits 1 additional enemy. Each time Crackling Energy hits an enemy, your Shock Skill Cooldowns are reduced by 0.1 seconds, increased to 0.25 seconds against Elites.

Enchantment (Class Mechanic):

I’d recommend mix-and matching two of the following Enchantments (you’ll need at least 1 point invested or from gear in the skills):

  • Obvious Synergies
    • Chain Lightning – Chain Lightning forms automatically after spending 100 Mana. (my pick)
    • Lightning Spear – Absorbing Crackling Energy has a 10% chance to conjure a Lightning Spear. (my pick)
    • Arc Lash – When you use a Cooldown (skill with cooldown), enemies around you are Stunned for 0.5 seconds.
    • Ball Lightning – Lucky Hit: Critical Strikes have a 25% chance to spawn a static Ball Lightning. (you’ll need to put at least 1 point into this as it’s not part of the build)
  • Still good to try
    • Frost Nova – Lucky Hit: Your Conjuration Skills have a 30% chance to unleash a Frost Nova when hitting enemies. (you’ll need to put at least 1 point into this as it’s not part of the build)
    • Hydra – After spending 300 Mana, a 5-headed Hydra spawns for 5 seconds. (you’ll need to put at least 1 point into this as it’s not part of the build)

Unique Item

In Diablo IV apparently (I have multiple sources that confirmed this) we can equip more than one unique item at the same time (not so ‘unique’ if we can get decked out in full uniques I guess). It seems that the one unique per build idea that Unique inherited from the Mythical gear they supposedly replaced was scrapped even before the closed beta tests. My top pick will be the following one but check the notes under the Aspects list for some additional picks:

Esadora’s Overflowing Cameo (Amulet)

[4 – 25]% Resistance to All Elements Upon collecting Crackling Energy, there’s a 10% chance to release a lightning nova, dealing N Lightning Damage.
+[7 – 14]% Non-Physical Damage
Damage_CracklingEnergy (Struck’s note: I’m 99% sure this is +X% Damage With Crackling Energy)
+[1 – 2] Ranks of the Shocking Impact Passive
+[16.5 – 23.5]% Movement Speed

The only thing more potent than Esadora’s magic was her endless hatred of humanity. As she lay dying, the pale amulet around her neck drank in both.

Sockets & Gems

Full Diamonds is a good fit for most builds, including this one, and I’d recommend doing this. For this build some people may prefer Skulls or Saphires in the weapons or even Skull in Jewelry.

XYZ Diamond (Requires Level XY)

• Weapon: +N% Ultimate Skill Damage
• Armor: +N% Barrier Generation
• Jewelry: N% Resistance to All Elements

+5%/+5%/5 for chipped (the 2nd grade at lvl 20)

XYZ Skull (Requires Level XY)

• Weapon: +N Life On Kill
• Armor: +N% Healing Received • Jewelry: +N Armor

+13/+5%/+170 for chipped (the 2nd grade at lvl 20)

XYZ Saphire (Requires Level XY)

• Weapon: +N% Critical Strike Damage to Crowd-Controlled Enemies
• Armor: N% Damage Reduction While Fortified
• Jewelry: N% Cold Resistance

+7.5%/5%/14.3% for chipped (the 2nd grade at lvl 20)

Legendary Aspects / Powers

I will only list the Legendary Aspects that have been selected for the build and the slots in which I advise putting those. For in-depth information you can check my RDY-4-Launch Builds spreadsheet on this link. This build (Chaining Thunder 2.0) is one of the builds on that spreadsheet.

  • Helm: Exploiter’s Aspect
  • Amulet: *Aspect of Shared Misery Until The Unique goes here (see note below)
  • Chest: Aspect of Fortune
  • Pants: Aspect of The Unwavering
  • Gloves: Aspect of the Unbroken Tether
  • Boots: *Aspect of Shared Misery (see note below)
  • Ring 1: Aspect of Splintering Energy
  • Ring 2: Prodigy’s Aspect OR Aspect of The Umbral is a great alternative but only REALLY good with Aspect of Shared Misery in the builds
  • 1H Weapon: Aspect of Overwhelming Currents
  • Off-hand: Stable Aspect
  • 2-H Weapon (if you decide to use one): Aspect of Overwhelming Currents
NOTE: After the unique goes on the Amulet slot, Shared Misery goes in the Boots slot. Before that use a filler in the Boots. My choice will be Charged Aspect. OR keep Shared Misery in the Boots then in the Amulet put Accelerating Aspect if you can manage the mana drain all that attack speed will cause. Alternatively, for the Amulet move the Splintering Energy there and use Aspect of The Umbral in the 1st Ring instead of it.

Paragon Boards:

Use the links below to check the paragon boards selected and the nodes i’ve taken. One link is for what the boards will look like at lvl 97 without any paragon points from renown (so more paragon points will be obtained on the way to 100 as well as from renown. The other link will be what the boards will look like when fully maxed out on paragon points.

Suggested Gear Rolls to look out for (NOT in order of priority):

I’ve shortlisted 39 different affixes that work well with the build of almost 300 total. I’ll highlight in Orange the ones I think should get higher priority

Bonus to All Damage
Critical Strike Damage Bonus
Critical Strike Chance
Critical Strike Damage with Core Skills
Damage with Core Skills
Damage with Crackling Energy
Lightning Damage Bonus
Lightning Critical Strike Damage Bonus
Critical Strike Damage vs Crowd Controlled Enemies
Cooldown Reduction
+ % Critical Strike Chance with Lightning Damage
+ % Damage to Elites
+ % Lightning Damage to Elites
Damage Upon Killing an Elite
+ % Critical Strike Chance with Lightning Damage Against Elites
Damage Reduction for X Seconds After Killing an Elite
+ % Damage for X Seconds After Killing an Elite
Damage Reduction from Elites
Resistance to All Elements
Attack Speed
Higher Priority
+ All Stats
Damage while Healthy
Damage vs Healthy Enemies
Damage vs Injured Enemies
Damage vs Close Enemies
Weapon Damage (not sure if there are any bonuses to that as rolls)
Damage vs Stunned Enemies
Damage vs Slowed Enemies
Damage vs Immobilized Enemies
Mana On Kill
Mana Generation
Mana Regeneration
Barrier Generation Bonus
Damage Reduction with an Active Barrier
Lucky Hit Chance with an Active Barrier
Lucky Hit Chance
Movement Speed
Intelligence
Resource Cost Reduction
Lower Priority

Useful Links (Spreadsheets & more):

For all of my Diablo IV RDY-4-Launch Theorycrafts/Builds: This Spreadsheet

For my Diablo IV Pre-Launch Class Skill Trees (can be used as mini-calculator): This Spreadsheet

For all of my Diablo IV Pre-Launch Theorycrafts/Builds: This Spreadsheet

♦ ◊ ♦ ◊ ♦

This concludes the Chaining Thunder 2.0 Sorcerer Build for Diablo IV. If you’re interested in the game below are links to the various platforms where one can buy it (you can just click the links to open a new tab):

PC (Battle.Net)

XBOX

PlayStation

Official Website

Endgame Growth & Activities, PVP & Release Times in Diablo IV

Endgame Growth & Activities, PVP & Release times in Diablo IV

(a look at growing stronger after completing the campaign, endgame exploration & activities plus PVP)

♦ ◊ ♦ ◊ ♦

Diablo IV launches on June 6th, 2023 for PC (Battle.Net), XBOX, & PlayStation with a 4 days Early Access (no wipe) for pre-orders (so kind of really launching June 2nd).

Diablo IV’s team has shared some additional information (via a video) about the post-story experience and the PVP aspects of the game. I’ve got some of things I’d like to say about what was shared with us in that video. I’ll express my thoughts, including some concerns, regarding what was revealed as well as what is already known from previous Blizzard videos and interviews.

Video Version:

Post-story Experiences

Blizzard are promising “A variety of different experiences players can pursue. An entire world of sanctuary for players to offer. There’s going to never be an absence of something to do. After a player has finished the campaign, there’s a lot more game to go and participate in.” Players gain access to a special – what Blizzard calls – Capstone Dungeon that they have to complete. Once players finish this Capstone Dungeon they will gain access to the first additional World Tier (Word Tier III a.k.a. Nightmare). Each World Tier brings better experience rates and gold drop rates. It’s worth noting that certain powerful loot (Unique Items also Ancestral & Sacred gear) only drop on World Tier III and above (it supposedly will go all the way to World Tier VI).

Whether we’re fans of dungeons, PVP or just roaming around the world (Whispers) there’s a way to continue our Diablo adventure long after hitting max level.

Growing in Power

Blizzard states that, as our character(s) continue(s) to grow in power, we’ll start with the skill tree and expand out into the Paragon system. A lot of the choices the players will make are grounded on skills themselves and the fantasies associated with those skills.

The Paragon Boards will allow us to have a lot more depth, a lot more customization, many more options as we go. We can rotate the board so we can choose a different path. This will allow us to approach the Glyphs, board sockets, and legendary tiles we are after in different ways that will involve taking different board tiles on the way. The majority of tiles on each board are basic ones that simply give + 5 to one of the core attributes but there are also blue and yellow ones that give a little bit more depth and are more suitable for specific types of builds. Charting their own path trough the Paragon Boards (and picking the Boards that suit their chosen Skills and Playstyle) will hopefully be enough for the more capricious players out there that were unhappy with how ‘small’ the Skill Tree was in the Beta. The Paragon Boards are a way for a player to keep expanding their character(s) and making it/them ‘uniquely yours’. I’ll make content dedicated specifically to this as a deep-dive very soon.

Blizzard also briefly talked about the Codex of Power (for which I already have a written guide+list). In a nutshell, it’s a system that allows players to obtain certain Legendary Aspects/Powers by completing dungeons for the first time as well as by reaching certain points in the game’s main story/campaign. In the Open Beta there were 114 Aspects that can be obtained via the Codex which is around half of the total number of Aspects in the Beta, 224, that was confirmed via a Beta datamine. Codex of Power Aspects always have the minimum roll possible unless obtained regularly by a drop but can be imprinted as many times as you want while dropped Aspects can be re-used, sadly, only once. This allows players to take Rare or Legendary item bases that they like and imprint them with the exact Aspect that their build needs. Rare items Imprinted that way automatically turn into a Legendary item.

Nightmare Dungeons

Blizzard says that every part of Sanctuary is fulfilling and satisfying. Nightmare Dungeons are going to give players the opportunity to experience the regular dungeons in each area they might have already done in the past BUT with various twists added to them. Players will enter a Nightmare Dungeon with a Sigil (that they either found or crafted at the Occultist). That dungeon will be a modified version of one of the 120+ standard dungeons with added modifiers that may alter the playstyle & the intensity of the dungeon. Those dungeons will be more difficult and may even have additional objectives. This is achieved by introducing dungeon affixes/modifiers that grow in number as the rank/grade of the Sigil goes up.

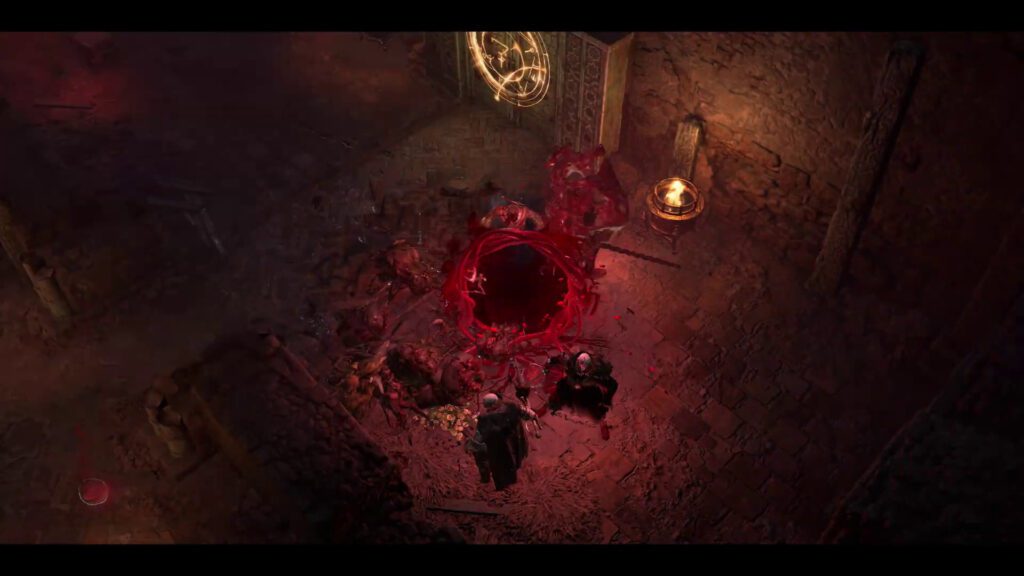
One example of such Nightmare Dungeon affix is called Hell Gate. Occasionally, portals will come up throughout the area that will just pour out different monsters that aren’t native to that region/dungeon. Players will have the added difficulty of dealing with those extra enemies while handling everything else inside the dungeon. Imagine the Butcher showing up for some fresh meat as you’re dealing with a Hell Gate + some regular dungeon-native enemies at the same time. The number of dungeons Blizzard has confirmed is 120+. I do remember them previously saying 150+ in an interview or a video. I guess the other 30 have either been removed or won’t be ready for launch. Any one of those 120+ dungeons can become a nightmare dungeon if you find or craft the right Nightmare Sigil and then use it. Using a Nightmare Sigil will activate a Nightmare version of that dungeon with the affixes that were on the Sigil. This will supposedly “add a little bit of a twist of flavor on your particular dungeon”.

Endgame Exploration

There will be some targeted activities in Diablo IV that suit what players are feeling in the mood for. The forces of Hell are starting to have more influence in parts of Sanctuary, in the vast, interconnected overworld of the experience, and as the players are going into Helltide Areas, they’re going to find even more powerful enemies. By killing those enemies, players will be able to “gain these special shards they can take to go and use to purchase these big rewards that are available at these caches that are found throughout Helltide Areas“. Basically, what they are saying here is that we, the players, will encounter Helltide events, and upon clearing those, we’ll be awarded keys that can unlock Helltide caches, which can be found in Helltide Areas.

“The sky darkens and the rivers run red, meteors fall from the sky and the monsters get harder”. Blizzard say they really want to create new experiences for the players. One such experience is the Whispers of the Dead system.

Whispers of the Dead

Whispers of the Dead is a system similar to Diablo III‘s bounties. Players get Whispers of the Dead/bounties from the Tree of Whispers. Apparently, “the tree has a little bit of a grudge against our players, and it would like for them to go serve its needs”. Players will take 10 bounties that they need to serve, which the game seems to refer to as “Whispers silenced“. Here I hope it’s not time-gated but rather simply limiting it to just 10 bounties per full whispers run. We’ll gather different rewards, different items, and bring those back to the tree, in hopes that the tree will reward us something really meaningful (hello bounty rewards RNG à la D3).

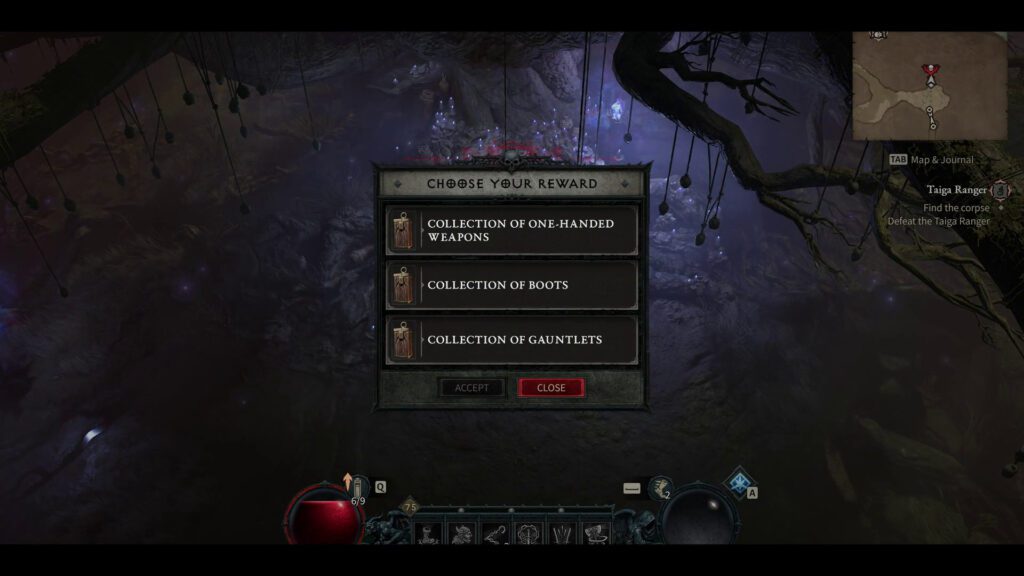
One thing that Blizzard revealed is the choice between 3 different types of rewards players can make. So, while it seems to be random what 3 types of rewards collections we’ll get, it’s also going to be random what is in those collections. My guess is that they may have made it to maybe have a guaranteed at least 1 Legendary but that’s just me being hopeful. Whispers are contained activities that can be done either solo or in a group. Here I’m hoping that split-pushing whispers will be possible. Blizzard says that they really “wanted to create a variety for people to be able to spend time where they wanted to in the world”.

The Fields of Hatred

In Diablo IV, the focus is on the world of Sanctuary, and there are parts of that world that are called the Fields of Hatred, where Lilith’s presence in Sanctuary has begun to seep through and manifest these poisonous areas throughout the world. When players go to these regions, they get to engage in player-vs-player conflict. These offer opportunities for the player to collect shards, with a catch. Shards need to be purified before players can take them back to town and turn them in for random gear rewards. When someone attempts to purify their shards, other players in the same field of hatred will know of this and can choose to go and intervene for the chance to steal those shards for themselves. Blizzard mentions that people should “be prepared that you might lose some stuff in the meantime”. What this refers to should be the loss of unpurified shards (purified shards can not be dropped as per what was officially confirmed many months ago).

Once players have purified their shards, “they can take these, go back to nearby towns to sell them, and then use that to buy a whole bunch of interesting cosmetic items and rewards.” While technically true, and they are not lying in our faces, they do make it sound that EVERYTHING you can buy via PVP rewards is cosmetic BUT that’s not the case. Yes, you can exchange purified shards for cosmetic rewards (not sell the shards as Blizzard said but straight up use them as currency as seen in the video). Note how they said “cosmetic items and rewards” and that is not clear whether cosmetic refers to the rewards part of this statement. Well, it doesn’t.

As the video showed us, we can use the shards at a PVP gambler vendor to directly buy random gear the same way gold can be used to gamble at the regular gambler npc. So, what I’ve been trying to warn people about is how this introduces a terrible dis-balance by not separating PVP and PVE gear and by letting people earn non-cosmetic rewards by partaking in PVP. PvE players may feel forced to partake in PVP IF, AND ONLY IF, the good loot chance from the PVP gambler ends up like a faster and a better way to earn good loot than the regular gambler, doing Nightmare Dungeons, and silencing Whispers.

Further on, Blizzard confirms that the Fields of Hatred are “a place for people who really love PVP and want to still get loot and still increase their character’s power. If that’s the way they want to play, they can.” While there’s nothing wrong in getting stronger and rewarded for partaking in PVP, it’s only right & fair if there are separate PVP and PVE versions of one’s character (like, for example, Guild Wars 2 structured PVP versions of the PvE characters).

Launch is just the beginning

“Launch is just the beginning” is what Blizzard say and it’s to be expected with a game that has adopted a seasonal content model. They say that one of the things they are really focused on is “creating a living, breathing set of updates for players to engage with after the game has gone live”. It’s going to be “a way to keep coming back and experiencing more Diablo IV in fresh ways”.


Global Launch Times

North America Early Access:
Pacific Daylight Time (PDT): 4PM, June 1
Eastern Daylight Time (EDT): 7PM, June 1

South America Early Access:
Brasilia Time (BRT): 8PM, June 1

Europe Early Access:
British Summer Time (BST): 12AM, June 2
Central Europe Summer Time (CEST): 1AM, June 2

Asia and Australia Early Access:
Korea Standard Time (KST): 8AM, June 2
Australian Eastern Daylight Time (AEDT): 10AM, June 2

North America standard release:
Pacific Daylight Time (PDT): 4PM, June 5
Eastern Daylight Time (EDT): 7PM, June 5

South America standard release:
Brasilia Time (BRT): 8PM, June 5

Europe standard release:
British Summer Time (BST): 12AM, June 6
Central Europe Summer Time (CEST): 1AM, June 6

Asia and Australia standard release:
Korea Standard Time (KST): 8AM, June 6
Australian Eastern Daylight Time (AEDT): 10AM, June 6

Useful Links (Spreadsheets & more):

I’ve also made two spreadsheets: one for theorycrafts/builds that shortlist the active and passive skills + legendary aspects that work well together with each build & the second one contains the full skill trees of all classes + all aspects (known so far) that the classes can use.

For all of my Diablo IV Pre-Launch Theorycrafts/Builds: This Spreadsheet

For my Diablo IV Pre-Launch Class Skill Trees (can be used as mini-calculator): This Spreadsheet

♦ ◊ ♦ ◊ ♦

This concludes My Endgame Growth & Activities, PVP and Release Times info post for Diablo IV. If you’re interested in the game, below are links to the various platforms where one can buy it (you can just click the links to open a new tab):

PC (Battle.Net)

XBOX

PlayStation

Official Website

Diablo 4 Aspects and Codex of Power Crafting Guide

Welcome to this short Diablo 4 Aspects and Codex of Power crafting guide. Its for all thoses that dont like to watch videos 😉

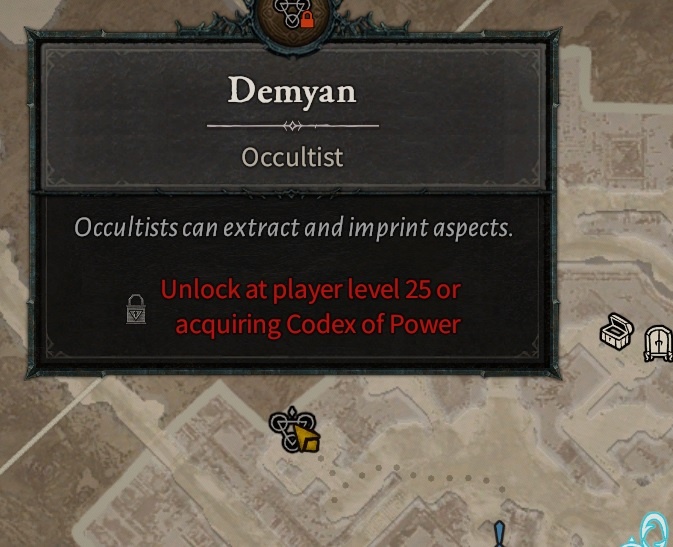
First we need to unlock the Occultist for beeing able to imprint and export Aspects and Codex of Power. You can do this once you reach level 25 or by acquiring Codex of Power. That means you just need to run a dungeon.

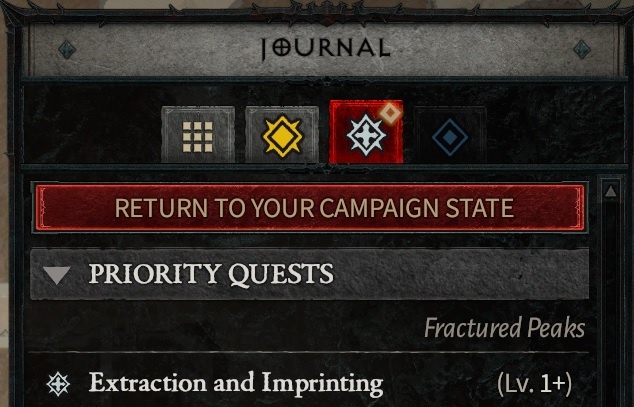
The quest for unlocking the Occultist will then just pop up in your journal. Extraction and Imprinting.

Codex of Power

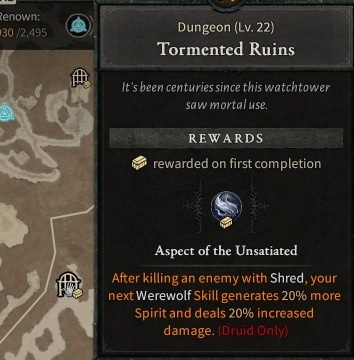
You get these as rewards on the first completion of dungeons. You need to know that you only have to do the dungeon once and you can use these over and over again.

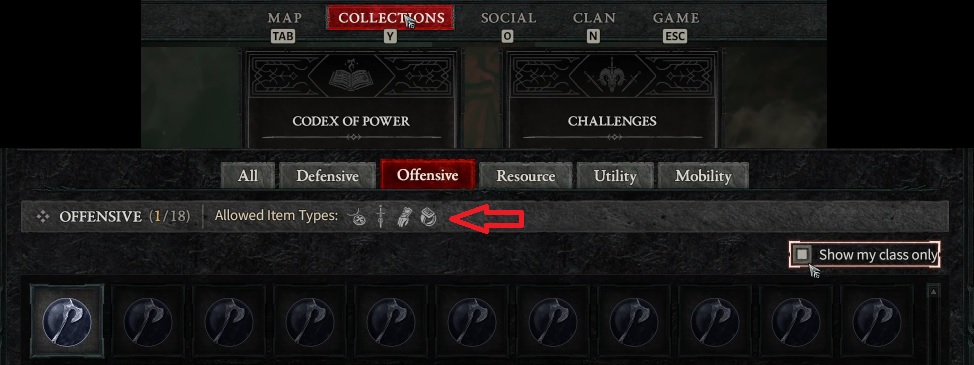
The complete list can be found if you open the codex of power collection tab

You can sort them also for your class only what really helps a lot. Also you can see the allowed item types what is very important when it comes to imprinting these stats on your rare gear.

Aspects

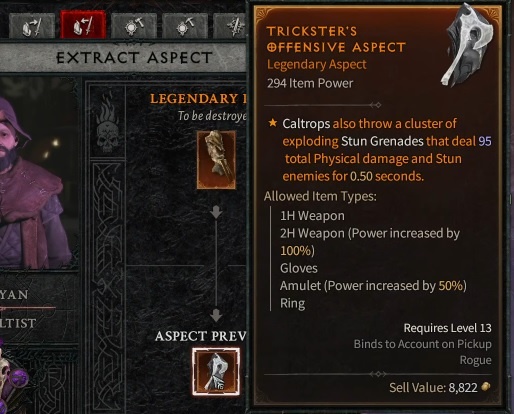
Will be extracted at the Occultist from legendary gear you found. You will only be able to do imprint this once to your gear so make sure if you have a rare aspect you dont waste it on bad gear. The legendary item also will be destroyed.

Crafting

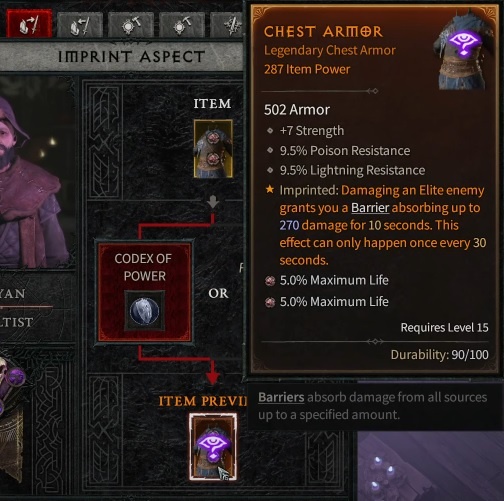
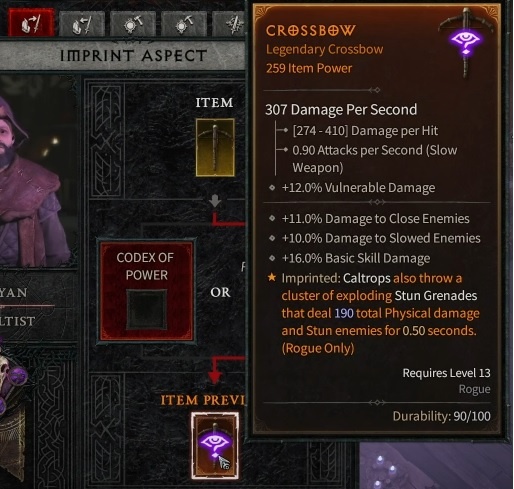
The crafting is really simple, just put your gear you want to craft it on in. No stat will be lost during the crafting, choose the Aspect or Codex of Power and start crafting it on your rare gear. The power of your Aspects and Codex of Power on your 2H weapon will be increased by 100% and also for the amulet by 50%. So choose wisely.

You will be able to see the outcome before you craft. As you can see on the 2H we get the 100% Bonus on this one what is really nice.

HFGL

Stef

Juggler Diablo IV Barbarian Build

Juggler Barbarian BUILD for Diablo IV

(keep Juggling those weapons to confuse your enemies & make it seem as if you have 6 hands)

♦ ◊ ♦ ◊ ♦

Diablo IV launches on June 6th, 2023 for PC (Battle.Net), XBOX, & PlayStation with a 4 days Early Access (no wipe) for pre-orders (so kind of really launching June 2nd).

Diablo IV‘s Open Beta Tests are almost here and I felt motivated to make some Pre-Launch theorycrafted semi-builds that should be good for ‘fresh-into-endgame’ characters when the game launches. I also plan to evolve them into FULL builds when the game is released & keep them updated when we get rebalance updates. This is one such build for the Barbarian Class called Juggler.

The Beta tests will only let us reach lvl 25 and only let us play in the first Act/Zone (Fractured Peaks) so those builds will be more useful for the actual game launch and ideally for characters around lvl 50+ or 60+. I’ve used 50+ and 60+ skill points when making the build instead of the full 100 so that they can be used to jumpstart a player’s post-story endgame grind.

I’ve also made spreadsheets for those builds (see the links below) that have shortlisted the active and passive skills + legendary aspect that work well with the build so one can spend the extra skill points on the way to lvl 100 into those other skills.

This build will be updated post-launch to a new & expanded version when I have actual in-game information as reference.

Video Version:

Skill Trees

Below you’ll see ONLY the Active & Passive skills that were selected for this build. For additional skills that can be taken on the way to lvl 100 + alternative skill options, you can check my pre-launch builds spreadsheet on this link. This build (Juggler) is one of the builds on that spreadsheet.

Some of the skill icon images you see could be outdated & differ from what is seen in the Full release version. I plan to replace them once the Beta ends or after the full launch

Basic Skill (Resource Generator/Builder) (Required Points: 0 )

  • (active) Frenzy – Unleash a rapid flurry of blows, dealing 26.83% (X – ?) damage with each pair of hits. Dealing damage with Frenzy increases Frenzy’s Attack Speed by +20% for 3 seconds up to 60% Requires dual-wielding weapons. Damage: Physical Generate Fury: 5 Lucky Hit Chance: 30%
    • (1st upgrade) Enhanced Frenzy While Frenzy is granting +60% bonus Attack Speed, it also generates 1 additional Fury.
    • (2nd upgrade – my pick of the 2) Combat Frenzy You gain 8% (multiplicative) Damage Reduction for each stack of Frenzy you currently have.

Core Skill(s) (Resource Spender) (Required Points: 2 )

  • (active) Hammer of the Ancients Slam your hammer down with the fury of the ancients, dealing 107.31% X – ?) damage to a concentrated area. Requires a two-handed bludgeoning weapon. Damage: Physical Fury Cost: 35 Lucky Hit Chance: 40%
  • (1st upgrade) Enhanced Hammer of the Ancients Gain 10 Fury when Hammer of the Ancients damages 2 or more enemies.
  • (2nd upgrade – my pick of the 2) Furious Hammer of the Ancients Gain Berserking for 2 seconds when hitting 2 or more enemies with Hammer of the Ancients.
  • (passive – NOT INVESTED INTO IT but good to consider) Pressure Point – Lucky Hit: Your Core Skills have up to a 10% chance to make enemies Vulnerable for 2 seconds.
  • (passive) did not pick any other Core Passives to save points

Defensive Skills (Required Points: 6 )

  • (active) Ground Stomp Smash the ground, dealing 18.20% (X – ?) damage and Stunning enemies for 3 seconds. Damage: Physical Cooldown: 16.0 seconds
  • (1st upgrade) Enhanced Ground Stomp Increase Ground Stomp’s duration by 1 second.
  • (2nd upgrade – my pick of the 2) Strategic Ground Stomp Reduce the Cooldown of your Ultimate skill by 1 second for each enemy damaged by Ground Stomp.
  • (passive) Imposing Presence Gain 15% (multiplicative) additional Maximum Life.
    • (upgrade) Martial Vigor Damage Reduction against Elites, Bosses, and Players is increased by 4% (multiplicative).
  • (passive) did not pick any other Defensive Passives to save points

Brawling Skills (Required Points: 11 )

  • (active) Leap Leap forward and slam downward, dealing 62.28% (X – ?) damage and Knocking Back nearby enemies on impact. Cooldown: 17.0 seconds Damage: Physical
  • (1st upgrade) Enhanced Leap If Leap doesn’t damage any enemies, its Cooldown is reduced by 4 seconds.
  • (2nd upgrade – my pick of the 2) Power Leap If Leap damages at least one enemy, gain X Fury.
  • (passive) Aggressive Resistance Gain 4% Damage Reduction while Berserking.
    • (upgrade)Battle Frenzy When a Brawling Skill damages at least one enemy, gain Berserking for 1 second.
    • (upgrade) Prolific Fury did not pick to save points
  • (passive) did not pick any other Brawling Passives to save points

Weapon Mastery Skills (Required Points: 16 )

  • (active) Steel Grasp Throw out a trio of chains that deal 24.15% (X – ?) damage and Pull In enemies. Charges: 2 Charge Cooldown: 11.0 seconds Damage: Physical Tags: Weapon Mastery Lucky Hit Chance: 50%
  • (1st upgrade) Enhanced Steel Grasp Steel Grasp also makes enemies Vulnerable for 2.5 seconds.
  • (2nd upgrade – my pick of the 2) Warrior’s Steel Grasp Steel Grasp gains 1 additional Charge.
  • (passive – only put 1 point to unlock the upgrades) Pit Fighter You deal 3% (multiplicative) increased damage to Close enemies and gain 2% Distant Damage Reduction.
    • (passive – did not put any points here) No Mercy You deal 5% (multiplicative) increased damage against Immobilized, Stunned, or Slowed enemies.
    • (passive – only put 1 point to unlock the next upgrade) Slaying Strike You deal 8% increased damage against Injured enemies.
    • (passive – only put 1 point to save points) Expose Vulnerability Dealing direct damage with a Weapon Mastery skill causes your next Core Skill to make enemies Vulnerable for 1.5 (multiplicative) seconds.
  • (passive – did not pick but worth considering) Thick Skin Each time you take direct damage gain X Fortify.
    • (upgrade – did not pick but worth considering) Counteroffensive While Fortified for over 50% of your Maximum Life, you deal 5% (multiplicative) increased damage.
    • (upgrade – did not pick but worth considering) Defensive Posture Increase the Damage Reduction gained while you are Fortified by an additional +3%.

Ultimate Skills (Required Points: 23 )

  • (active) Iron Maelstrom Activate to attach a chain to your Two-Handed Bludgeoning weapon and slam the ground, dealing 63.00% (X – ?) damage and Stunning them for 2 seconds. Reactivate a second time to attach a chain to your Two-Handed Slashing weapon and swipe it in front of you, dealing 21.00% (X – ?) damage and 126.00% (X) Bleeding damage over 5 seconds. Reactivate a final time to attach a chain to your Dual Wield weapons and swing them around you, dealing 34.13% (X – ?) damage per hit. Requires a Full Arsenal of weapons. Cooldown: 60.0 seconds Damage: Physical Tags: Ultimate
  • (1st upgrade) Prime Iron Maelstrom Iron Maelstrom gains +10% increased Critical Strike Chance and deals 20% (multiplicative) increased Critical Strike Damage
  • (2nd upgrade – my pick of the 2) Supreme Iron Maelstrom Dealing direct damage to an enemy after swapping weapons reduces Iron Maelstrom’s Cooldown by 1 second.
  • (passive – only put 1 point to unlock the upgrades and save points) Tempered Fury Increase your Maximum Fury by 3.
    • (upgrade) Furious Impulse Each time you swap weapons, gain 2 Fury.
    • (upgrade – only put 2 points to save points) Invigorating Fury Heals you for 2% of your Maximum Life for each 100 Fury spent.
  • (passive – – did not take this to save points) Wallop Your Skills using Bludgeoning weapons deal 5% (multiplicative) increased damage if the enemy is Stunned or Vulnerable.
    • (upgrade – – did not take this to save points) Concussion Lucky Hit: Skills using Bludgeoning weapons have up to a 10% chance to Stun enemies for 3 seconds, or up to a 15% chance when using a Two-Handed Bludgeoning weapon.
  • (passive) Heavy Handed While using Two-Handed weapons you deal 5% (multiplicative) increased Critical Strike Damage.
    • (upgrade – did not take this to save points) Brute Force Your Overpower deals 15% (multiplicative) increased damage when using a Two-Handed weapon *NOTE: It seems that unlocking this skill upgrade requires investing into either Wallop OR Heavy Handed (can still get both if you want)
  • (passive) did not pick any other Ultimate Passives to save points

Specializations (Required Points: 33 )

  • (passive) Walking Arsenal Dealing direct damage with a Two-Handed Bludgeoning, Two-Handed Slashing, or Dual Wielded weapons grants 10% (multiplicative) increased damage for 6 seconds. While all three damage bonuses are active, you gain an additional 15% (multiplicative) increased damage.

Arsenal (Class Mechanic):

The Barbarian class mechanics is called Arsenal and this is how I believe it works:

The Barbarian class can equip 4 weapons at the same time: a Dual-wielding set of 2x One-Handed weps + two separate Two-Handed weapons (not dual-wielding those). They switch in combat between those based on what weapon is assigned to specific skills via the class unique Arsenal System. So each skill can have its own weapon assigned to it as long as it’s one of the 4 weapons equipped. The weps you don’t actually use work as ‘stat sticks’. Here are the types:

  • Dual Wielded 1-Handed Weapons are Slashing and can be Swords, Axes, or Maces (strange why the 1H Maces are clumped together with Swords & Axes under Slashing and not listed as Bludgeoning maybe the information I found is incorrect… hopefully 1h Maces are not Slashing)
  • The two slots of Two-Handed Weapons can be occupied by Slashing type weps like Swords, Axes, & Polearms and/or by Bludgeoning Maces
  • Ideally 1x 2h Slashing, 1x 2h Bludgeoning and a Dual Wield 1h combo for the 4 weps if you got for a swap-centric build

Legendary Aspects / Powers

I will only list the Legendary Aspects that have been selected for the build and the slots in which I advise putting those. For in-depth information you can check my pre-launch builds spreadsheet on this link. This build (Juggler) is one of the builds on that spreadsheet.

  • Helm: Aspect of The Relentless Armsmaster
  • Amulet: Aspect of Retribution
  • Chest: Aspect of Tempering Blows
  • Pants: Aspect of Bul-Kathos
  • Gloves: Relentless Berserker’s Apect
  • Boots: Aspect of Shared Misery
  • Ring 1: Aspect of The Umbral
  • Ring 2: Aspect of Unrelenting Fury
  • 1H Weapon: Windstriker Aspect
  • Off-hand: Aspect of Ancestral Echoes
  • 2-H Weapon One (see Class Mechanic for info): Aspect of Ancestral Force
  • 2-H Weapon Two (see Class Mechanic for info): Aspect of Veteran Brawler

Useful Links (Spreadsheets & more):

For all of my Diablo IV Pre-Launch Theorycrafts/Builds: This Spreadsheet

For my Diablo IV Pre-Launch Class Skill Trees (can be used as mini-calculator): This Spreadsheet

♦ ◊ ♦ ◊ ♦

This concludes the Juggler Barbarian Build for Diablo IV. If you’re interested in the game below are links to the various platforms where one can buy it (you can just click the links to open a new tab):

PC (Battle.Net)

XBOX

PlayStation

Official Website

Volatile Diablo IV Rogue Build

Volatile Rogue BUILD for Diablo IV

(vanish from their sight to get up close and personal then unleash clones to throw them into disarray)

♦ ◊ ♦ ◊ ♦

Diablo IV launches on June 6th, 2023 for PC (Battle.Net), XBOX, & PlayStation with a 4 days Early Access (no wipe) for pre-orders (so kind of really launching June 2nd).

Diablo IV’s Open Beta Tests are almost here and I felt motivated to make some Pre-Launch theorycrafted semi-builds that should be good for ‘fresh-into-endgame’ characters when the game launches. I also plan to evolve them into FULL builds when the game is released & keep them updated when we get rebalance updates. This is one such build for the Rogue Class called Volatile.

The Beta tests will only let us reach lvl 25 and only let us play in the first Act/Zone (Fractured Peaks) so those builds will be more useful for the actual game launch and ideally for characters around lvl 50+ or 60+. I’ve used 50+ and 60+ skill points when making the build instead of the full 100 so that they can be used to jumpstart a player’s post-story endgame grind.

I’ve also made spreadsheets for those builds (see the links below) that have shortlisted the active and passive skills + legendary aspect that work well with the build so one can spend the extra skill points on the way to lvl 100 into those other skills.

This build will be updated post-launch to a new & expanded version when I have actual in-game information as reference.

Video Version:

Skill Trees

Below you’ll see ONLY the Active & Passive skills that were selected for this build. For additional skills that can be taken on the way to lvl 100 + alternative skill options, you can check my pre-launch builds spreadsheet on this link. This build (Volatile) is one of the builds on that spreadsheet.

Some of the skill icon images you see could be outdated & different from what is seen in the Full release version. I plan to replace them once the Beta ends or after the full launch

Basic Skill (Resource Generator/Builder) (Required Points: 0 )

  • (active) Puncture Throw your blades, dealing 59.66% (X – ?) damage and Slowing enemies by 20% for 2 seconds. Requires Dual Wielded Weapons. Damage: Physical Tags: Basic, Ranged Lucky Hit Chance: 50%
    • (1st upgrade) Enhanced Puncture Gain 5 Energy when Puncture damages a Crowd Controlled enemy.
    • (2nd upgrade – my pick of the 2) Primary Puncture Puncture has a 30% chance to make Crowd Controlled enemies Vulnerable for 2 seconds.

Core Skill(s) (Resource Spender) (Required Points: 2 )

  • (active) Twisting Blades Impale an enemy on your blades, dealing 107.38% (X – ?) damage and making them take 8% (multiplicative) increased damage while impaled. After 1.5 seconds the blades return to you, piercing enemies for 139.60% (X – ?) damage. Combo Points increase damage and grant a Movement Speed bonus: 1: 57% damage & 20% Movement Speed bonus ; 2: 70% damage & 40% Movement Speed bonus ; 3: 83% damage & 60% Movement Speed bonus Requires Dual Wielded weapons Energy Cost: 21 Damage: Physical Tags: Core, Melee, Imbueable
  • (1st upgrade) Enhanced Twisting Blades Twisting Blades deals 15% (multiplicative) increased damage per enemy it passes through when returning, up to 60% (multiplicative).
  • (2nd upgrade – my pick of the 2) Improved Twisting Blades Enemies are Immobilized while impaled with Twisting Blades.
  • (passive) Sturdy You gain +12% Melee Damage Reduction.
    • (upgrade) Siphoning Strikes – did not pick to save points
  • (passive) did not pick other Core passives to save points

Agility Skills (Required Points: 6 )

  • (active) Caltrops Leap backwards and throw caltrops on the ground, dealing 71.59% (X – ?) damage and Slowing enemies by 50%. Lasts 6 seconds. Energy Cost: 21 Damage: Physical Tags: Agility, Trap
  • (1st upgrade) Enhanced Caltrops Enemies take 3% (multiplicative) increased damage from all sources each second they’re in Caltrops.
  • (2nd upgrade – my pick of the 2) Disciplined Caltrops You have 15% Critical Strike Chance against enemies inside your Caltrops. Double this amount against Vulnerable enemies.
  • (passive) Weapon Mastery Gain a bonus when attacking based on weapon type: Daggers: 15.0% (multiplicative) increased damage to Healthy enemies. Swords: 9% (multiplicative) increased damage. Bows: Up to 12% (multiplicative) increased damage to Vulnerable enemies. Crossbows: 15% (multiplicative) increased Critical Strike Damage. For all weapons: Vulnerable enemies take 20% (multiplicative) increased damage Healthy characters have more than 80% of their life.
  • (passive) did not pick other Agility passives to save points

Subterfuge Skills (Required Points: 11 )

  • (active) Dark Shroud Surround yourself with up to 5 protective shadows. Gain 8% Damage Reduction per active shadow. Each time you take direct damage, that damage is reduced and a shadow is consumed Cooldown: 20.0 seconds. Tags: Subterfuge
  • (1st upgrade) Enhanced Dark Shroud Dark Shroud’s shadows have a 10% chance to not be consumed
  • (2nd upgrade – my pick of the 2) Countering Dark Shroud While you have at least 2 active shadow from Dark Shroud, gain 10% Critical Strike Chance.
  • (passive) Exploit You deal 18% (multiplicative) increased damage to Healthy and Injured enemies.
    • (upgrade) Malice You deal 9% (multiplicative) increased damage to Vulnerable enemies.
  • (passive) did not pick other Subterfuge passives to save points

Imbuements Skills (Required Points: 16 )

  • (active) Imbue Weapon: Poison Imbue your weapons with lethal poison. Your next 2 non- Basic Melee or Ranged Skills apply up to 198.85% (X) Poison damage over 5 seconds. Cooldown: 9.0 seconds. Tags: Imbuements
  • (1st upgrade) Enhanced Imbue Weapon: Poison Poison Imbue’s Poison Duration is increased by 1 second.
  • (2nd upgrade – my pick of the 2) Blended Imbue Weapon: Poison Critical Strikes with Poison Imbued Skills deal 30% (multiplicative) increased Poison damage.
  • (passive) Deadly Venom You deal 3% (multiplicative) increased Poison damage.
    • (upgrade DID NOT take) Alchemical Advantage You gain +1% increased Attack Speed for each enemy you’ve Poisoned, up to +15%.
    • (upgrade DID NOT take to save points) Debilitating Toxins Poisoned enemies deal X% less damage.
  • (passive) did not pick other Imbuements passives to save points

Ultimate Skills (Required Points: 23 )

  • (active) Death Trap Place a trap that arms after 1.25 seconds. It activates when an enemy moves near, dealing 596.56% (X – ?) damage to enemies in the area. Cooldown: 45.0 seconds. Damage: Shadow Tags: Ultimate, Imbueable
  • (1st upgrade) Prime Death Trap Enemies are Pulled into Death Trap when it activates.
  • (2nd upgrade – my pick of the 2) Supreme Death Trap If Death Trap kills an enemy, its Cooldown is reduced by 10 seconds.
  • (passive) Innervation Lucky Hit: Up to a 20% chance to gain 5 Energy.
    • (upgrade) Second Wind Every 100 Energy you spend grants you +10% increased Lucky Hit Chance for 5 seconds.
    • (upgrade) Alchemist’s Fortune – DID NOT INVEST in this to save points
  • (passive) Aftermath After using an Ultimate Skill, restore 25 Energy.
  • (passive – DID NOT take to save points) Trap Mastery When Poison Trap or Death Trap activates, you gain 4% increased Critical Strike Chance against Vulnerable and Crowd Controlled enemies for 4 seconds.
  • (passive) did not pick other Ultimate passives to save points

Specializations (Required Points: 33 )

  • (passive) Victimize Lucky Hit: Dealing direct damage to a Vulnerable enemy has up to a +30% chance to cause an explosion, dealing 23% of the original damage to them and nearby enemies.

Class Mechanic:

I don’t have much information about the 3 Specializations of the Rogue which are their Class Mechanics:

  • Combo Points – Your Basic Skills now generate Combo Points. Certain Skills consume Combo Points for additional effects.
  • Inner Sight – Attack marked enemies to fill up your Inner Sight gauge. When it’s full, gain unlimited Energy for 4 seconds.
  • Preparation – This specialization was not available during the closed beta builds of the game.

My guess is that it would be best to switch between specializations depending on the situation/content. For now I won’t go into detail or say use only a certain one of those until the game launches and I try them out.

Legendary Aspects / Powers

I will only list the Legendary Aspects that have been selected for the build and the slots in which I advise putting those. For in-depth information you can check my pre-launch builds spreadsheet on this link. This build (Volatile) is one of the builds on that spreadsheet.

  • Helm: Aspect of The Umbral
  • Amulet: Aspect of Unstable Imbuements
  • Chest: Aspect of Shared Misery
  • Pants: Aspect of Might
  • Gloves: Vengeful Aspect
  • Boots: Ghostwalker Aspect
  • Ring 1: Blast-Trapper’s Aspect
  • Ring 2: Volatile Blades
  • 1H Weapon (see NOTE below): Volatile Shadows
  • Off-hand (see NOTE below): Aspect of Corruption
  • 2-H Weapon (if you decide to use one): Volatile Shadows
NOTE: You'll be using a Dual-Wielded Weapon & Offhand combo for this build.

I do not currently know if having a 2H weapon equipped as a 2nd weapon set will grant the aspect on it at all times so I've put the same aspect on both the 1H and 2H.

Useful Links (Spreadsheets & more):

For all of my Diablo IV Pre-Launch Theorycrafts/Builds: This Spreadsheet

For my Diablo IV Pre-Launch Class Skill Trees (can be used as mini-calculator): This Spreadsheet

♦ ◊ ♦ ◊ ♦

This concludes the Volatile Rogue Build for Diablo IV. If you’re interested in the game below are links to the various platforms where one can buy it (you can just click the links to open a new tab):

PC (Battle.Net)

XBOX

PlayStation

Official Website

Storm Lord Diablo IV Druid Build

Storm Lord Druid BUILD for Diablo IV

(call upon the forces of Nature to smite your foes with the power of wrathful storms)

♦ ◊ ♦ ◊ ♦

Diablo IV launches on June 6th, 2023 for PC (Battle.Net), XBOX, & PlayStation with a 4 days Early Access (no wipe) for pre-orders (so kind of really launching June 2nd).

Diablo IV’s Open Beta Tests are almost here and I felt motivated to make some Pre-Launch theorycrafted semi-builds that should be good for ‘fresh-into-endgame’ characters when the game launches. I also plan to evolve them into FULL builds when the game is released & keep them updated when we get rebalance updates. This is one such build for the Druid Class called Storm Lord.

The Beta tests will only let us reach lvl 25 and only let us play in the first Act/Zone (Fractured Peaks) so those builds will be more useful for the actual game launch and ideally for characters around lvl 50+ or 60+. I’ve used 50+ and 60+ skill points when making the builds instead of the full 100 so that they can be used to jumpstart a player’s post-story endgame grind.

I’ve also made spreadsheets for those builds (see the links below) that have shortlisted the active and passive skills + legendary aspect that work well with the build so one can spend the extra skill points on the way to lvl 100 into those other skills.

This build will be updated post-launch to a new & expanded version when I have actual in-game information as reference.

Video Version:

Skill Trees

Below you’ll see ONLY the Active & Passive skills that were selected for this build. For additional skills that can be taken on the way to lvl 100 + alternative skill options, you can check my pre-launch builds spreadsheet on this link. This build (Storm Lord) is one of the builds on that spreadsheet.

Some of the skill icon images you see could be outdated & different from what is seen in the Full release version. I plan to replace them once the Beta ends or after the full launch

Basic Skill (Resource Generator/Builder) (Required Points: 0 )

  • (active) Storm Strike Electricity gathers around your weapon, dealing +27.34% (X-?) damage split between your target and up to 3 nearby enemies. Type: Storm Magic Damage: Lightning Generates: 15 Spirit
    • (1st upgrade) Enhanced Storm Strike Dealing damage with Storm Strike reduces your damage taken by +25% for 3 seconds.
    • (2nd upgrade – my pick of the 2) Fierce Storm Strike Storm Strike has a 50% chance to make enemies Vulnerable for 3 seconds.

Spirit / Core Skill(s) (Resource Spender) (Required Points: 2 )

  • (active) Tornado Conjure a vortex that moves outwards and curves in a random direction, dealing 105.00% (X-?) damage every second. Talents: Natural Balance, Eye of the Storm, Elemental Exposure, Natural Resonance, Fury of Nature, Perfect Storm. Type: Storm Magic Damage: Physical Spirit Cost: 38
  • (1st upgrade) Enhanced Tornado Each time you cast Tornado, you have a 20% chance to spawn an additional Tornado.
  • (2nd upgrade – my pick of the 2) Raging Tornado Each time an enemy is damaged by a Tornado, they take 5% (multiplicative) increased damage from Tornado for 3 seconds, stacking up to 15% (multiplicative) increased damage.
  • (passive) Heart of the Wild Maximum Spirit is increased by 3.
    • (upgrade – did NOT take to save points) Wild Impulses Your Core Skills cost 5% (multiplicative) more Spirit but deal 10% (multiplicative) increased damage
    • (upgrade) Abundance Basic Skills generate 5% more Spirit.
  • (passive – did NOT take to save points) Predatory Instinct Critical Strike Chance against nearby enemies is increased by 3%.
    • (upgrade – did NOT take as it’s not needed) Iron Fur – While in Werebear form, damage reduction is increased by 3%. This bonus persists for 3 seconds after leaving Werebear form.
    • (upgrade – did NOT take as it’s not needed) Digitigrate Gait / Lycanthropic Speed
  • (passive) did not pick other Spirit/Core passives to save points

Defensive Skills (Required Points: 6 ) I took both of the Defensive skills listed below

  • (active) Cyclone Armor Powerful winds protect you, granting 20.0% ranged damage reduction. When an enemy in melee range hits you, there is up to a 15.75% (X- ?) chance for the winds to knock it back. Type: Storm Magic
  • (1st upgrade) Enhanced Cyclone Armor Enemies who are Knocked Back by Cyclone Armor are also Slowed by 40% for 3 seconds.
  • (2nd upgrade – my pick of the 2) Preserving Cyclone Armor Every 10 seconds, Cyclone Armor intensifies, reducing the next instance of non-Physical damage by an additional 40%.
  • (passive) Ancestral Fortitude Increase your non-physical resistances by 5%.
    • (upgrade) Vigilance You Take X% reduced damage for X seconds after using a Defensive Skill.
  • (active) Blood Howl Shapeshift into a Werewolf and howl furiously, restoring X% Life. Cooldown: 15 seconds
  • (1st upgrade) Enhanced Blood Howl Kills reduce the cooldown of Blood Howl by 1 second.
  • (2nd upgrade – my pick of the 2) Innate Blood Howl Blood Howl also generates 20 Spirit.

Companion Skills (Required Points: 11 ) I did NOT take a companion BUT if you want to sacrifice one of the Defensive skills, I recommend the skills & upgrades below

  • (active) Ravens Active: The target area is swarmed with ravens. dealing 89.25 (X-?) damage over 6 seconds. Type: Companion Damage: Physical Cooldown: 25 seconds
  • (1st upgrade) Enhanced Ravens Passive: Ravens fly above you and periodically attack your enemies for 13.85% (X-?) damage every 5 seconds.
  • (2nd upgrade – my pick of the 2) Ferocious Ravens Enemies inside the swarm of Ravens when it is activated become Vulnerable for 3 seconds.
  • (passive) did not pick any Companion passives to save points BUT even if you take a companion I still won’t recommend the Companion passives for this build

Wrath Skills (Required Points: 16 )

  • (active) Hurricane Form a hurricane around you that deals 102.37 (X-?) damage to nearby enemies over 8 seconds. Talents: Storm and Claw, Eye of the Storm, Natural Resonance, Endless Tempest, Fury of Nature, Perfect Storm, Type: Storm Magic Damage: Physical Cooldown: 20 seconds
  • (1st upgrade) Enhanced Hurricane Enemies who are damaged by Hurricane are Slowed by 25% for 2 seconds.
  • (2nd upgrade – my pick of the 2) Savage Hurricane Enemies who are in Hurricane’s radius have their damage reduced by 20%.
  • (passive) Elemental Exposure Lucky Hit: Your Storm Skills have up to 20% chance to make enemies Vulnerable for 1.0 seconds.
    • (upgrade 1) Endless Tempest Increase the duration of Hurricane and Cataclysm by 5%.
    • (upgrade 2 – did NOT pick this one) Charged Atmosphere Every 18 seconds, a Lightning Strike hits a nearby enemy dealing 47.25% (X-?) damage.
    • (upgrade 3 – did NOT pick this one) Bad Omen Lucky Hit: Up to a 10% chance when dealing damage to a Vulnerable, Immobilized or Stunned enemy that a Lightning Strike also hits dealing 57.75% (X-?} damage.
    • (upgrade 4 – did NOT pick this one) Electric Shock Lucky Hit: Dealing Lightning damage to enemies has a 5% chance to Immobilize them for 3 seconds. If the target is already Immobilized, the Lightning damage dealt to them is increased by X% instead.
  • (active) Ravens Active: The target area is swarmed with ravens. dealing 89.25 (X-?) damage over 6 seconds. Type: Companion Damage: Physical Cooldown: 25 seconds
  • (1st upgrade) Enhanced Ravens Passive: Ravens fly above you and periodically attack your enemies for 13.85% (X-?) damage every 5 seconds.
  • (2nd upgrade – my pick of the 2) Ferocious Ravens Enemies inside the swarm of Ravens when it is activated become Vulnerable for 3 seconds.
  • (passive) did not pick any other Wrath passives

Ultimate Skills (Required Points: 23 )

  • (active) Cataclysm A massive storm follows you for 8 seconds Tornadoes knock back enemies, and lightning strikes wildly dealing 54.60% (X-?) damage. Cooldown: 80 seconds
  • (1st upgrade) Prime Cataclysm Cataclysm’s duration is increased by 2 seconds.
  • (2nd upgrade) Supreme Cataclysm Lightning strikes from Cataclysm make enemies Vulnerable for 2 seconds.
  • (passive) Defiance Nature Magic skills deal 4% (multiplicative) increased damage to Elites.
    • (passive) Natural Disaster Your Earth Skills deal 4% (multiplicative) increased damage to Vulnerable enemies. Your Storm Skills deal 4% (multiplicative) increased damage to enemies that are Stunned, Immobilized, or Knocked Back.
    • (passive – did NOT pick to save points) Circle of Life Nature Magic skills that consume Spirit restore 1% of your maximum Life.
    • (passive – did NOT pick to save points) Resonance Nature Magic skills deal 2% (multiplicative) increased damage. Triple this bonus if an Earth Skill is the next skill cast after a Storm Skill, or a Storm Skill is the next skill cast after an Earth Skill.
  • (passive – did NOT pick to save points) Defensive Posture Increase the Damage Reduction gained while you are Fortified by an additional +3%.
    • (upgrade – did NOT pick to save points) Thick Hide Whenever you are Stunned, Immobilized, or Knocked Down, Fortify for X.
    • (upgrade – did NOT pick to save points) Nature’s Resolve 5% chance when struck to Fortify you for X
  • (passive) did not pick any other Ultimate passives

Specializations (Required Points: 33 )

  • (passive) Perfect Storm Your Storm Skills grant 2 Spirit and deal 20% (multiplicative) increased damage when damaging a Vulnerable, Immobilized or Slowed enemy.

Class Mechanic (Spirit Boons):

I don’t have much info regarding the Spirit Boons but I think you can pick at least 2 from the same category + maybe 1 more from another. I’ll leave this empty for now.

Legendary Aspects / Powers

I will only list the Legendary Aspects that have been selected for the build and the slots in which I advise putting those. For in-depth information you can check my pre-launch builds spreadsheet on this link. This build (Storm Lord) is one of the builds on that spreadsheet.

  • Helm: Storm Beast’s Aspect
  • Amulet: Aspect of Shared Misery
  • Chest: Skinwalker’s Aspect
  • Pants: Cyclonic Force
  • Gloves: Stormshifter’s Aspect
  • Boots: Ghostwalker Aspect
  • Ring 1: Aspect of The Umbral
  • Ring 2: Overcharged Aspect
  • 1H Weapon (see note below): Nighthowler’s Aspect
  • Off-hand (see note below): Aspect of The Tempest
  • 2-H Weapon (see note below): Nighthowler’s Aspect
NOTE: I recommend using 1H + offhand so that you can get an extra aspect. 

If you go for 2-Handed and put Aspect of The Ursine Horror in the Gloves Slot you could move Aspect of Quicksand to the Chest Slot, while removing Skinwalker's Aspect from the setup or replacing Mending Stone in the Pants slot with it (skinwalker).

Useful Links (Spreadsheets & more):

For all of my Diablo IV Pre-Launch Theorycrafts/Builds: This Spreadsheet

For my Diablo IV Pre-Launch Class Skill Trees (can be used as mini-calculator): This Spreadsheet

♦ ◊ ♦ ◊ ♦

This concludes the Storm Lord Druid Build for Diablo IV. If you’re interested in the game, below are links to the various platforms where one can buy it (you can just click the links to open a new tab):

PC (Battle.Net)

XBOX

PlayStation

Official Website

Iceplosion Diablo IV Sorcerer Build

Iceplosion Sorcerer BUILD for Diablo IV

(chill then freeze your enemies to shatter their frozen selves into an icy explosion)

♦ ◊ ♦ ◊ ♦

Diablo IV launches on June 6th, 2023 for PC (Battle.Net), XBOX, & PlayStation with a 4 days Early Access (no wipe) for pre-orders (so kind of really launching June 2nd).

Diablo IV’s Open Beta Tests are almost here and I felt motivated to make some Pre-Launch theorycrafted semi-builds that should be good for ‘fresh-into-endgame’ characters when the game launches. I also plan to evolve them into FULL builds when the game is released & keep them updated when we get rebalance updates. This is one such build for the Sorcerer Class called Iceplosion.

The Beta tests will only let us reach lvl 25 and only let us play in the first Act/Zone (Fractured Peaks) so those builds will be more useful for the actual game launch and ideally for characters around lvl 50+ or 60+. I’ve used 50+ and 60+ skill points when making the builds instead of the full 100 so that they can be used to jumpstart a player’s post-story endgame grind.

I’ve also made spreadsheets for those builds (see the links below) that have shortlisted the active and passive skills + legendary aspect that work well with the build so one can spend the extra skill points on the way to lvl 100 into those other skills.

This build will be updated post-launch to a new & expanded version when I have actual in-game information as reference.

Video Version:

Skill Trees

Below you’ll see ONLY the Active & Passive skills that were selected for this build. For additional skills that can be taken on the way to lvl 100 + alternative skill options, you can check my pre-launch builds spreadsheet on this link. This build (Iceplosion) is one of the builds on that spreadsheet.

Some of the skill icon images you see could be outdated & different from what is seen in the Full release version. I plan to replace them once the Beta ends or after the full launch.

Minor Destruction / Basic Skill (Resource Generator/Builder) (Required Points: 0 )

  • (active) Frost Bolt – Throw a bolt of frost at an enemy, dealing 39.00% (X- ?) damage and Chilling them for 13%. Damage: Cold Tags: Basic, Frost
    • (1st upgrade) Enhanced Frost Bolt Frost Bolt has a 10% chance to explode on Chilled targets, hitting nearby enemies. Chance increased by 100% against Frozen targets.
    • (2nd upgrade – my pick of the 2) Glinting Frost Bolt Frost Bolt generates 4 Mana when hitting Chilled or Frozen.

Major Destruction / Core Skill(s) (Resource Spender) (Required Points: 2 )

  • (active) Ice Shards Launch 5 shards that deal 25.00% (X-?) damage each. Deals 25% (Multiplicative) increased damage to Frozen enemies. Mana Cost: 30 Damage: Cold Tags: Core, Frost
  • (1st upgrade) Enhanced Ice Shards Ice Shards have 15% chance to ricochet to another enemy.
  • (2nd upgrade – my pick of the 2) Greater Ice Shards While you have a Barrier active, Ice Shards treats enemies as if they were Frozen.
  • (passive) Potent Warding Your non-Physical Damage and Resistances are increased by 2%.
  • (passive) did not pick other Core passives to save points

Defensive Skills (Required Points: 6 ) I picked two Defensive skills for this build

  • (active) Frost Nova Unleash a torrent of frost, Freezing enemies around you for 2 seconds. Cooldown: 14.7 Tags: Defensive, Frost
  • (1st upgrade) Enhanced Frost Nova Frost Nova’s radius is increased by 25%.
  • (2nd upgrade – my pick of the 2) Shimmering Frost Nova Frost Nova generates 4 Mana per enemy hit.
  • (passive) did not pick any Defensive passives to save points
  • (active) Teleport Transform into lightning becoming Unstoppable and surging to the target location dealing 25.00% (X -?) damage around you upon arrival. Cooldown: 10.8 Damage: Lightning Tags: Defensive, Shock
  • (1st upgrade) Enhanced Teleport After Teleporting, take 30% less damage for 5 seconds.
  • (2nd upgrade – my pick of the 2) Shimmering Teleport Teleport’s cooldown is decreased by 0.5 seconds per enemy hit, up to 3 seconds.
  • (passive) did not pick any Defensive passives to save points

Conjuration Skills (Required Points: 11 ) I DID NOT pick a Conjuration skill but you can remove 1 of the defensive skills and add Ice Blades

  • (active) Ice Blades Conjure ice blades for 6.0 seconds that rapidly slashes enemies for 30.67% (X – ?) damage and has a 20% chance to make them Vulnerable for 2 seconds. Cooldown: 11.8 Damage: Cold Tags: Conjuration, Frost
  • (1st upgrade) Enhanced Ice Blades Ice Blades has a 10% increased chance to make enemies Vulnerable.
  • (2nd upgrade – my pick of the 2) Summoned Ice Blades Every time Ice Blades hits a Vulnerable enemy, it gains 25% Attack Speed, up to 100%.
  • (passive) Align the Elements You gain 5% Damage reduction against Elites for each second you don’t take damage from any of these sources, up to 50%.  
    • (1st upgrade) Mana Shield – Every time you spend 100 Mana, you gain 5% Damage Reduction for 5 seconds.
    • (2nd upgrade) Protection Using a skill with cooldown grants 10% of your maximum Life as a Barrier for 5 seconds.
  • (passive) did not pick any more Conjuration passives to save points

Mastery Skills (Required Points: 16 )

  • (active) Blizzard Summon a frigid blizzard that deals 120.00% (X) damage and continually Chills enemies for 18% over 5 seconds. Mana Cost: 40 Damage: Cold Tags: Mastery, Frost
  • (1st upgrade) Enhanced Blizzard Blizzard’s duration is increased by 2 seconds.
  • (2nd upgrade – my pick of the 2) Mage’s Blizzard Every second an enemy is in Blizzard, they take 2.5% (multiplicative) increased damage from you, up to 20% (multiplicative).
  • (passive I ONLY invested ONE point hereto unlock the upgrade ) Ice Veil – Your Barriers have a 5% increased duration. Barriers absorb damage from all sourced up to a specified amount.
    • (upgrade 1) Hoarfrost – You deal more damage to enemies the more Chilled they are, up 6% (multiplicative) while they are Frozen.
    • (upgrade 2 – did get this to save points) Cold Front – While you have a Barrier active, you apply 8% more Chill.

Ultimate Skills (Required Points: 23 )

  • (active) Deep Freeze Encase yourself in ice, becoming Immune for 4 seconds, continually Chilling enemies for 20%. When Deep Freeze ends, Frozen enemies shatter for 200.00% (X- ?). Casting Deep Freeze again ends the effect early. Cooldown: 58.8 Damage: Cold Tags: Ultimate, Frost
  • (1st upgrade) Prime Deep Freeze Gain 5% of your Life as a Barrier for 6 seconds for each enemy shattered by Deep Freeze.
  • (2nd upgrade) Supreme Deep Freeze When Deep Freeze ends, your active cooldowns are reduced by 50%.
  • (passive) Frostbite You deal 3% (multiplicative) more damage to Frozen or Vulnerable enemies, and 6% (multiplicative) more damage to enemies who are both Frozen and Vulnerable.
    • (upgrade) Icy Touch You deal 4% (multiplicative) increased damage to Vulnerable enemies.
    • (upgrade) Permafrost Frost Skills deal 5% (multiplicative) increased damage to Elites.
    • (upgrade) Snap Freeze Lucky Hit: Frost Skills have up to a 3% chance to instantly Freeze.

Specializations (Required Points: 33 )

  • (passive) Shatter After Freeze expires, enemies explode for 25% of the damage you dealt to them while Frozen.

Class Mechanic:

I don’t have much info regarding sacrificing skills as “Enchantments” and if it even is still a part of the game so I’ll leave this empty for now.

Legendary Aspects / Powers

I will only list the Legendary Aspects that have been selected for the build and the slots in which I advise putting those. For in-depth information you can check my pre-launch builds spreadsheet on this link. This build (Iceplosion) is one of the builds on that spreadsheet.

  • Helm: Aspect of The Umbral
  • Amulet: Aspect of Control
  • Chest: Aspect of Might
  • Pants: Snowguard’s Aspect
  • Gloves: Aspect of Biting Cold
  • Boots: Aspect of Shared Misery
  • Ring 1: Aspect of Retribution
  • Ring 2: Prodigy’s Aspect
  • 1H Weapon: Aspect of Pummeling
  • Off-hand: Aspect of Piercing Cold
  • 2-H Weapon (if you decide to use one): Aspect of Pummeling

Useful Links (Spreadsheets & more):

For all of my Diablo IV Pre-Launch Theorycrafts/Builds: This Spreadsheet

For my Diablo IV Pre-Launch Class Skill Trees (can be used as mini-calculator): This Spreadsheet

♦ ◊ ♦ ◊ ♦

This concludes the Iceplosion Sorcerer Build for Diablo IV. If you’re interested in the game below are links to the various platforms where one can buy it (you can just click the links to open a new tab):

PC (Battle.Net)

XBOX

PlayStation

Official Website

Hemomancer Diablo IV Necromancer Build

Hemomancer Necromancer BUILD for Diablo IV

(the Hemomancer will bleed you dry and consume your vitality to keep themselves Healthy)

♦ ◊ ♦ ◊ ♦

Diablo IV launches on June 6th, 2023 for PC (Battle.Net), XBOX, & PlayStation with a 4 days Early Access (no wipe) for pre-orders (so kind of really launching June 2nd).

Diablo IV’s Open Beta Tests are almost here and I felt motivated to make some Pre-Launch theorycrafted semi-builds that should be good for ‘fresh-into-endgame’ characters when the game launches. I also plan to evolve them into FULL builds when the game is released & keep them updated when we get rebalance updates. This is one such build for the Necromancer Class called Hemomancer. (you can call it Mrs. or Ms. bones if suits you better

The Beta tests will only let us reach lvl 25 and only let us play in the first Act/Zone (Fractured Peaks) so those builds will be more useful for the actual game launch and ideally for characters around lvl 50+ or 60+. I’ve used 50+ and 60+ skill points when making the builds instead of the full 100 so that they can be used to jumpstart a player’s post-story endgame grind.

I’ve also made spreadsheets for those builds (see the links below) that have shortlisted the active and passive skills + legendary aspect that work well with the build so one can spend the extra skill points on the way to lvl 100 into those other skills.

This build will be updated post-launch to a new & expanded version when I have actual in-game information as reference.

Video Version:

Skill Trees

Below you’ll see ONLY the Active & Passive skills that were selected for this build. For additional skills that can be taken on the way to lvl 100 + alternative skill options, you can check my pre-launch builds spreadsheet on this link. This build (Hemomancer) is one of the builds on that spreadsheet.

The images you see are PLACEHOLDERS due to lack of any real skill icons leaks for the Necromancer class. I will replace them once the Beta starts and I can screenshot the actual icons.

Basic Skill (Resource Generator/Builder) (Required Points: 0 )

  • (active) Hemorrhage – Burst an enemy’s blood, dealing 25.00% (X-XX) damage. Hemorrhage has 20% chance to form a Blood Orb. Blood Orbs heal you for 15% of your maximum Life when picked up. Generates: 7 Essence Damage: Physical
    • (1st upgrade) Enhanced Hemorrhage After picking up a Blood Orb, your next Hemorrhage also hits nearby enemies and grants 2 additional essence per enemy hit
    • (2nd upgrade – my pick of the 2) Initiate’s Hemorrhage Hemorrhage grants X Fortify each time it hits and enemy, and had a 1.5% chance per enemy hit to Fortify you.

Core Skill(s) (Resource Spender) (Required Points: 2 )

  • (active) Blood Surge Draw blood from enemies, dealing 20.00% (X-?) damage, and expel a blood nova, dealing 50.00% (X-?) damage. Blood Surge’s nova damage is increased by 10% (multiplicative) per enemy drained, up to 50% (multiplicative). Essence Cost: 30 Damage: Physical
  • (1st upgrade) Enhanced Blood Surge Blood Surge heals you for 1% of your maximum Life per each enemy drained, up to 5%.
  • (2nd upgrade – my pick of the 2) Supernatural Blood Surge Each time an enemy is hit by Blood Surge’s nova, you are Fortified for X.
  • (passive) Unliving Energy – Your maximum Essence is increased by 3.
    • (1st upgrade) did not pick to save points
  • (passive) Reconstitution Your damage has up to a 4% chance to create a corpse at the target’s location.

Macabre Skills (Required Points: 6 ) I took two Macabre active skills

  • (active) Blood Mist Disperse into a bloody mist, becoming Immune for 3 seconds. Your Movement Speed is reduced by 50.00% and you periodically deal 1.75 (X-X) damage to enemies, healing for 100% of the damage dealt. Cooldown: 19 Seconds.
  • (1st upgrade) Enhanced Blood Mist Blood Mist’s Movement Speed penalty is reduced to 20%.
  • (2nd upgrade – my pick of the 2) Ghastly Blood Mist Blood Mist leaves behind a Corpse every 1 second.
  • (passive – only put 1 point here to unlock the upgrade) Grim Harvest Consuming a Corpse generates 3 Essence.
    • (upgrade) Fueled by Death You deal 4% (multiplicative) increased damage for 4 seconds after consuming a Corpse.
  • (passive – only put 1 point here & it’s optional) Necrotic Carapace When a Corpse is formed from your Skills or your Minions, Fortify for X.
  • (active) Bone Prison Unearth a prison of bone with X Life that surrounds the target area for 6 seconds. Cooldown: 20 Seconds.
  • (1st upgrade) Enhanced Bone Prison Gain 3 Essence each time an enemy hits your Bone Prison.
  • (2nd upgrade – my pick of the 2) Dreadful Bone Prison Fortify for X for each enemy trapped by Bone Prison.

Corruption Skills (Required Points: 11 ) DID NOT pick a Corruption skill but you can remove Bone Prison and pick Iron Maiden

  • (active 1) Iron Maiden Curse the target area. Enemies afflicted by Iron Maiden take 10.00% (X-XX) damage each time they deal direct damage. Lasts 10 seconds. Essence Cost: 10 Damage: Physical
  • (1st upgrade) Enhanced Iron Maiden Iron Maiden no longer costs Essence. Instead, gain 5 Essence for each enemy Cursed. Does not work with enemies already cursed with Iron Maiden.
  • (2nd upgrade – my pick of the 2) Abhorrent Iron Maiden Heal for 5% of your maximum Life when an enemy dies while afflicted with Iron Maiden.
  • (passive) did not invest into Corruption passives to save points

Summoning Skills (Required Points: 16 )

  • (active) Corpse Tendrils Veins burst out of a Corpse, pulling in enemies, Stunning them for 3 seconds, and dealing 20.00% (X-?) damage to them. Cooldown: 11.0 Seconds. Damage: Physical
  • (1st upgrade) Enhanced Corpse Tendrils Enemies who are in range of Corpse Tendrils are Slowed by 50% before being pulled.
  • (2nd upgrade – my pick of the 2) Abhorrent Corpse Tendrils Enemies slain while Stunned by Corpse Tendrils have a 25% chance to drop a Blood Orb.
  • (passive) Blood Begets Blood While below 50% Life, you receive 10% more healing from all sources.
    • (upgrade 1 DID NOT INVEST in this to save points) Tides of Blood Your Blood Skills deal 5% increased (multiplicative) Overpower damage. This bonus is doubled while you are Healthy.
    • (upgrade 2) Coalesced Blood Blood Orbs heal you for 15% more.
    • (upgrade 3 DID NOT INVEST in this to save points) Drain Vitality Hitting enemies with Blood Skills has up to 25% chance to Fortify you for X.
    • (upgrade 4) Transfusion Blood Orbs also heal your Minions for 15% of the amount.
  • (passive) did not invest into Summoning passives to save points

Ultimate Skills (Required Points: 23 )

  • (active) Blood Wave Conjure a tidal wave of blood that deals 90.00% (X-XX) damage and knocks enemies back. Cooldown: 50.0 Seconds. Damage: Physical
  • (1st upgrade) Prime Blood Wave Blood Wave Slows enemies by 50% for 4 seconds.
  • (2nd upgrade) Supreme Blood Wave Blood Wave leaves behind 3 Blood Orbs as it travels.
  • (passive- ONLY PUT 1 LEVEL here to save points & to unlock the upgrade) Stand Alone Increases Damage Reduction by 6%, reduced by 2% for each active Minion.
    • (upgrade) Memento Mori Sacrificing both Skeletal Warriors and Skeletal Mages increases their Sacrifice bonuses by 20%.
  • (passive) Golem Mastery Increase the damage and Life of your Golem by 15%
  • (passive) did not invest into Ultimate passives to save points but there are some nice options

Specializations (Required Points: 33 )

  • (passive) Rathma’s Vigor Increase your maximum Life by 10%. While Healtthy, you deal 25% (multiplicative) increased damage

Book of the Dead (Class Mechanic):

This build is all about doing as much shadow dmg hits as possible and focuses on ranged DPS. Sacrificing our melee minions might make it hard by not having a “tank” but it also boosts our dps in a lovely way. As for the types I picked, I’d recommend as follows:

  • Skeletal Reapers + Sacrifice is what we take for the bonus dps
    • Description: Your critical strike chance is increased by 5%, but you can no longer raise Skeletal Warriors.
  • Shadow Mages + Sacrifice is a lovely build synergy
    • Description: Your maximum essence is increased by 15, but you can no longer raise Skeletal Mages.
  • Iron Golem + Sacrifice is what we take for the bonus dps
    • Description: You deal 30% (multiplicative) increased critical strike damage, but you lose the ability to summon a Golem.

Legendary Aspects / Powers

I will only list the Legendary Aspects that have been selected for the build and the slots in which I advise putting those. For in-depth information you can check my pre-launch builds spreadsheet on this link. This build (Hemomancer) is one of the builds on that spreadsheet.

  • Helm: Aspect of Potent Blood
  • Amulet: Aspect of Shared Misery
  • Chest: Fastblood Aspect
  • Pants: Aspect of Might
  • Gloves: Aspect of Pummeling
  • Boots: Aspect of Grasping Veins
  • Ring 1: Aspect of The Umbral
  • Ring 2: Aspect of Bursting Bones
  • 1H Weapon: Aspect of Retribution
  • Off-hand: Blood-bathed Aspect
  • 2-H Weapon (if you decide to use one): Aspect of Retribution

Useful Links (Spreadsheets & more):

For all of my Diablo IV Pre-Launch Theorycrafts/Builds: This Spreadsheet

For my Diablo IV Pre-Launch Class Skill Trees (can be used as mini-calculator): This Spreadsheet

♦ ◊ ♦ ◊ ♦

This concludes the Hemomancer Necromancer Build for Diablo IV. If you’re interested in the game below are links to the various platforms where one can buy it (you can just click the links to open a new tab):

PC (Battle.Net)

XBOX

PlayStation

Official Website