『Diablo 4』 Devs promise to FIX the 1.1.0 MESS + Hotfix Nerf for Nightmare Dungeons

Diablo 4’s Devs promise to FIX the 1.1.0 MESS + a Hotfix Nerf for Nightmare Dungeons

(yesterday Diablo 4’s devs held another Campfire Chat livestream & made promises to FIX the current balance mess as well as to avoid making the similar messes in the future )

♦ ◊ ♦ ◊ ♦

Diablo IV launched on June 6th, 2023 for PC (Battle.Net), XBOX, & PlayStation) and I’ve had my fair share of playing and testing done. After the 18th of July patch 1.1.0a, the game was left in a severely & unreasonably badly balanced state. All classes received massive nerfs mostly in the shape of reduced bonuses of the stats & affixes we get such as: Cooldown Reduction, Vulnerable Damage, Critical Strike Damage, Core Skill Damage, as well as various types of Damage Reduction, to name a few of the major culprits. There were a plethora of other nerfs that affected all classes as well as some buffs that do so too, but the overall result was that many of the working viable meta builds received a big blow and the ones that were non-meta & barely viable even stopped being viable for endgame content.

The aftermath was that a plethora of players, me including, did not feel the game was worth our time in its current state and were left looking for other games to play in the meantime. Blizzard held a Campfire Chat livestream yesterday and made a bunch of promises to address the situation and “fix” the mess in the upcoming Patch 1.1.1 (ETA around 1-2 weeks from the Campfire Chat on the 21st of July). What promises did they make, how do they plan to “fix” this mess, this article will hopefully answer any questions you may have regarding this.

Video Version:

“We know it is bad, we know it is not fun”

Blizzard acknowledged that reducing player power this drastically was uncalled for… but then why do it in the first place? They have at least realized that they made a big oopsie and are fast with the damage control so we already received (yesterday) a Hotfix that adjusts the hp and damage of the middle & higher tier Nightmare Dungeons. They also promise that they “don’t plan on doing a patch like this ever again”. So without further ado, below is a list of the Nightmare Dungeon changes that the most recent hotfix included:

Gameplay Update

We are implementing a reduction to overall monster power levels in Nightmare dungeons. The new top range for tier 100 will feel like what tier 70 was previously.

Developer Note: Although these values make it appear that the higher tiers are easier than lower tiers, this is not the case because the monsters also benefit from being significantly higher level than players in higher Nightmare Dungeon tiers.

Examples
Tier 35

    HP reduced by ~2%
    Damaged reduced by ~1%

Tier 50

    HP reduced by ~20%
    Damage reduced by ~13%

Tier 70

    HP reduced by ~60%
    Damage reduced by 54%

Tier 100

    HP reduced by ~82%
    Damage reduced by ~79%

Bug Fixes

    Fixed an issue where additional Blood Lances from the Gore Quills aspect could sometimes not deal damage.
    Fixed an issue where the Answers in the Ashes quest could have progression blocked if Varshan was killed before the quest updates to the step to defeat him.
    Fixed an issue where the dungeons Buried Halls and Endless Gates dungeons were not giving players proper rewards upon completion.
    Fixed an issue where the Akhan’s Grasp Nightmare Dungeon was not giving players proper rewards upon completion.
    Fixed an issue where the Moonrage Malignant Power would cause the Wolves power to be unequipped from the action bar.
    Fixed an issue where the Subterranean Legendary aspect was dealing far less damage than intended.
    Fixed an issue where the Frozen Terror Malignant Power could also fear the player with it equipped.
    Fixed an issue where Malignant Hearts could be duplicated when salvaging them, logging out immediately, and logging back in.
    Fixed an issue where Tier Skips wouldn’t be properly rewarded in certain scenarios.
    Fixed an issue where Whispers sometimes wouldn’t grant experience on completion.
    Further stability improvements

Why did they do those Nerfs?

Blizzard explains that the reason for those nerfs is that they did not want to see certain stats over-performing as much as they did compared to others and that they wanted people to use a wider variety of affixes instead of always using the same 5-6 affixes in their gear like Cooldown Reduction, Damage Reductions, Vulnerable Damage, Critical Strike Damage, and Core Skill Damage, for example. And this seems like a sound reason BUT the way they went on about it was FAR from the right way to handle this.

First off, if they wanted people to not feel pressured to use damage reduction in 3 out of 4 of their Leg armor affix slots, for example, they should have just buffed damage reduction to the point where people would feel that 3 of those on the same item are an overkill and just 2 would suffice, but they did the exact opposite and nerfed various kinds of damage reduction affixes. And now comes the damage control hotfix I mentioned & listed earlier where Nightmare Dungeons are getting nerfed to match the weak player power. While it’s better than nothing it’s definitely not the proper way those things should be done. I’ll be logging in later tonight to see how the game feels with the new NMD rebalance.

Another change I strongly disagree with is the cooldown reduction nerfs, they went overboard with that one and this severe of a nerf was totally uncalled for. They could have went for a very minor 5 to 10% nerf and then just increased the cooldown of skills that were being abused if they wanted to prevent infinite resources, infinite cast of certain abilities and so on as they said was their intention.

Addressing The “Vulnerable Problem”

I, among many players, agree that we need a rework or a removal+replacement of the Vulnerable damage mechanic. Simply nerfing the Vulnerable Damage affixes/rolls is not going to magically solve the problem. There is a reason why we take this stat in all our builds and why we take advantage of the mechanic. And apparently Joe Piepiora knows that it’s because of how Vulnerable damage is calculated. So the Devs admitted that it was not the proper way to handle this problem and that they’ll need to do a proper rework of the Vulnerable damage formula. He also said that doing a proper rework on Vulnerable will mean needing to look at other things, such as Overpower damage as an example, because all kinds of builds use it currently to be viable, so good alternatives will be needed.

Diablo IV Mission Statement

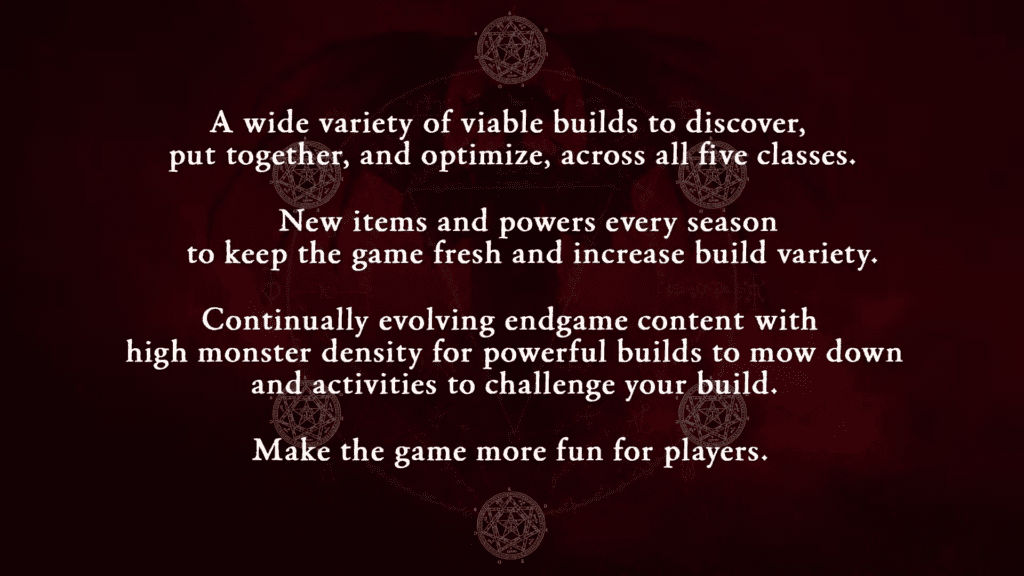
Blizzard showed a list of 4 key points that they will use as guidelines when making patches & balance changes to avoid such a big mess of a patch from happening again. They are as follows:

  • A wide variety of viable builds to discover, put together, and optimize, across all five classes
  • New items and powers every season to keep the game fresh and increase build variety
  • Continually evolving endgame content with high monster density for powerful builds to mow down and activities to challenge your build
  • Make the game more fun for players

So, those 4 mission statement points are obviously something that makes sense. So far, since launch, I have never felt that Blizzard was spot on with either of them while playing Diablo 4 on various builds on each class. They definitely have a long way to go before I would feel like each of those things feels accomplished. I obviously can not speak about point 3 as only the future will tell if the endgame evolves in the right pace but I do believe they should have launched with 2 more endgame activities as an alternative to Nightmare Dungeons that are just as rewarding and give us more ways to level up our glyphs and spend our in-game grind time.

Regarding new items and powers patch 1.1.0 was a hit and miss. Sorcerers, once again, getting the short end of the stick with yet another unique that has an awful negative effect, and is still the only class to get negative effect alongside the positives with their unique and legendary powers. 1.1.0 did bring some cool stuff for various classes in terms of unqiues and legendaries but was kind of a 50-50 for me what i considered cool and reasonable. And that also applies to the malignant hearts that also seem to be 50-50 hit or miss, and also has some underwhelming ones for the sorcerer.

A promise to make Sorcs viable & make Barbs worth it again

Blizzard made a promise that with 1.1.1 Sorcs, who were always at the bottom of the barrel in terms of how underpowered they are compared to other classes, a viable class worth playing. They also made a promise to bring Barbs to a reasonable power level again as 1.1.0 hit the very few reasonable Barb builds pretty hard too. Will this happen? Time will tell but I for sure hope it’s not an empty promise as i love playing elemental mages/casters in games or a good close range brawler class, which the Barbarian never felt like one to me (even with a strong build) ever since the game launched.

Players can expect that to happen partially trough re-visiting of the legendary and unique powers for those two classes and reworking + re-balancing those to make the two classes have a reasonable amount of viable builds for players to use.

Changes to Crowd Control in NMDs?

Blizzard also made a promise to address the ridiculously stupid amount of crowd control that exists in Nightmare Dungeons as well as the lack of many builds capable of dealing with it. I hope this change comes with patch 1.1.1 because right now it’s extremely painful to play certain maps & map affixes on the majority of the builds, especially ones that don’t have enough unstoppable (or any for that matter) to counter the freezing, rooting, slowing, etc. enemies

New Endgame Mode to challenge our builds… in Season 3

Apparently, NMDs are not the best type of content to use as a goal/benchmark to challenge one’s builds and Blizzard will be introducing a new Endgame Mode for us to do that. BUT it’s going to be a long wait of at least another half a year before we get a taste of it as it’s coming with Season 3. Not sure if they were talking about this content but they did also say they plan on bringing back the bosses from the campaign story in new endgame type that suits them when asked about bringing those bosses back. Another thing that they were asked about was leaderboards and they did say with Season 3 they will be bringing leaderboards and content where those could fit.

Here’s a wild guess from me: could we be getting a tower/arena/crucible/survival mode type of endgame with X arena stages where every N stages there’s a bigger boss fight? Is this going to have a timer running to see who get to the end of it the quickest? Is this going to be the content that re-uses the story bosses? I say probably but my guess is as good as anyone’s at this point so we’ll just going to have to wait and see.

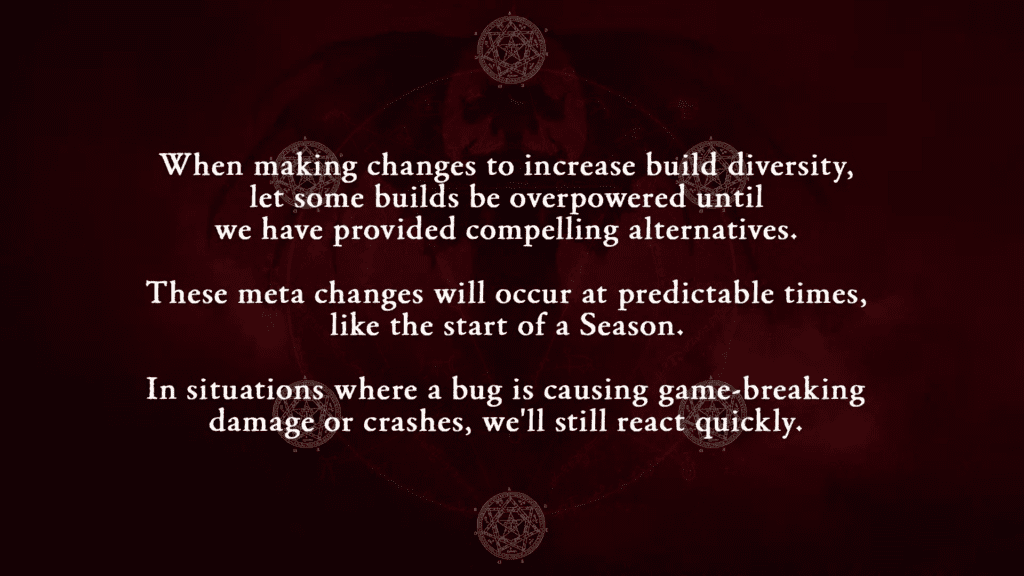
A promise to leave overpowered builds as they are until given reasonable alternatives

Blizzard also promised to keep some builds overpowered until they have provided the playerbase with a compelling viable alternative to those builds. What is worth noting is that such meta shift changes will occur at predictable times, like the start of a new Season. However, in cases where a bug is causing game-breaking damage or crashes, Blizzard will still react quickly.

Increased density for Helltides and NMDs

Another changed that we’ll supposedly be getting with 1.1.1 is an increase of the mob density is the majority of Helltide area zones as well as in Nightmare Dungeons. They’ll also look into improving performance for certain effects/skills so that the substantial increase to mob density doesn’t result in substantially worse performance.

More storage? Devs: 1 extra stash tab is my best offer!

A big source of the negative experience in Diablo 4 is the inventory and storage tension. And maybe only players who play 1 class and 1 build only don’t feel this but anyone who has played more than 1 character or likes testing multiple builds on at least 1 character has realized how bad and how little the storage we’ve got available is. Blizzard has previously promised that Season 2 will come with a rework to the gem system and that gems will get their own “materials” tab in the way veiled crystals and the likes do. However, players need improvements to inventory and storage space right now. The best Blizzard can do is apparently give is a measly extra stash tab which is, obviously, better than zero extra stash tabs. So what can they do to hopefully solve this problem?

I, and many others i assume, believe that giving us personal stash tabs + much more shared ones would be the best option. 4 to 5 personal stash tabs + 10 shared ones should be all we need to have enough room for all sorts of builds on every single class. Additionally, I believe we’ll need a big change to the aspects & the codex of power where every single aspect is on the codex of power and can be unlocked from dungeons and other types of content. As an added bonus being able to put extracted aspects in the codex with their “better than min-roll” values being selectable from there when imprinting would be an amazing QoL feature

Respec cost will be 40% cheaper

One more area where the game has needed improvement was the respec cost for skill points and paragon points. The devs promised that 1.1.1 will bring a 40% reduction to that cost, which should make it roughly around 7-8 million gold for a full respec at lvl 100 (down from 12-13 mil). While it’s still far from perfect it’s a step in the right direction. I still believe respecs should not cost much at all and the real cost of switching to a new build should be farming the new gear and aspects for it + re-rolling the stats on that new gear to suit the build.

Currently, having to pay 12-13 Million god coins, on top of the already costly re-roll (enchant), extract, and imprint costs that one would need to do when gearing up for a new build is a kick in the nuts. Reducing it by only 40% down to 7-8 Mil will make the kick feel like a punch in the nuts so it will still be pretty painful. I’ve counted that excluding skill & paragon respecs, switching a build could end up somewhere between 20 and 40 mil gold on average. The main reason why the cost is this high is because of the shitty design of the enchantment system where each consecutive enchant gets more expensive. If they change it so that the cost of our 2nd re-roll is as high as the cost goes, then this whole respec “problem” will be much bearable. We need a gold sink but it also needs to be reasonable with the bloody costs.

More Changes to EXP incoming

Blizzard are also promising more changed to EXP, in particular speeding up the leveling from levels 50 to 100. They did not provide any specifics but they did say they don’t want reaching lvl 100 to feel like a job but still want it to feel like a challenge. They added that they don’t want players to reach a wall around lvl 70 or 75 where leveling becomes a total slog. I’m personally looking forward to that as EXP rates are a sore subject for me in looter games like Diablo 4.

Storm Lord 3.0 Druid Build for Diablo IV [S- Tier Potential]

Storm Lord 3.0 Druid BUILD for Diablo IV [S- Tier Potential]

(call upon the forces of Nature, embrace your Inner Wolf, & Claw your foes to Smite them with wrathful Storm Strikes)

♦ ◊ ♦ ◊ ♦

Diablo IV launched on June 6th, 2023 for PC (Battle.Net), XBOX, & PlayStation) and I’ve had my fair share of playing and testing done. I’m already making full Builds/Theorycrafts that work for both ‘fresh-into-endgame’ characters as well as late endgame. I’ll evolve & keep them updated when we get major rebalance updates. This is one such build for the Druid Class called Storm Lord 3.0.

I’ve also made spreadsheets for my builds (see the links below) that have shortlisted the active and passive skills + legendary aspect + unique item + gems & sockets + suggested stat rolls + paragon boards that work well with the build which you can use to tinker. Alternatively, I’ve added build calculator links (mostly needed for the paragons)

This build will be updated when needed.

Video Version:

Skill Trees

Below you’ll see ONLY the Active & Passive skills that were selected for this build. For additional skills that can be taken + alternative skill options, you can check my RDY-4-Launch Builds spreadsheet on this link. This build (Storm Lord 3.0) is one of the builds on that spreadsheet.

Basic Skill (Resource Generator/Builder) (Required Points: 0)

  • (active) Claw Shapeshift into a Werewolf and shred an enemy, dealing 20% (X-?) damage.
    Lucky Hit Chance: 50%
    Type: Shapeshifting ; Damage: Physical Generates: 9 Spirit
    • (1st upgrade) Enhanced Claw Claw’s Attack Speed is increased by +10%.
    • (2nd upgrade – my pick of the 2) Fierce Claw – Claw applies 10% (X) poisoning damage over 3 seconds.

Spirit / Core Skill(s) (Resource Spender) (Required Points: 2)

  • (active) Tornado Conjure a swirling tornado that deals 35% (X-?) damage.
    Lucky Hit Chance: 33%
    Type: Storm Magic ; Damage: Physical | Spirit Cost: 40
    • (1st upgrade) Enhanced Tornado Each time you cast Tornado, you have a 20% chance to spawn an additional Tornado.
    • (2nd upgrade – my pick of the 2) Raging Tornado Enemies hit with Tornado have a 10% chance to become Vulnerable for 3 seconds.
  • (passive – ONLY put 1 point here) Heart of the Wild Maximum Spirit is increased by 3/6/9.
    • (upgrade – did NOT take to save points) Wild Impulses
    • (upgrade) Abundance Basic Skills generate 6%/12%/18% (multiplicative) more Spirit.
  • (passive) Predatory Instinct Critical Strike Chance against nearby enemies is increased by +3%/+6%/+9%.
    • (upgrade – did NOT take as its’ Werebear synergy) Iron Fur
    • (upgrade – did NOT take to save points) Digitigrate Gait / Lycanthropic Speed
  • (passive) did not pick other Spirit/Core passives to save points

Defensive Skills (Required Points: 6 ) I took both of the Defensive skills listed below

  • (active – ONLY put 1 point here) Earthen Bulwark – Rocks surround you for 3 seconds, granting a Barrier that absorbs 45% of your Base Life in damage.
    Lucky Hit Chance: 50%
    Cooldown: 16 seconds | Type: Earth Magic ; Damage: Physical
  • (1st upgrade) Enhanced Earthen Bulwark Earthen Bulwark makes you Unstoppable while active.
  • (2nd upgrade – my pick of the 2) Preserving Earthen Bulwark – Casting Earthen Bulwark grants 18% Base Life as Fortify.
  • (active – ONLY put 1 point here) Debilitating Roar Shapeshift into a Werebear and bellow a mighty roar, reducing Nearby enemies’ damage dealt by 50% for 4 seconds.
    Cooldown: 22 seconds | Type: Shapeshifting
  • (1st upgrade) Enhanced Debilitating Roar Debilitating Roar also Fortifies you for 22% Base Life.
  • (2nd upgrade – my pick of the 2) Preserving Debilitating Roar – Debilitating Roar also heals you for 4% of your maximum Life each second for its duration.
  • (passive) did not pick any Defensive passives to save points

Companion Skills (Required Points: 11 ) I did NOT take a companion

  • (active) DID NOT TAKE a Companion active due to using already full skillbar
  • (1st upgrade)
  • (2nd upgrade – my pick of the 2)
  • (passive) did not pick any Companion passives to save points

Wrath Skills (Required Points: 16 )

  • (active – ONLY put 1 point here) Hurricane Form a hurricane around you that deals 97% (X-?) damage to surrounding enemies over 8 seconds.
    Lucky Hit Chance: 33%
    Cooldown: 20 seconds | Type: Storm Magic ; Damage: Physical
  • (1st upgrade) Enhanced Hurricane Enemies who are damaged by Hurricane are Slowed by 25% for 2 seconds.
  • (2nd upgrade – my pick of the 2)Savage Hurricane Enemies affected by Hurricane deal 20% less damage.
  • (passive – ONLY put 1 point here) Elemental Exposure Lucky Hit: Your Storm Skills have up to 20% chance to make enemies Vulnerable for 1/2/3 second(s).
    • (upgrade) Endless Tempest Increase the duration of Hurricane and Cataclysm by 5%/10%/15% (multiplicative). This node is ONLY required to unlock Bad Omen BUT you’ll also need a point in Atmosphere for Bad Omen
    • (upgrade – did NOT take to save points) Charged Atmosphere
    • (upgrade – did NOT take to save points) Bad Omen
    • (upgrade – did NOT take to save points) Electric Shock
  • (passive) did not pick any other Wrath passives to save points but there are some worth considering

Ultimate Skills (Required Points: 23)

  • (active) Cataclysm A massive storm follows you for 8 seconds. Tornadoes Knock Back enemies, and lightning strikes wildly dealing 52% (X-?) damage.
    Lucky Hit Chance: 82%
    Cooldown: 80 seconds | Type: Storm Magic ; Damage: Lightning
  • (1st upgrade) Prime Cataclysm Cataclysm’s duration is increased by 2 seconds.
  • (2nd upgrade) Supreme Cataclysm Lightning strikes from Cataclysm make enemies Vulnerable for 2 seconds.
  • (passive) Defiance Nature Magic skills deal 4% (multiplicative) increased damage to Elites.
    • (upgrade – did NOT pick to save points) Natural Disaster
    • (upgrade – did NOT pick to save points) Circle of Life
    • (upgrade – did NOT pick to save points) Resonance
  • (passive) Defensive Posture Increases the amount of Fortify you gain from all sources by +5%/+10%/+15%.
    • (upgrade – did NOT pick to save points) Thick Hide
    • (upgrade) Nature’s Resolve 5%/10%/15% chance when struck to Fortify you for 4% Base Life.
    • (upgrade – did NOT pick to save points) Unrestrained
  • (passive – ONLY put 1 point here) Quickshift After Shapeshifting into a different form, your next skill deals 5%/10%/15% (multiplicative) increased damage.
    • (upgrade) Heightened Senses Upon shapeshifting into a Werewolf or Werebear, gain 4%/8%/12% damage reduction against Elites for 5 seconds.
    • (upgrade) Natural Fortitude Shapeshifting Fortifies you for 1%/3%/4% Base Life.
  • (passive) did not pick other Ultimate passives to save points

Key Passive / Capstone (Required Points: 33 )

  • (passive) Lupine Ferocity – Every 6th Werewolf skill hit Critically Strikes and deals 60% (multiplicative) increased damage.

Class Mechanic (Spirit Boons):

The Spirit Boons system lets you pick 1 spirit Boon per bond out of 4 categories. Eventually you unlock the option to specialize into a certain bond which will let you get 2 Boons from that category. I advise using the following 2 + 1 +1 +1 for now.

  • Eagle Category: take those two
    • Scythe Talons: +5% Critical Strike Chance.
    • Avian Wrath +30% Critical Strike Damage.
  • Deer Category: take this one
    • Wariness: Take 10% reduced damage from Elites
  • Snake Category: two decent picks here so choose whichever you like based on whether you need more survivability or ultimate CDR
    • option 1) Masochistic: Critical Strikes with Shapeshifting Skills heal you for 3% of your maximum Life.
    • option 2) Calm Before the Storm: Lucky Hit: Nature Magic Skills (Earth & Storm) have up to a 15% chance to reduce the Cooldown of your Ultimate Skill by 2 seconds.
  • Wolf Category: There are also two decent picks here. Pick based on whether you need longer Ultimates or more survivability.
    • option 1) Calamity: Extend the duration of Ultimate Skills by 25%.
    • option 2) Bolster: Fortify for 10% of your Maximum Life when you use a Defensive Skill

Note: Obsidian Slam on the Snake Category is also a very interesting synergy with this build worth considering for mobbing but won’t be great on Boss figh

Unique Items

In Diablo IV we can equip more than one unique item at the same time (not so ‘unique’ if we can get decked out in full uniques I guess). It seems that the one unique per build idea that Uniques inherited from the Mythical gear they supposedly replaced was scrapped even before the closed beta tests. My top pick will be the following one but check below it & the notes under the Aspects list for more info:

Top Pick Uniques for the Build

Greatstaff of the Crone (Staff)

+[17.5%] Damage to Crowd Controlled Enemies

Claw is now a Storm Skill and also casts Storm Strike at [120 – 150]% normal damage.

+[16.5 – 23.5]% Damage to Close Enemies
+[9.5 – 16.5]% Damage to Crowd Controlled Enemies
+[7 – 14]% Non-Physical Damage
+[X – 9] Ranks of Claw

“She has existed in Scosglen since before Fiacla-Géar walked the land. Her purpose is a mystery to us all. However, approach her with deference; she may grant you her counsel.” – Airidah, to Donan

Tempest Roar (Helm)

Lucky Hit: Storm Skills have up to a [15 – 25]% chance to grant 10 Spirit. Your base Storm Skills are now also Werewolf Skills

+[7 – 14]% Damage while Shapeshifted
[24.5 – 45.5]% Poison Resistance
+[16 – 24] Maximum Spirit
[0.031 – 0.073] Life On Kill

“Listen, child, to the music of the storm. It has its own rhythm. Its own melody. Hear how beautifully it sings, and perhaps one day you will be able to join in its harmony.” – Airidah

Sockets & Gems

There are various possible good/viable choices for the gem slots. I’ve shortlisted what works by slot. I’d recommend picking one of those:

Weps: Emerald is what this build needs most BUT worth trying Topaz too
Armor: Ruby or Saphire/Topaz (dmg reduction is very needed in high tier NM dungeons).
Jewelry: Skull for Armor until they rework resistances. After the rework: Diamond unless you need specific resistance more than all.

XYZ Diamond (Requires Level XY)

• Weapon: +N% Ultimate Skill Damage
• Armor: +N% Barrier Generation
• Jewelry: N% Resistance to All Elements

+15%/+5%/+8% for Royal (the 5th grade at lvl 60)

XYZ Skull (Requires Level XY)

• Weapon: +N Life On Kill
• Armor: +N% Healing Received
• Jewelry: +N Armor

+24/+5%/+250 for Royal (the 5th grade at lvl 60)

XYZ Emerald (Requires Level XY)

• Weapon: +N% Critical Strike Damage to Vulnerable Enemies
• Armor: +N Thorns
• Jewelry: N% Poison Resistance

+12%/+250/22.1% for Royal (the 5th grade at lvl 60)

XYZ Ruby (Requires Level XY)

• Weapon: +N% Overpower Damage

• Armor: +N% Maximum Life
• Jewelry: N% Fire Resistance

+24%/+4.0%/22.1% for Royal (the 5th grade at lvl 60)

XYZ Topaz (Requires Level XY)

• Weapon: +N% Basic Skill Damage
• Armor: N% Damage Reduction While Control Impaired
• Jewelry: N% Lightning Resistance

+20%/10%/22.1% for Royal (the 5th grade at lvl 60)

XYZ Saphire (Requires Level XY)

• Weapon: +N% Critical Strike Damage to Crowd-Controlled Enemies
• Armor: N% Damage Reduction While Fortified
• Jewelry: N% Cold Resistance

+12%/3%/22.1% for Royal (the 5th grade at lvl 60)

Legendary Aspects / Powers

I will only list the Legendary Aspects that have been selected for the build and the slots in which I advise putting those. For in-depth information you can check my RDY-4-Launch Builds spreadsheet on this link. This build (Storm Lord 3.0) is one of the builds on that spreadsheet.

  • Helm: Aspect of Disobedience / Tempest Roar (see notes below)
  • Amulet: Eluding Aspect
  • Chest: Aspect of Might
  • Pants: Vigorous Aspect
  • Gloves: Aspect of the Dark Howl
  • Boots: Stormshifter’s Aspect
  • Ring 1: Accelerating Aspect / Rapid Aspect (see notes below)
  • Ring 2: Stormchaser’s Aspect
  • Main Hand Weapon: I recommend using a 2h axe before you get the unique Staff
  • Off-hand Totem: I recommend using a 2h axe before you get the unique Staff
  • 2-H Weapon: Rapid Aspect / Greatstaff of the Crone (see notes below)
    (I recommend using a 2H Axe as a weapon until Greatstaff of the Crone drops. With a 1h weapon + off-hand totem you can get a bit less dps but more utility (cooldown reduction, spirit cost reduction, etc.) so if you decide to do that a 1h Axe will be the best choice)
NOTES: How to re-arrange if using any of the Uniques:

- For Tempest Roar (Helm): Aspect of Disobedience gets removed from the Helm slot to make room for the Unique Helm.
- For Greatstaff of the Crone (2h Staff): Accelerating Aspect gets removed from the Ring 1 slot. Then, Rapid Aspect goes into the, now empty, Ring 1 slot to make room for the 2H Staff.

Additional Note: Since on higher Nightmare dungeon Tiers damage reduction is too important, the unique werewolf chest armor (Mad Wolf's Glee) is not recommended. BUT you can use if it drops for you up until around NMD Tiers 50-60, especially if you're maxed out and speed-running those tiers.

Paragon Boards:

Use the links below to check the paragon boards selected and the nodes I’ve taken. One link is for what the boards will look like at lvl 91 with 186 paragon points (so more paragon points will be obtained on the way to 100). The other link is what the boards will look like when fully maxed out on paragon points.

Suggested Gear Rolls to look out for (NOT in order of priority):

I’ve shortlisted 36 different affixes that work well with the build of almost 300 total. I’ll highlight in Orange the ones I think should get higher priority. NOTE: I’ve added a new “Top Priority per Slot” list but left the old unsorted list below it.

This is the Sorted by Slot list of Top Priority Affixes/Rolls:

    • Helm:
      • Priority 1: Cooldown Reduction
      • Priority 2: Maximum Life, Basic Skill Attack Speed
      • Priority 3: Core Stats (Int, Dex, Wil, All Stats), Maximum Spirit
      • Priority 4: Total Armor
    • Chest:
      • Priority 1: Damage Reduction from Close/Distant Enemies, Damage Reduction while Fortified
      • Priority 2: Maximum Life, + X% Damage, Damage Reduction from Enemies That Are Poisoned
      • Priority 3: Core Stats (Int, Dex, Wil, All Stats), +x Ranks to Debilitating Roar/Earthen Bulwark, Total Armor
      • Priority 4: Damage while Shapeshifted, Werewolf Skill Damage, Storm Skill Damage, Lightning Damage, Physical Damage
    • Gloves:
      • Priority 1: + X ranks of Tornado
      • Priority 2: Critical Strike Chance, Damage to Injured Enemies, Attack Speed
      • Priority 3: Storm Skill Cooldown Reduction, Lucky Hit Chance, Lightning Critical Strike Damage, Critical Strike Damage with Werewolf Skills
      • Priority 4: Core Stats (Int, Dex, Wil, All Stats), Critical Strike Chance Against Injured Enemies
    • Pants:
      • Priority 1: Damage Reduction from Close/Distant Enemies, Damage Reduction while Fortified
      • Priority 2: Maximum Life, Damage Reduction while Injured
      • Priority 3: + X ranks of Hurricane, Core Stats (Int, Dex, Wil, All Stats)
      • Priority 4: Total Armor, Damage Reduction
    • Boots:
      • Priority 1: Movement Speed, Damage Reduction while Injured
      • Priority 2: Energy Cost Reduction
      • Priority 3: Core Stats (Int, Dex, Wil, All Stats), Fortify Generation
      • Priority 4: Total Armor while in Werewolf Form
    • Amulet:
      • Priority 1: Cooldown Reduction, +X Ranks of Wrath Skills, Movement Speed
      • Priority 2: Maximum Life, +X Ranks of a Passive you like, Storm Skill Cooldown Reduction
      • Priority 3:Damage while Shapeshifted, Werewolf/Storm Skill Damage, +X% Damage, Damage Reduction from Close or Distant Enemies/While Injured/While Fortified, Damage Reduction from Enemies That Are Poisoned
      • Priority 4: Spirit Cost Reduction
    • Rings:
      • Priority 1: Vulnerable Damage, Critical Strike Damage, Core Skill Damage
      • Priority 2: Maximum Life, Critical Strike Chance, Damage to Injured/Close/Poisoned Enemies
      • Priority 3: Physical/Lightning Damage, Lucky Hit Chance
      • Priority 4: Resource Generation, Fortify Generation
    • Main Hand Weapon: See the 2H Weapon Rolls List
    • Off-hand Totem: if you decide to use 1H + Totem
      • Priority 1: Cooldown Reduction, Critical Strike Chance
      • Priority 2: Spirit Cost Reduction
      • Priority 3: Lucky Hit Chance, Core Stats (Int, Dex, Wil, All Stats), Damage Reduction while Fortified
      • Priority 4: Fortify Generation, Up to a 5% Chance to Restore X% Primary Resource, Critical Chance Against Injured
    • 2-H Weapon: See the 1H Weapon Rolls List
      • Priority 1: Vulnerable Damage, Critical Strike Damage, Core Skill Damage
      • Priority 2: Damage to Injured Enemies, Damage to Close Enemies
      • Priority 3: Critical Strike Damage with Werewolf Skills, Lightning Critical Strike Damage, Damage to Poisoned Enemies
      • Priority 4: Core Stats (Int, Dex, Wil, All Stats)

This is the UNsorted by list of useful Affixes/Rolls:

+ X% Damage
Critical Strike Chance/Critical Damage Bonus
Critical Chance / Critical Damage with Physical/Storm/Nature/Shapeshifting/Werewolf Skills
Critical Chance/Critical Damage with Core/Basic Skills
Damage with Core/Basic/Nature/Storm/Shapeshifting/Werewolf Skills
Lucky Hit Chance
+ X Ranks to Core/Defensive/Wrath Skills
+ X Ranks to Tornado/Debilitating Roar/Earthen Bulwark/Hurricane
Damage vs Injured Enemies
+ Intelligence, + Dexterity, + Willpower
+ All Stats
+ Maximum Life
Spirit Generation / Regeneration / On Kill
Resource/Spirit Cost Reduction
Cooldown Reduction
Attack Speed
Physical/Lightning Skill Damage Bonus
Lucky Hit Chance with Physical/Storm/Nature/Shapeshifting/Werewolf Skill Damage
Resistance to All Elements
Damage Against Close/Distant Enemies
+ % Physical/Lightning Damage to Elites
Vulnerable Damage / Damage Against Vulnerable Enemies
Damage Reduction from Enemies That Are Poisoned
Damage Reduction while Fortified
Damage Reduction for X Seconds After Killing an Elite
Damage Reduction from Elites
+ % Damage for X Seconds After Killing an Elite
Damage Against Crowd Controlled Enemies
Lucky Hit: Up to a 5% chance to Restore +X% Primary Resource
Lucky Hit: Up to a 5% chance to Heal +X Life
Damage while Healthy
Barrier Generation
Movement Speed
Fortify Generation
Higher Priority
Critical Strike Chance Against Injured Enemies
Lucky Hit: Up to a +X% Chance to Execute Injured Non-Elites
Damage vs Healthy Enemies
Weapon Damage (not sure if there are any bonuses to that as rolls)
Lower Priority

Useful Links (Spreadsheets & more):

For all of my Diablo IV Post-Launch & RDY-4-Launch Theorycrafts/Builds: This Spreadsheet

For my Diablo IV Class Skill Trees (can be used as mini-calculator): This Spreadsheet

For all of my Diablo IV Pre-Launch Theorycrafts/Builds: This Spreadsheet

♦ ◊ ♦ ◊ ♦

This concludes the Storm Lord 3.0 Druid Build for Diablo IV. If you’re interested in the game below are links to the various platforms where one can buy it (you can just click the links to open a new tab):

PC (Battle.Net)

XBOX

PlayStation

Official Website

Shadow Hunter Rogue Build for Diablo IV [S Tier Grade]

Shadow Hunter Rogue BUILD for Diablo IV [S Tier Grade]

(Emerge from the Shadows to Penetrate your foes while splitting your shots to clear big groups at once)

♦ ◊ ♦ ◊ ♦

Diablo IV launched on June 6th, 2023 for PC (Battle.Net), XBOX, & PlayStation) and I’ve had my fair share of playing and testing done. I’m already making full Builds/Theorycrafts that work for both ‘fresh-into-endgame’ characters as well as late endgame. I’ll evolve & keep them updated when we get major rebalance updates. This is one such build for the Rogue Class called Shadow Hunter.

I’ve also made spreadsheets for my builds (see the links below) that have shortlisted the active and passive skills + legendary aspect + unique item + gems & sockets + suggested stat rolls + paragon boards that work well with the build which you can use to tinker. Alternatively, I’ve added build calculator links (mostly needed for the paragons)

This build will be updated when needed.

Video Version:

Skill Trees

Below you’ll see ONLY the Active & Passive skills that were selected for this build. For additional skills that can be taken + alternative skill options, you can check my RDY-4-Launch Builds spreadsheet on this link. This build (Shadow Hunter) is one of the builds on that spreadsheet.

Basic Skill (Resource Generator/Builder) (Required Points: 0 )

  • (active – ONLY put 1 point here) Forceful Arrow – Fire a powerful arrow at an enemy, dealing 20% (X – ?) damage. Every 3rd cast makes the enemy Vulnerable for 2 seconds.
    Requires a Ranged Weapon
    Lucky Hit Chance: 50% | Damage: Physical ; Tags: Basic, Ranged, Marksman
    • (1st upgrade) Enhanced Forceful Arrow Every 3rd cast of Forceful Arrow additionally has a +15% increased Critical Strike Chance.
    • (2nd upgrade – my pick of the 2) Primary Forceful Arrow – Forceful Arrow pierces through Vulnerable enemies.

Core Skill(s) (Resource Spender) (Required Points: 2 )

  • (active) Penetrating Shot Fire an arrow that pierces through all enemies in a line, dealing 70% (X – ?) damage.
    Combo Points increase damage and improve Lucky Hit Chance* (LHC):
    1: 91% damage & 10% LHC*
    2: 112% damage & 20% LHC*
    3: 133% damage & 30% LHC*
    Requires a Ranged Weapon
    Energy Cost: 35 | Lucky Hit Chance: 50% | Damage: Physical ; Tags: Core, Ranged, Imbueable, Marksman
    • (1st upgrade) Enhanced Penetrating Shot Penetrating Shot deals 20% (multiplicative) increased damage per enemy it pierces.
    • (2nd upgrade – my pick of the 2) Improved Penetrating Shot If Penetrating Shot damages at least 3 enemies, your next Penetrating Shot has a +20% increased Critical Strike Chance.
  • (passive) Sturdy You gain 4%/8%/12% Close Damage Reduction.
    • (upgrade) Siphoning Strikes Heal for 1%/2%/3% of your Maximum Life when you Critically Strike Close enemies.
  • (passive) did not pick any other Core passives to save points

Agility Skills (Required Points: 6 )

  • (active – ONLY put 1 point here) Shadow Step – Become Unstoppable and quickly move through the shadows and stab your victim from behind for 72% (X – ?) damage. Gain 50% increased Movement Speed for 2 seconds afterwards.
    Requires Dual Wielded weapons
    Cooldown: 9 seconds | Lucky Hit Chance: 100% | Damage: Physical ; Tags: Agility, Melee, Imbueable, Cutthroat
    • (1st upgrade) Enhanced Shadow Step – Damaging an enemy with Shadow Step increases your Critical Strike Chance against them by +8% for 3 seconds
    • (2nd upgrade – my pick of the 2) Disciplined Shadow Step – Shadow Step’s Cooldown is reduced by 3 seconds if it damages an enemy you haven’t hit in the last 4 seconds.
  • (passive) Weapon Mastery Gain a bonus when attacking based on weapon type:
    Daggers: 5%/10%/15% (multiplicative) increased damage to Healthy enemies.
    Swords: 3%/6%/9% (multiplicative) increased damage.
    Bows: 4%/8%/12% (multiplicative) increased damage to Vulnerable enemies.
    Crossbows: 5%/10%/15% (multiplicative) increased Critical Strike Damage.
  • (passive) Rugged – Gain 5%/10%/15% Damage Reduction against Damage Over Time effects.
    • (upgrade – ONLY put 1 point here) Reactive Defense – Gain 4.5%/9%/13.5% Damage Reduction while inflicted with Control Impairing Effects
  • (passive) did not pick other Agility passives to save points

Subterfuge Skills (Required Points: 11 )

  • (active – ONLY put 1 point here) Vanish from sight, gaining an advanced form of Stealth for 4 seconds tat will no be removed by taking damage. Concealment also makes you Unstoppable, grants +30% Movement Speed, and allows you to move freely through enemies for its duration. Using an attack Skill during Concealment will break Concealment .
    Cooldown: 20 seconds. Tags: Subterfuge
    • (1st upgrade) Enhanced Stealth You gain 40 Energy when you enter Stealth.
    • (2nd upgrade – my pick of the 2) Countering Stealth The Skill that breaks Concealment will always be a guaranteed Critical Strike.
  • (active – ONLY put 1 point here) Dark Shroud Surround yourself with up to 5 protective shadows. Gain 8% Damage Reduction per active shadow. Each time you take direct damage, that damage is reduced and a shadow is consumed
    Cooldown: 20 seconds. Tags: Subterfuge
    • (1st upgrade) Enhanced Dark Shroud Dark Shroud’s shadows have a 8% chance to not be consumed
    • (2nd upgrade – my pick of the 2) Countering Dark Shroud While you have at least 2 active shadow from Dark Shroud, gain +10% Critical Strike Chance.
  • (passive) Exploit – You deal 6%/12%/18% (multiplicative) increased damage to Healthy and Injured enemies.
    • (upgrade) Malice – You deal 3%/6%/9% (multiplicative) increased damage to Vulnerable enemies.
  • (passive) did not pick other Subterfuge passives to save points

Imbuements Skills (Required Points: 16 )

  • (active – ONLY put 1 point here) Shadow Imbuement – Imbue your weapons with festering shadows. Enemies struck by your next 2 Imbueable Skills deal damage and infect enemies for 6 seconds. Infected enemies explode on death, dealing 40% (X) damage to all surrounding enemies. If the infection expires before the enemy dies, it will deal 40% (X) damage to only that enemy.
    Cooldown: 9 seconds | Lucky Hit Chance: 33% | Damage: Shadow ; Tags: Imbuements
    • (1st upgrade) Enhanced Shadow Imbuement – You have +25% increased Critical Strike Chance against Injured enemies infected by Shadow Imbuement.
    • (2nd upgrade – my pick of the 2) Blended Shadow Imbuement – Shadow Imbue’s primary explosion makes enemies Vulnerable for 2 seconds.
  • (passive) Precision Imbuement – Imbued Skills gain +5%/+10%/+15% increased Critical Strike Chance.
  • (passive – ONLY put 1 point here) Shadow Crash – Lucky Hit: Shadow damage has up to a 10% chance to Stun for 0.5/1/1.5 seconds.
    • (passive) Consuming Shadows – Each time you kill an enemy with Shadow Damage, you generate 10/20/30 Energy.
  • (passive) did not pick other Imbuements passives to save points

Ultimate Skills (Required Points: 23 )

  • (active) Death Trap Place a trap that arms after 1.25 seconds. It activates when an enemy moves near, dealing 250% (X – ?) damage to enemies in the area.
    Cooldown: 50 seconds. Lucky Hit Chance: 4% | Damage: Shadow ; Tags: Ultimate, Trap
    • (1st upgrade) Prime Death Trap Enemies are Pulled into Death Trap when it activates.
    • (2nd upgrade – my pick of the 2) Supreme Death Trap If Death Trap kills an enemy, its Cooldown is reduced by 10 seconds.
  • (passive) Innervation – Lucky Hit: Up to a 10%/20%/30% chance to gain 8 Energy.
    • (upgrade) Second Wind did NOT put point into this
    • (upgrade) Alchemist’s FortuneNon-Physical damage you deal has a +5%/+10%/+15% increased Lucky Hit Chance.
  • (passive) Aftermath – After using an Ultimate Skill, restore 25/50/75 Energy.
  • (passive) Trap Mastery When Poison Trap or Death Trap activates, you gain +4%/+8%/+12% increased Critical Strike Chance against Vulnerable and Crowd Controlled enemies for 4 seconds.
  • (passive) did not pick other Ultimate passives to save points

Key Passive / Capstone (Required Points: 33 )

  • (passive) Precision Critical Strikes with Marksman Skills grant you Precision.

    You gain 4% (multiplicative) increased Critical Strike Damage per stack of Precision, up to a maximum of 20% (multiplicative).

    When you reach maximum Precision, your next Marksman Skill is a guaranteed Critical Strike that deals 40% (multiplicative) increased Critical Strike Damage, then consumes all stacks of Precision.

Class Mechanic (Specializations):

The 3 Specializations are the Rogues’ Class Mechanics:

  • Combo Points – Your Basic Skills now generate Combo Points. Core Skills consume Combo Points for additional effects.
  • Inner Sight – Attack marked enemies to fill up your Inner Sight gauge. When it’s full, gain unlimited Energy for 4 seconds.
  • Preparation – Every 100 Energy you spend reduces your Ultimate Skill’s Cooldown by 4 seconds. Using an Ultimate Skill resets the Cooldowns of your other Skills..

I prefer and advise using Combo Points for this build, especially if you already are using the Condemnation dagger (it would be pointless to use that dagger without that specialization). Also, try to use Penetrating Shot with full Combo Points as much as possible, especially vs Bosses and Elites.

Unique Items

In Diablo IV we can equip more than one unique item at the same time (not so ‘unique’ if we can get decked out in full uniques I guess). It seems that the one unique per build idea that Uniques inherited from the Mythical gear they supposedly replaced was scrapped even before the closed beta tests. My top pick will be the following one but check below it & the notes under the Aspects list for more info:

Top Pick Unique for the Build

Harlequin Crest (Helm)

Gain [5-8%] Damage Reduction. In addition, gain +[2-4] Ranks to All Skills.

[0.245 – 0.455] Maximum Life
X% Cooldown Reduction
+[42 – 70]% Crafting Material Drop Rate
[14 – 28] All Stats

“This headdress was once worn by an assassin disguised as a court mage. Her treachery was unveiled, but not before she used its magic to curse the king’s entire lineage.” – The Fall of House Aston

Condemnation (Dagger)

+[20%] Damage to Close Enemies

Your Core Skills deal x[20 – 40]% increased damage when spending 3 Combo Points. Your Basic Skills using this weapon have a [30%] chance to generate 3 Combo Points.

+[4 – 10]% Basic Attack Speed
+[4.5 – 12]% Critical Strike Chance Against Injured Enemies
+[7 – 14]% Damage with Dual-Wielded Weapons
+[12.5 – 19.5]% Core Skill Damage

“I’ve never seen such ruthless butchery. He deserves to be be shipped off to die in the swamps with the rest of the godless murderers.” – Witness to the murder of Sergeant Walcot

Sockets & Gems

There are various possible good/viable choices for the gem slots. I’ve shortlisted what works by slot. I’d recommend picking one of those:

Weps: Emerald is what this build needs most
Armor: Ruby or Topaz (dmg reduction is very needed in high tier NM dungeons).
Jewelry: Skull for Armor until they rework resistances. After the rework: Diamond unless you need specific resistance more than all.

XYZ Diamond (Requires Level XY)

• Weapon: +N% Ultimate Skill Damage
• Armor: +N% Barrier Generation
• Jewelry: N% Resistance to All Elements

+15%/+5%/+8% for Royal (the 5th grade at lvl 60)

XYZ Skull (Requires Level XY)

• Weapon: +N Life On Kill
• Armor: +N% Healing Received
• Jewelry: +N Armor

+24/+5%/+250 for Royal (the 5th grade at lvl 60)

XYZ Emerald (Requires Level XY)

• Weapon: +N% Critical Strike Damage to Vulnerable Enemies
• Armor: +N Thorns
• Jewelry: N% Poison Resistance

+12%/+250/22.1% for Royal (the 5th grade at lvl 60)

XYZ Ruby (Requires Level XY)

• Weapon: +N% Overpower Damage

• Armor: +N% Maximum Life
• Jewelry: N% Fire Resistance

+24%/+4.0%/22.1% for Royal (the 5th grade at lvl 60)

XYZ Topaz (Requires Level XY)

• Weapon: +N% Basic Skill Damage
• Armor: N% Damage Reduction While Control Impaired
• Jewelry: N% Lightning Resistance

+20%/10%/22.1% for Royal (the 5th grade at lvl 60)

Legendary Aspects / Powers

I will only list the Legendary Aspects that have been selected for the build and the slots in which I advise putting those. For in-depth information you can check my RDY-4-Launch Builds spreadsheet on this link. This build (Shadow Hunter) is one of the builds on that spreadsheet.

  • Helm: Umbrous Aspect / Harlequin Crest (see notes below)
  • Amulet: Enshrouding Aspect
  • Chest: Aspect of The Protector
  • Pants: Aspect of Disobedience
  • Gloves: Aspect of Inner Calm
  • Boots: Eluding Aspect
  • Ring 1: Accelerating Aspect
  • Ring 2: Aspect of The Expectant
  • Main Hand Weapon: Trickshot Aspect
  • Off-hand Weapon: Vengeful Aspect / Condemnation (see notes below)
  • 2-H Weapon: Rapid Aspect
    (I recommend using a Crossbow in the 2h Weapon slot and using Swords in the 1h Weapon slots, until you equip the Condemnation unique dagger in one of the 1h weapon slots, of course)
NOTES: How to re-arrange if using any of the Uniques:

- For Harlequin Crest (Helm): Aspect of The Protector gets removed from the Helm slot to make room for the Unique Helm.
- For Condemnation (Dagger): Vengeful Aspect gets removed from the Helm slot to make room for the Unique Dagger.

NOTE 2: Keep in mind that, in order to get the most out of the Condemnation Unique dagger, I STRONGLY recommend using Puncture (with the triple shot upgrade) and leaning towards Close Enemies over Distant enemies bonuses (if you need to pick between them in the first place).

Obviously crit dmg, vulnerable dmg, core skill dmg, and Crit Dmg with Imbued skills (and even vs injured enemies) may be better than either dmg vs close or distant but when using Puncture the synergy is better when adopting point blank shotgun playstyle.

Paragon Boards:

Use the links below to check the paragon boards selected and the nodes I’ve taken. One link is for what the boards will look like at lvl 86 with 166 paragon points (so more paragon points will be obtained on the way to 100). The other link is what the boards will look like when fully maxed out on paragon points.

Suggested Gear Rolls to look out for (NOT in order of priority):

I’ve shortlisted 36 different affixes that work well with the build of almost 300 total. I’ll highlight in Orange the ones I think should get higher priority. NOTE: I’ve added a new “Top Priority per Slot” list but left the old unsorted list below it.

This is the Sorted by Slot list of Top Priority Affixes/Rolls:

    • Helm:
      • Priority 1: Cooldown Reduction
      • Priority 2: Maximum Life, Basic Skill Attack Speed
      • Priority 3: Core Stats (Int, Dex, Str, All Stats), Maximum Energy
      • Priority 4: Total Armor
    • Amulet:
      • Priority 1: Cooldown Reduction, +X Ranks of Imbuement Skills, Movement Speed
      • Priority 2: Maximum Life, +X Ranks of a Passive you like, Imbuement Skill Cooldown Reduction
      • Priority 3: Imbuement Skill DMG, +X% Damage, Damage Reduction from Close or Distant Enemies/While Injured,
      • Priority 4: Energy Cost Reduction
    • Chest:
      • Priority 1: Damage Reduction from Close/Distant Enemies
      • Priority 2: Maximum Life, + X% Damage
      • Priority 3: Core Stats (Int, Dex, Str, All Stats), Total Armor
      • Priority 4: Imbuement Skill Damage, Marksman Skill Damage, Shadow Damage
    • Pants:
      • Priority 1: Damage Reduction from Close/Distant Enemies
      • Priority 2: Maximum Life, Damage Reduction while Injured
      • Priority 3: + X ranks of Concealment/Dark Shroud, Core Stats (Int, Dex, Str, All Stats), Imbuement Skill Cooldown Reduction
      • Priority 4: Total Armor, Damage Reduction
    • Gloves:
      • Priority 1: + X ranks of Penetrating Shot
      • Priority 2: Critical Strike Chance, Damage to Injured Enemies, Attack Speed
      • Priority 3: Lucky Hit: Up to a 5% Chance to Restore +X% Primary Resource, Lucky Hit Chance
      • Priority 4: Core Stats (Int, Dex, Str, All Stats)
    • Boots:
      • Priority 1: Movement Speed, Energy Cost Reduction
      • Priority 2: Damage Reduction while Injured
      • Priority 3: Core Stats (Int, Dex, Str, All Stats), +X Ranks of Shadow Step (if using it intead of an Ult)
      • Priority 4: Dodge Chance, Dodge Chance Against Distant Enemies
    • Rings:
      • Priority 1: Vulnerable Damage, Critical Strike Damage, Core Skill Damage
      • Priority 2: Maximum Life, Critical Strike Chance, Damage to Injured Enemies, Damage to Close/Distant Enemies
      • Priority 3: Physical/Shadow Damage, Imbued Skill DMG, Critical Strike DMG with Imbued Skills, Lucky Hit Chance
      • Priority 4: Resource Generation
    • Main Hand Weapon:
      • Priority 1: Vulnerable Damage, Critical Strike Damage, Core Skill Damage
      • Priority 2: Damage to Injured Enemies, Damage to Distant/Close Enemies (depending on preferred playstyle)
      • Priority 3: Critical Strike Damage with Imbued Skills
      • Priority 4: Core Stats (Int, Dex, Str, All Stats)
    • Off-hand Weapon: See the 1H Weapon Rolls List
    • 2-H Weapon: See the 1H Weapon Rolls List

This is the UNsorted by list of useful Affixes/Rolls:

+ X% Damage
Critical Strike Chance/Critical Damage Bonus
Critical Chance / Critical Damage with Physical/Shadow/Imbued Skills
Critical Chance/Critical Damage with Core Skills
Damage with Core Skills
Lucky Hit Chance
+ X Ranks to Core/Imbuement Skills
+ X Ranks to Penetrating Shot/Concealment/Dark Shroud/Shadow Step
Damage vs Injured Enemies
+ Intelligence, + Dexterity, + Strength
+ All Stats
+ Maximum Life
Energy Generation / Regeneration / On Kill
Resource/Energy Cost Reduction
Cooldown Reduction
Attack Speed
Physical/Shadow/Imbued Skill Damage Bonus
Lucky Hit Chance with Physical/Shadow/Imbued Skill Damage
Resistance to All Elements
Damage Against Close/Distant Enemies
+ % Physical/Shadow Damage to Elites
Vulnerable Damage
Damage Against Vulnerable Enemies
Damage Reduction for X Seconds After Killing an Elite
Damage Reduction from Elites
+ % Damage for X Seconds After Killing an Elite
Damage Against Crowd Controlled Enemies
Lucky Hit: Up to a 5% chance to Restore +X% Primary Resource
Lucky Hit: Up to a 5% chance to Heal +X Life
Damage while Healthy
Barrier Generation
Movement Speed
Higher Priority
Critical Strike Chance Against Injured Enemies
Lucky Hit: Up to a +X% Chance to Execute Injured Non-Elites
Damage vs Healthy Enemies
Weapon Damage (not sure if there are any bonuses to that as rolls)
Lower Priority

Useful Links (Spreadsheets & more):

For all of my Diablo IV Post-Launch & RDY-4-Launch Theorycrafts/Builds: This Spreadsheet

For my Diablo IV Class Skill Trees (can be used as mini-calculator): This Spreadsheet

For all of my Diablo IV Pre-Launch Theorycrafts/Builds: This Spreadsheet

♦ ◊ ♦ ◊ ♦

This concludes the Shadow Hunter Rogue Build for Diablo IV. If you’re interested in the game below are links to the various platforms where one can buy it (you can just click the links to open a new tab):

PC (Battle.Net)

XBOX

PlayStation

Official Website

Hailstorm Sorcerer Build for Diablo IV [B Tier Grade]

Hailstorm Sorcerer BUILD for Diablo IV [B Tier Grade]

(Call forth a Hailstorm and cover the battlefield with Glacial Icicles, let your foes feel the power of Cold )

♦ ◊ ♦ ◊ ♦

Diablo IV launched on June 6th, 2023 for PC (Battle.Net), XBOX, & PlayStation) and I’ve had my fair share of playing and testing done. I’m already making full Builds/Theorycrafts that work for both ‘fresh-into-endgame’ characters as well as late endgame. I’ll evolve & keep them updated when we get major rebalance updates. This is one such build for the Sorcerer Class called Hailstorm.

I’ve also made spreadsheets for my builds (see the links below) that have shortlisted the active and passive skills + legendary aspect + unique item + gems & sockets + suggested stat rolls + paragon boards that work well with the build which you can use to tinker. Alternatively, I’ve added build calculator links (mostly needed for the paragons)

This build will be updated when needed.

Video Version:

Skill Trees

Below you’ll see ONLY the Active & Passive skills that were selected for this build. For additional skills that can be taken + alternative skill options, you can check my RDY-4-Launch Builds spreadsheet on this link. This build (Hailstorm) is one of the builds on that spreadsheet.

Minor Destruction / Basic Skill (Resource Generator/Builder) (Required Points: 0 )

  • (active) Fire Bolt – Hurl a flaming bolt, dealing 10.00% (X – ?) damage and Burning for 40.00% (X-?) over 8 seconds.
    Lucky Hit Chance: 20% | Damage: Fire ; Tags: Basic, Pyromancy
    Enchantment Effect Direct damage from Skills applies up to an additional 23% (X – ?) Burning damage over 8 seconds.
    • (1st upgrade) Enhanced Fire Bolt Fire Bolt pierces Burning enemies
    • (2nd upgrade) Flickering Fire Bolt Fire Bolt generates 2 Mana when hitting a Burning enemy.

Major Destruction / Core Skill(s) (Resource Spender) (Required Points: 2 )

  • (active) Frozen Orb Unleash an orb that Chills for 34% and expels piercing shards dealing a total of 32% (X- ?) damage. Upon expiration, Frozen Orb explodes, dealing 29% (X- ?) damage. and Chilling enemies for 9%.
    Lucky Hit Chance: 20%
    Mana Cost: 40 | Damage: Cold ; Tags: Core, Frost
    Enchantment Effect When you cast a Non-Basic Skill, you have a 20% chance to launch a Frozen Orb at a Nearby enemy.
    • (1st upgrade) Enhanced Frozen Orb When cast above 50 Mana, Frozen Orb’s explosion damage is increased by 30% (multiplicative).
    • (2nd upgrade – my pick of the 2) Greater Frozen Orb Frozen Orb’s explosion has a 30% chance to make all enemies hit Vulnerable for 2 seconds. Frozen Orb always makes Frozen enemies Vulnerable.
  • (passive) did not pick any Core passives to save points

Defensive Skills (Required Points: 6 )

  • (active – ONLY put 1 point here) Teleport Transform into lightning becoming Unstoppable and surging to the target location dealing 25% (X -?) damage around you upon arrival.
    Lucky Hit Chance: 40%
    Cooldown: 11 | Damage: Lightning ; Tags: Defensive, Shock
    Enchantment Effect: Evade is replaced with a short range Teleport on a 17.0 second Cooldown.
    • (1st upgrade) Enhanced Teleport Teleport’s cooldown is decreased by 0.5 seconds per enemy hit, up to 3 seconds.
    • (2nd upgrade – my pick of the 2) Shimmering Teleport After Teleporting, you gain 30% Damage Reduction for 5 seconds.
  • (active – ONLY put 1 point here) Frost Nova Unleash a torrent of frost, Freezing enemies around you for 2 seconds. Cooldown: 15 Tags: Defensive, Frost
    Enchantment Effect Lucky Hit: Your Conjuration Skills have a 30% chance to unleash a Frost Nova when hitting enemies.
    • (1st upgrade) Enhanced Frost Nova Killing enemies Frozen by Frost Nova reduces its Cooldown by 2 seconds, up to 6 seconds per cast.
    • (2nd upgrade – my pick of the 2) Mystical Frost Nova Frost Nova makes enemies Vulnerable for 4 seconds, increased to 8 seconds against Bosses.
  • (active – ONLY put 1 point here) Flame Shield Engulf yourself in flames for 2 seconds, Burning nearby enemies for 23% (X) damage per second. While Flame Shield is active, you are Immune.
    Lucky Hit Chance: 50%
    Cooldown: 20 | Damage: Fire ; Tags: Defensive, Pyromancy
    Enchantment Effect: Flame Shield automatically activates when you take fatal damage. Can only happen once every 120 seconds.
    • (1st upgrade) Enhanced Flame Shield Flame Shield grants 25% Movement Speed while active.
    • (2nd upgrade – my pick of the 2) Shimmering Flame Shield Flame Shield Heals you for 50% of your missing Life.
  • (passive) Elemental Attunement Elemental Critical Strikes have a 5%/10%/15% chance to reset the Cooldown of one of your Defensive Skills. Can only happen once every 10 seconds.
  • (passive) did not pick any other Defensive passives to save points

Conjuration Skills (Required Points: 11 ) Not Taking any Active summons

  • (active)
    • (1st upgrade)
    • (2nd upgrade – my pick of the 2)
  • (passive – ONLY 1 point here) Align the Elements You gain 5%/10%/15% Damage reduction against Elites for each second you don’t take damage from any of these sources, up to 50%.  
    • (1st upgrade) Mana Shield did NOT take this one
    • (2nd upgrade – TOP TIER PASSIVE & MUST HAVE) Protection Using a cooldown grants 10%/20%/30% of your maximum Life as a Barrier for 5 seconds.
  • (passive) Precision Magic Your Lucky Hit Effect Chance is increased by up to 5%/10%/15%.
  • (passive) did not pick any more Conjuration passives to save points

Mastery Skills (Required Points: 16 ) Not taking an Active Mastery skill

  • (active) Blizzard Summon a frigid blizzard that deals 120% (X) damage and continually Chills enemies for 18% over 8 seconds.
    Lucky Hit Chance: 35%
    Mana Cost: 40 | Damage: Cold ; Tags: Mastery, Frost
    Enchantment Effect Every 15 seconds, a Blizzard forms over you and follows you for 6 seconds.
    • (1st upgrade) Enhanced Blizzard Blizzard deals 25% (multiplicative) increased damage to Frozen enemies.
    • (2nd upgrade – my pick of the 2) Mage’s Blizzard – When cast above 50 Mana, Blizzard’s duration is increased by 4 seconds.
  • (passive) Ice Veil Your Barriers have a +5%/+10%/+15% increased duration. (Barriers absorb damage from all sources up to a specified amount.)
    • (upgrade) Snap Freeze Lucky Hit: Frost Skills have a 3%/6%/9% chance to instantly Freeze.
    • (upgrade) Cold front While you have a Barrier active, you apply 8%/16%/24% (multiplicative) more Chill.

Ultimate Skills (Required Points: 23 )

  • (active) Deep Freeze Encase yourself in ice, becoming Immune for 4 seconds, continually dealing 13% damage, and Chilling enemies for 20%. When Deep Freeze expires, it deals an additional 100% damage. Casting Deep Freeze again ends the effect early.
    Lucky Hit Chance: 5%
    Cooldown: 60 | Damage: Cold ; Tags: Ultimate, Frost
    • (1st upgrade) Prime Deep Freeze When Deep Freeze ends, gain 10% of your Base Life as a Barrier for 6 seconds for each enemy you Froze while it was active.
    • (2nd upgrade) Supreme Deep Freeze When Deep Freeze ends, your Non-Ultimate Cooldowns are reduced by 50%.
  • (passive) Permafrost Frost Skills deal 5%/10%/15% (multiplicative) increased damage to Elites.
    • (upgrade) Icy Touch You deal 4%/8%/12% (multiplicative) increased damage to Vulnerable enemies.
    • (upgrade) Hoarfrost You deal 3%/6%/9% (multiplicative) increased damage to Chilled enemies, and 6%/12%/18% (multiplicative) increased damage to Frozen enemies.
    • (upgrade) Frigid Breeze Lucky Hit: Cold Damage against Vulnerable enemies has a 20%/40%/60% chance to generate 5 Mana.

Specializations (Required Points: 33 )

  • (passive) Avalanche Lucky Hit: Your Frost Skills have up to a 10% chance to make your next Ice Shards, Frozen Orb, or Blizzard consume no Mana and deal 40% (multiplicative) increased damage. Chance is doubled against Vulnerable enemies.

Enchantment (Class Mechanic):

I’d recommend mix-and matching two of the following Enchantments (you’ll need at least 1 point invested or from gear in the skills):

  • My MUST HAVE Picks
    • Frozen Orb – Whenever you cast a non-basic skill, you have a 20% chance to launch a Frozen Orb at a nearby enemy. NOTE that you’ll need to invest 3 points into it and its first & second Upgrades to get the most out of this. Ideally getting some extra ranks from gear will help too but is not as important. The skill points allocation has accounted for this so no need to worry about downgrading anything. This is my ideal pick for Slot 1 @ lvl 15
    • Blizzard Every 15 seconds, a Blizzard forms over you and follows you for 6 seconds. This is my ideal pick for Slot 2 @ lvl 30
  • Good to use For Mobbing AoE & DPS:
    • Fireball – When you kill an enemy, they explode in a Fireball for 50% of its damage. NOTE that you’ll need to invest 2 points into it and its first Upgrade to get the most out of this. Ideally getting some extra ranks from gear will help too but is not as important. The skill points allocation has accounted for 3 points (1+1+1) into Frozen Orb & its upgrades so no need to worry about downgrading other things just use those points… UNLESS you decide to use two core skill enchantments. Very good to use for leveling in the early first 30-40 levels.
      • Ice ShardsIce Shards automatically conjure and fly toward Frozen enemies. NOTE that you’ll need to invest 3 points into it and its first & second Upgrades to get the most out of this. Ideally getting some extra ranks from gear will help too but is not as important. The skill points allocation has accounted for 3 points (1+1+1) into Frozen Orb & its upgrades so no need to worry about downgrading other things just use those points… UNLESS you decide to use two core skill enchantments. Very good to use for leveling in the early first 30-40 levels.

Unique Items

In Diablo IV we can equip more than one unique item at the same time (not so ‘unique’ if we can get decked out in full uniques I guess). It seems that the one unique per build idea that Uniques inherited from the Mythical gear they supposedly replaced was scrapped even before the closed beta tests. My top pick will be the following one but check below it & the notes under the Aspects list for more info:

Top Pick Unique for the Build

Harlequin Crest (Helm)

Gain [5-8%] Damage Reduction. In addition, gain +[2-4] Ranks to All Skills.

[0.245 – 0.455] Maximum Life
X% Cooldown Reduction
+[42 – 70]% Crafting Material Drop Rate
[14 – 28] All Stats

“This headdress was once worn by an assassin disguised as a court mage. Her treachery was unveiled, but not before she used its magic to curse the king’s entire lineage.” – The Fall of House Aston

Sockets & Gems

There are various possible good/viable choices for the gem slots. I’ve shortlisted what works by slot. I’d recommend picking one of those:

Weps: Amethyst is what this build needs more because DoT (Blizzard is DoT) doesn’t crit or overpwoer
Armor: Ruby or Topaz (dmg reduction is very needed in high tier NM dungeons).
Jewelry: Skull for Armor until they rework resistances. After the rework: Diamond unless you need specific resistance more than all.

XYZ Diamond (Requires Level XY)

• Weapon: +N% Ultimate Skill Damage
• Armor: +N% Barrier Generation
• Jewelry: N% Resistance to All Elements

+5%/+5%/+5% for chipped (the 2nd grade at lvl 20)

XYZ Skull (Requires Level XY)

• Weapon: +N Life On Kill
• Armor: +N% Healing Received
• Jewelry: +N Armor

+13/+5%/+170 for chipped (the 2nd grade at lvl 20)

XYZ Amethyst (Requires Level XY)

• Weapon: +N% Damage Over Time
• Armor: N% Damage Taken Over Time Reduction
• Jewelry: N% Shadow Resistance

+5%/+8.2%/+14.3% for chipped (the 2nd grade at lvl 20)

XYZ Ruby (Requires Level XY)

• Weapon: +N% Overpower Damage

• Armor: +N% Maximum Life
• Jewelry: N% Fire Resistance

+15%/+5.5%/14.3% for chipped (the 2nd grade at lvl 20)

XYZ Topaz (Requires Level XY)

• Weapon: +N% Basic Skill Damage
• Armor: N% Damage Reduction While Control Impaired
• Jewelry: N% Lightning Resistance

+16.7%/8.2%/14.3% for chipped (the 2nd grade at lvl 20)

Legendary Aspects / Powers

I will only list the Legendary Aspects that have been selected for the build and the slots in which I advise putting those. For in-depth information you can check my RDY-4-Launch Builds spreadsheet on this link. This build (Hailstorm) is one of the builds on that spreadsheet.

  • Helm: Aspect of The Protector / Harlequin Crest (see notes below)
  • Amulet: Aspect of The Unwavering
  • Chest: Frostblitz Aspect
  • Pants: Snowguard’s Aspect
  • Gloves: Aspect of Frozen Memories
  • Boots: Aspect of Fortune
  • Ring 1: Prodigy’s Aspect
  • Ring 2: Aspect of Frozen Orbit
  • Main Hand Weapon: Glacial Aspect
  • Off-hand Focus: Aspect of the Frozen Tundra
  • 2-H Weapon: I do NOT recommend using a 2h weapon as it would mean loosing a precious aspect and cooldown reduction + the wand’s lucky hit chance which helps with both dps and survivability for this build by procing defensive skill resets (which in turn also = mana generation). But if you use a 2hander then the one aspect to sacrifice from the build would be Aspect of Frozen Orbit. I’d also keep the Glacial Aspect imprinted on the 2h slot
NOTES: How to re-arrange if using any of the Uniques:

- For Harlequin Crest (Helm): Aspect of The Protector gets removed from the Helm slot to make room for the Unique Helm.

Paragon Boards:

Use the links below to check the paragon boards selected and the nodes I’ve taken. One link is for what the boards will look like at lvl 89 with 179 paragon points (so more paragon points will be obtained on the way to 100). The other link is what the boards will look like when fully maxed out (I left the last 1 point unspent) on paragon points.

Suggested Gear Rolls to look out for (NOT in order of priority):

I’ve shortlisted 36 different affixes that work well with the build of almost 300 total. I’ll highlight in Orange the ones I think should get higher priority. NOTE: I’ve added a new “Top Priority per Slot” list but left the old unsorted list below it.

This is the Sorted by Slot list of Top Priority Affixes/Rolls:

    • Helm:
      • Priority 1: Cooldown Reduction
      • Priority 2: Maximum Life
      • Priority 3: Core Stats (Int, Dex, Wil, All Stats), Maximum Mana
      • Priority 4: Total Armor
    • Amulet:
      • Priority 1: Cooldown Reduction, +X Ranks of Mastery Skills, Movement Speed
      • Priority 2: Maximum Life, +X Ranks of a Passive you like, +X% Frost Skills Damage
      • Priority 3: +X% Damage, Damage Reduction from Close or Distant Enemies/While Injured,
      • Priority 4: Mana Cost Reduction
    • Chest:
      • Priority 1: Damage Reduction from Close/Distant Enemies
      • Priority 2: Maximum Life, + X% Damage
      • Priority 3: Core Stats (Int, Dex, Wil, All Stats), Total Armor
      • Priority 4: Cold Damage, Frost Skill Damage
    • Pants:
      • Priority 1: +X Ranks of Blizzard, Damage Reduction from Close/Distant Enemies
      • Priority 2: Maximum Life, Damage Reduction while Injured
      • Priority 3: Core Stats (Int, Dex, Wil, All Stats), Total Armor
      • Priority 4: Damage Reduction
    • Gloves:
      • Priority 1: + X ranks of Frozen Orb
      • Priority 2: Damage to Injured Enemies, Attack Speed
      • Priority 3: Lucky Hit: Up to a 5% Chance to Restore +X% Primary Resource, Lucky Hit Chance
      • Priority 4: Core Stats (Int, Dex, Wil, All Stats), Lucky Hit: Up to a 5% Chance to Heal +X Life
    • Boots:
      • Priority 1: Movement Speed, +4 Ranks of Frost Nova, Mana Cost Reduction
      • Priority 2: Damage Reduction while Injured
      • Priority 3: Core Stats (Int, Dex, Wil, All Stats)
      • Priority 4: Dodge Chance Against Distant Enemies
    • Rings:
      • Priority 1: Damage to Injured Enemies, Vulnerable Damage, Damage to Close Enemies
      • Priority 2: Maximum Life, Damage Over Time
      • Priority 3: Cold Damage, Damage to Burning Enemies, Lucky Hit Chance
      • Priority 4: Damage to Frozen/Crowd Controlled Enemies
    • Main Hand Weapon: Apparently, weapons can NOT roll two types of Damage mods!!!
      • Priority 1: Vulnerable Damage, Damage to Close Enemies
      • Priority 2: Damage to Injured Enemies
      • Priority 3: Damage to Frozen/Crowd Controlled Enemies
      • Priority 4: Core Stats (Int, Dex, Wil, All Stats)
    • Off-hand Focus:
      • Priority 1: Cooldown Reduction, Mana Cost Reduction
      • Priority 2: Lucky Hit Chance
      • Priority 3: Up to a 5% Chance to Restore +[7 – 14]% Primary Resource
      • Priority 4: Core Stats (Int, Dex, Wil, All Stats), Damage Reduction from Enemies that are Burning
    • 2-H Weapon: See the 1H Weapon Rolls List

This is the UNsorted by list of useful Affixes/Rolls:

+ X% Damage
Damage with Frost Skills
Damage with Mastery Skills (from paragons only)
Lucky Hit Chance
+ X Ranks to Mastery Skills
+ X Ranks to Blizzard/Frozen Orb/Frost Nova
+ Willpower, + Dexterity, + Strength
+ All Stats
+ Maximum Life
Mana Generation / Regeneration / On Kill
Resource/Mana Cost Reduction
Cooldown Reduction
Attack Speed
Cold Damage Bonus
Lucky Hit Chance with Cold Damage
Resistance to All Elements
Damage to Burning Enemies
+ % Cold Damage to Elites
+ % Damage for X Seconds After Killing an Elite
Damage Reduction for X Seconds After Killing an Elite
Damage Reduction from Elites
Damage Against Close Enemies
Damage Against Crowd Controlled Enemies
Vulnerable Damage
Damage Against Vulnerable Enemies
Lucky Hit: Up to a 5% chance to Restore +X% Primary Resource
Lucky Hit: Up to a 5% chance to Heal +X Life
Damage while Healthy
Barrier Generation
Lucky Hit Chance while you have a Barrier
Movement Speed
Higher Priority
Damage vs Injured Enemies
Lucky Hit: Up to a +X% Chance to Execute Injured Non-Elites
Critical Strike Chance Against Injured Enemies
Damage vs Healthy Enemies
Weapon Damage (not sure if there are any bonuses to that as rolls)
Lower Priority

Useful Links (Spreadsheets & more):

For all of my Diablo IV Post-Launch & RDY-4-Launch Theorycrafts/Builds: This Spreadsheet

For my Diablo IV Class Skill Trees (can be used as mini-calculator): This Spreadsheet

For all of my Diablo IV Pre-Launch Theorycrafts/Builds: This Spreadsheet

♦ ◊ ♦ ◊ ♦

This concludes the Hailstorm Sorcerer Build for Diablo IV. If you’re interested in the game below are links to the various platforms where one can buy it (you can just click the links to open a new tab):

PC (Battle.Net)

XBOX

PlayStation

Official Website

Hammer Time Barbarian Build for Diablo IV [S- Tier Grade]

Hammer Time Barbarian BUILD for Diablo IV [S- Tier Grade]

(It’s HAMMER TIME! Slam that massive Warhammer into the ground and grind your foes into dust.)

♦ ◊ ♦ ◊ ♦

Diablo IV launched on June 6th, 2023 for PC (Battle.Net), XBOX, & PlayStation) and I’ve had my fair share of playing and testing done. I’m now ready to start making full Builds/Theorycrafts that work for both ‘fresh-into-endgame’ characters as well as late endgame. I’ll evolve & keep them updated when we get major rebalance updates. This is one such build for the Barbarian Class called Hammer Time.

I’ve also made spreadsheets for my builds (see the links below) that have shortlisted the active and passive skills + legendary aspect + unique item + gems & sockets + suggested stat rolls + paragon boards that work well with the build which you can use to tinker. Alternatively, I’ve added build calculator links (mostly needed for the paragons)

This build will be updated when needed.

Video Version:

Skill Trees

Below you’ll see ONLY the Active & Passive skills that were selected for this build. For additional skills that can be taken + alternative skill options, you can check my RDY-4-Launch Builds spreadsheet on this link. This build (Hammer Time) is one of the builds on that spreadsheet.

Basic Skill (Resource Generator/Builder) (Required Points: 0 )

  • (active – ONLY put 1 point here) Bash Bash the enemy with your weapon, dealing 30% (X – ?) damage. After bashing enemies 4 times, your next Bash will Stun for 1.25 seconds, this increases to 2 seconds if using a Two-Handed weapon.
    Requires bludgeoning weapon. Generate Fury: 10
    Lucky Hit Chance: 50% | Damage: Physical ; Tags: Basic,
    • (1st upgrade) Enhanced Bash Damaging a Stunned enemy with Bash grants you 5% Base Life as Fortify. Double this amount when using a Two-Handed weapon.
    • (2nd upgrade – my pick of the 2) Combat Bash After Critically Striking 4 times with Bash using a Two-Handed weapon, your next Core or Weapon Mastery Skill will Overpower.

Core Skill(s) (Resource Spender) (Required Points: 2 )

  • (active) Hammer of the Ancients Slam your hammer down with the fury of the Ancients, dealing 50% X – ?) damage to a concentrated area.
    Requires a two-handed bludgeoning weapon. Fury Cost: 35
    Lucky Hit Chance: 40% | Damage: Physical ; Tags: Core,
    • (1st upgrade) Enhanced Hammer of the Ancients Gain 3% (multiplicative) more Fury for 5 seconds for each enemy damaged by Hammer of the Ancients, stacking up to 10 times.
    • (2nd upgrade – my pick of the 2) Furious Hammer of the Ancients Hammer of the Ancients deals 1% (multiplicative) additional damage for each point of Fury you had when using it.
  • (passive) Pressure Point Lucky Hit: Your Core Skills have up to a 10%/20%/30% to make enemies Vulnerable for 2 seconds.
  • (passive) Endless Fury – Basic Skills generate 5%/10%/15% (multiplicative) more Fury when using Two-Handed weapons.
  • (passive) did not pick any other Core passives to save points

Defensive Skills (Required Points: 6 )

  • (active – ONLY put 1 point here) Challenging Shout – Taunt nearby enemies and gain (40/45/50/55/60) Damage Reduction for 8 seconds.
    Cooldown: 25 seconds | Tags: Defensive, Shout
    • (1st upgrade) Enhanced Challenging Shout – While Challenging Shout is active, gain 20% (multiplicative) bonus Maximum Life.
    • (2nd upgrade – my pick of the 2) Tactical Challenging Shout – While Challenging Shout is active you gain 3 Fury each time you take damage.
  • (active – ONLY put 1 point here) Rallying Cry Bellow a rallying cry, increasing your Movement Speed by +30% and Resource Generation by 50% (multiplicative) for 6 seconds, and Nearby allies for 3 seconds.
    Cooldown: 25 seconds | Tags: Defensive, Shout
    • (1st upgrade) Enhanced Rallying Cry Rallying Cry grants you Unstoppable while active.
    • (2nd upgrade – my pick of the 2) Tactical Rallying Cry Rallying Cry generates 25 Fury and grants you an additional 50% (multiplicative) Resource Generation.
  • (passive) Imposing Presence Gain 5%/10%/15% (multiplicative) additional Maximum Life.
    • (upgrade) Martial Vigor Damage Reduction against Elites, is increased by 4%/8%/12% (multiplicative).
  • (passive) did not pick any other Defensive passives to save points

Brawling Skills (Required Points: 11 )

  • (active – ONLY put 1 point here) Charge – Become Unstoppable and rush forward pushing enemies with you then swinging through them for 25% (X – ?) damage and Knocking them Back.
    Cooldown: 17 seconds
    Lucky Hit Chance: 33% | Damage: Physical ; Tags: Brawling,
    • (1st upgrade) Enhanced Charge – Enemies who are Knocked Back into terrain by Charge take 15% (X – ?) damage and are Stunned for 3 seconds.
    • (2nd upgrade – my pick of the 2) Mighty Charge – Damaging enemies with Charge makes them Vulnerable for 2 seconds.
  • (passive) Booming Voice Shout Skill effect durations are increased by 10%/20%/30% (multiplicative).
    • (upgrade) Raid Leader – did NOT take this one
    • (upgrade) Guttural Yelldid NOT take this one
  • (passive) did not pick any other Brawling passives to save points

Weapon Mastery Skills (Required Points: 16 ) Not taking an active Weapon Mastery skill

  • (active)
    • (1st upgrade)
    • (2nd upgrade – my pick of the 2)
  • (passive) Pit Fighter You deal 3%/6%/9% (multiplicative) increased damage to Close enemies and gain 2%/4%/6% Distant Damage Reduction.
    • (upgrade) No Mercy did NOT take this one
    • (upgrade) Slaying Strike You deal 7.5%/15%/22.5% increased damage against Injured enemies.
    • (upgrade) Expose Vulnerability – did NOT take this one
  • (passive) did not pick any other Weapon Mastery passives to save points

Ultimate Skills (Required Points: 23 )

  • (active) Wrath of the Berserker Gain Berserking and Unstoppable for 5 seconds. For the next 10 seconds, dealing direct damage with Basic Skills grants Berserking for 25 seconds.
    Cooldown: 60 seconds
    Lucky Hit Chance: 40% | Tags: Ultimate,
    • (1st upgrade) Supreme Wrath of the Berserker While Wrath of the Berserker is active, gain +20% increased Movement Speed and increase Fury Generation by 30% (multiplicative)
    • (2nd upgrade) Prime Wrath of the Berserker While Wrath of the Berserker is active, every 50 Fury spend increases Berserk’s damage bonus by 25% (multiplicative)
  • (passive – ONLY put 1 point here) Wallop – Your Skills using Bludgeoning weapons deal 5%/10%/15% (multiplicative) increased damage if the enemy is Stunned or Vulnerable.
    • (upgrade) Concussion Lucky Hit: Skills using Bludgeoning weapons have up to a 10%/20%/30% chance to Stun enemies for 3 seconds, or up to a 15%/30%/45% chance when using a Two-Handed Bludgeoning weapon.
  • (passive ) Heavy Handed While using Two-Handed weapons you deal 5%/10%/15% (multiplicative) increased Critical Strike Damage.seconds.
    • (upgrade) Brute Force – Your Overpower deals 15%/30%/45% (multiplicative) increased damage when using a Two-Handed weapon *NOTE: Unlocking this skill upgrade requires investing into either Wallop OR Heavy Handed (can still get both if you want)
  • (passive) Tempered Fury Increase your Maximum Fury by 3/6/9.
    • (upgrade) Furious Impulse did NOT take this one
    • (upgrade – ONLY put 1 point here and it’s totally optional) Invigorating Fury Heal for 3%/6%/9% of your Maximum Life for each 100 Fury spent.
  • (passive) did not pick other Ultimate passives to save points

Specializations (Required Points: 33 )

  • (passive) Unbridled Rage Core Skills deal 135% (multiplicative) increased damage, but cost 100% (multiplicative) more Fury.

Class Mechanic:

The Barbarian class mechanics is called Arsenal and this is how I believe it works:

The Barbarian class can equip 4 weapons at the same time: a Dual-wielding set of 2x One-Handed weps + two separate Two-Handed weapons (not dual-wielding those). They switch in combat between those based on what weapon is assigned to specific skills via the class unique Arsenal System. So each skill can have its own weapon assigned to it as long as it’s one of the 4 weapons equipped. The weps you don’t actually use work as ‘stat sticks’, even any aspects slotted on them. Here are the types:

  • Dual Wielded 1-Handed Weapons on Barbarians can be either Slashing or Bludgeoning such as: Swords, Axes, or Maces. The game seems to clump all 1-Handed weapons together under the “Dual-Wielding” as far as Barbarians and their skill tags are concerned so regardless of Slashing or Bludgeoning type, a 1-Handed weapon will apparently not count as either.
  • The two slots of Two-Handed Weapons can be occupied by Slashing type weps like Swords, Axes, & Polearms and/or by Bludgeoning Maces
  • Ideally 1x 2h Slashing, 1x 2h Bludgeoning and a Dual-Wield 1h combo for the 4 weps if you go for a swap-centric build

On top of this, each weapon type has it’s own passive bonus levels weapon & a technique which gets unlocked after a certain threshold is reached. Here is how I recommend that you arrange the weapons by skill and also which weapon technique to use:

  • Dual Wielded OR 2-handed Slashing will be attached to Charge But. I personally prefer Dual Wielded for it as I’m looking for speed when used to escape enemy CCs or initiate a fight rather than dmg with that skill.
  • 2-handed Bludgeoning must be on both Bash & Hammer of the Ancients as the build demands it for Bash‘s guaranteed Core Skill Overpower after critically striking 4 times with a 2H Bludgeoning

Unique Items

In Diablo IV we can equip more than one unique item at the same time (not so ‘unique’ if we can get decked out in full uniques I guess). It seems that the one unique per build idea that Uniques inherited from the Mythical gear they supposedly replaced was scrapped even before the closed beta tests. My top pick will be the following one but check below it & the notes under the Aspects list for more info:

Top Pick Unique for the Build

Harlequin Crest (Helm)

Gain [5-8%] Damage Reduction. In addition, gain +[2-4] Ranks to All Skills.

[0.245 – 0.455] Maximum Life
X% Cooldown Reduction
+[42 – 70]% Crafting Material Drop Rate
[14 – 28] All Stats

“This headdress was once worn by an assassin disguised as a court mage. Her treachery was unveiled, but not before she used its magic to curse the king’s entire lineage.” – The Fall of House Aston

Additional/Alternative Unique for the Build

Ideally I’d want this one in the build but not sure how well it would work considering the Fury Drain that will occur

Melted Heart of Selig (Amulet)

[4 – 25]% Resistance to All Elements

Gain +30% Maximum Resource. In addition, when you take damage, drain [3 – 8] Resource for every 1% of Life you would have lost instead.

[10 – 18] All Stats
+[12.5 – 19.5]%
Core Skill Damage
+[16.5 – 23.5]% Damage while Healthy
[7 – 14]% X Generation (Struck’s note: I’m 100% sure X here stands for each class’ Primary Resource: Mana, Essence, Spirit, Energy, Fury)

“Do not allow your passions to become obsessions. Fuel the fire that burns within you, but it is madness to allow yourself to become ash to please an uncaring universe.” – Last words of Master Selig

This one is an EXTREMELY RARE DROP but IF you get it It may be an amazing one for the 2h Slashing slot. (We get a solid chunk of MULTIPLICATIVE crit dmg from it and that should be a solid dps boost by itself on top of the +% dmg, life and core stats)
The Grandfather (Two-Handed Sword)

+[17.5%] Critical Strike Damage

Increases your Critical Strike Damage by x[60 – 100]%. The other properties on this weapon can roll higher than normal.

+[14 – 28]% Damage
[0.245 – 0.455] Maximum Life
[20 – 36] All Stats
Ignores Durability Loss


This one is an ALTERNATIVE pick and not something I suggested for the final build but worth considering. (It has pretty good rolls that come with it and pretty useful when mobbing, not so much vs bosses)
Mother’s Embrace (Ring)

[6 – 35]% Fire Resistance
[6 – 35]% Cold Resistance

If a Core Skill hits 5 or more enemies, [20 – 40]% of the Resource cost is refunded.

+[2 – 6]% Critical Strike Chance
+[14 – 21]% Critical Strike Damage
+[21 – 42]% Overpower Damage
+[12.5 – 19.5]% Core Skill Damage

“Every tome, every scroll, every book in this temple produces the same answer. The only being willing to stand against the Eternal Conflict, against the Prime Evils, was Lilith.” – Elias

This one is an ALTERNATIVE pick and not something I suggested for the final build but worth considering. (It comes with not so good rolls but the unique affix is nice for either bosses or mobbing)
Ring of Starless Skies (Ring)

[6 – 35]% Lightning Resistance
[6 – 35]% Shadow Resistance

Each consecutive Core Skill cast reduces the Resource cost of your next Core Skill by [5 – 10]%, up to a maximum of 30%.

[10 – 18] All Stats
+[4 – 10]% Lucky Hit Chance
+[9.5 – 16.5]% Damage to Crowd Controlled Enemies
+[12.5 – 19.5]% Core Skill Damage

“Yours is the power to pluck the stars from the heavens with the ease of a child gathering fruit from the bough.” – Unknown

Sockets & Gems

There are various possible good/viable choices for the gem slots. I’ve shortlisted what works by slot. I’d recommend picking one of those:

Weps: Ruby. Emerald is also good, but Ruby is what this build needs more.
Armor: Ruby or Saphire (dmg reduction apparently is very needed in high tier NM dungeons).
Jewelry: Skull for Armor until they rework resistances. After the rework: Diamond unless you need specific resistance more than all.

XYZ Diamond (Requires Level XY)

• Weapon: +N% Ultimate Skill Damage
• Armor: +N% Barrier Generation
• Jewelry: N% Resistance to All Elements

+5%/+5%/+5% for chipped (the 2nd grade at lvl 20)

XYZ Skull (Requires Level XY)

• Weapon: +N Life On Kill
• Armor: +N% Healing Received
• Jewelry: +N Armor

+13/+5%/+170 for chipped (the 2nd grade at lvl 20)

XYZ Saphire (Requires Level XY)

• Weapon: +N% Critical Strike Damage to Crowd-Controlled Enemies
• Armor: N% Damage Reduction While Fortified
• Jewelry: N% Cold Resistance

+7.5%/5%/14.3% for chipped (the 2nd grade at lvl 20)

XYZ Ruby (Requires Level XY)

• Weapon: +N% Overpower Damage

• Armor: +N% Maximum Life
• Jewelry: N% Fire Resistance

+15%/+5.5%/14.3% for chipped (the 2nd grade at lvl 20)

XYZ Emerald (Requires Level XY)

• Weapon: +N% Critical Strike Damage to Vulnerable Enemies
• Armor: +N Thorns
• Jewelry: N% Poison Resistance

+7.5%/+39/14.3% for chipped (the 2nd grade at lvl 20)

Legendary Aspects / Powers

I will only list the Legendary Aspects that have been selected for the build and the slots in which I advise putting those. For in-depth information you can check my RDY-4-Launch Builds spreadsheet on this link. This build (Hammer Time) is one of the builds on that spreadsheet.

  • Helm: Aspect of Might OR Aspect of The Protector / Harlequin Crest (see notes below)
  • Amulet: Accelerating Aspect (see notes below)
  • Chest: Aspect of Might OR Aspect of The Protector
  • Pants: Aspect of Disobedience
  • Gloves: Aspect of Ancestral Force
  • Boots: Eluding Aspect
  • Ring 1: Aspect of Echoing Fury
  • Ring 2: Bold Chieftain’s Aspect
  • Main Hand Weapon: Rapid Aspect
  • Off-hand Weapon: Aspect of The Expectant (see notes below)
  • 2-H Weapon (Bludgeoning): Earthstriker’s Aspect
  • 2-H Weapon (Slashing): Aspect of Limitless Rage (see notes below)
NOTES: How to re-arrange if using any of the Uniques:

- For Harlequin Crest (Helm): Aspect of Might OR Aspect of The Protector gets removed from the Helm slot to make room for the Unique Helm.

ALTERNATIVE PICKS (if you decide to use them), my advice will be to sacrifice one of the offensive aspects (especially if already using the Unique Helm):

- For Melted Heart of Selig (Amulet): Aspect of The Expectant gets removed from the Off-hand weapon slot, then Accelerating Aspect goes into the, now empty, Off-hand slot to make room for the Unique Amulet.
- For Grandfather (Greatsword): Aspect of The Expectant gets removed from the Off-hand weapon slot, then Accelerating Aspect goes into the, now empty, Off-hand slot to make room for Aspect of Limitless Rage to go into the Amulet Slot, which makes room for the Unique Greatsword.
- For any 1 of the Unique Rings: You will need to sacrifice one of the Ring aspects and it may be hurting the build to loose any of those two. Up to you to decide which on is okay to sacrifice for that Unique ring but I'd recommend testing out how it will be without Aspect of Echoing Fury as the unique rings will, at least on paper, make up for the lost Fury generation.

Paragon Boards:

Use the links below to check the paragon boards selected and the nodes I’ve taken. One link is for what the boards will look like at lvl 93 with 190 paragon points (so more paragon points will be obtained on the way to 100). The other link is what the boards will look like when fully maxed out (I left the last 5 point unspent in case one want the Carnage legendary node) on paragon points.

Suggested Gear Rolls to look out for (NOT in order of priority):

I’ve shortlisted 41 different affixes that work well with the build of almost 300 total. I’ll highlight in Orange the ones I think should get higher priority. NOTE: I’ve added a new “Top Priority per Slot” list but left the old unsorted list below it.

This is the Sorted by Slot list of Top Priority Affixes/Rolls:

    • Helm:
      • Priority 1: Cooldown Reduction
      • Priority 2: Maximum Life, Maximum Fury
      • Priority 3: Core Stats (Str, Dex, Wil, All Stats)
      • Priority 4: Total Armor
    • Amulet:
      • Priority 1: Cooldown Reduction, Movement Speed
      • Priority 2: Maximum Life, +X Ranks of All Brawling Skills or to a Passive you like, +X% Damage with Two-Handed Bludgeoning Weapons
      • Priority 3: +X% Damage, Damage Reduction from Close or Distant Enemies/While Injured,
      • Priority 4: Fury Cost Reduction, Overpower Damage with Two-Handed Bludgeoning Weapons
    • Chest:
      • Priority 1: Damage Reduction from Close or Distant Enemies/while Fortified
      • Priority 2: Maximum Life, + X% Damage
      • Priority 3: Core Stats (Str, Dex, Wil, All Stats), Total Armor
      • Priority 4: Physical Damage, Fortify Generation, Overpower Damage with Two-Handed Bludgeoning Weapons
    • Pants:
      • Priority 1: +Ranks of Charge, Damage Reduction from Close or Distant Enemies/while Fortified
      • Priority 2: Maximum Life, Damage Reduction while Injured
      • Priority 3: Core Stats (Str, Dex, Wil, All Stats), Total Armor
      • Priority 4: Damage Reduction
    • Gloves:
      • Priority 1: + X ranks to Hammer of the Ancients, Critical Strike Chance, Overpower Damage
      • Priority 2: Damage to Injured Enemies, Critical Strike Chance Against Injured Enemies
      • Priority 3: Lucky Hit: Up to a 5% Chance to Restore +X% Primary Resource, Lucky Hit Chance
      • Priority 4: Core Stats (Str, Dex, Wil, All Stats), Lucky Hit: Up to a 5% Chance to Heal +X Life
    • Boots:
      • Priority 1: Movement Speed, Fury Cost Reduction
      • Priority 2: Damage Reduction while Injured
      • Priority 3: Core Stats (Str, Dex, Wil, All Stats)
      • Priority 4: Fortify Generation
    • Ring 1:
      • Priority 1: Overpower Damage, Critical Chance, Maximum Fury
      • Priority 2: Maximum Life, Critical Damage, Vulnerable Damage, Damage to Close Enemies
      • Priority 3: Damage to Stunned/Slowed/Crowd Controlled Enemies
      • Priority 4: Physical Damage, Lucky Hit Chance
    • Ring 2:
      • Priority 1: Overpower Damage, Critical Chance, Maximum Fury
      • Priority 2: Maximum Life, Critical Damage, Vulnerable Damage, Damage to Close Enemies
      • Priority 3: Damage to Stunned/Slowed/Crowd Controlled Enemies
      • Priority 4: Physical Damage, Lucky Hit Chance
    • Main Hand Weapon: Apparently, weapons can NOT roll two types of Damage mods!!!
      • Priority 1: Damage to Vulnerable Enemies & Vulnerable Damage, Damage to Close Enemies, Overpower Damage
      • Priority 2: Critical Strike Damage, Core Skill Damage
      • Priority 3: Damage to Slowed/Stunned Enemies
      • Priority 4: Core Stats (Str, Dex, Wil, All Stats)
    • Off-hand Weapon: See the 1H Weapon Rolls List
    • 2-H Weapons: See the 1H Weapon Rolls List
+ X% Damage
Critical Strike Chance/Critical Damage Bonus
Critical Chance / Critical Damage with Physical/2H Bludgeoning Skills
Critical Chance/Critical Damage with Core Skills
Damage with Core Skills
Lucky Hit Chance
+ X Ranks to Core Skills
+ X Ranks to Hammer of the Ancients/Rallying Cry/Challenging Shout/Charge
Overpower Damage
+ Willpower, + Dexterity, + Strength
+ All Stats
+ Maximum Life
Fury Generation / Regeneration / On Kill
Resource/Fury Cost Reduction
Cooldown Reduction
Physical/2H Bludgeoning Damage Bonus
Lucky Hit Chance with Physical/2H Bludgeoning Damage
Resistance to All Elements
+ % Critical Chance / Critical Damage with Physical Damage
+ % Physical Damage to Elites
+ % Critical Strike Chance with Physical Damage Against Elites
+ % Damage for X Seconds After Killing an Elite
Damage Reduction for X Seconds After Killing an Elite
Damage Reduction from Elites
Damage / Critical Chance / Critical Damage Against Close Enemies
Damage / Critical Chance / Critical Damage Against Crowd Controlled Enemies
Vulnerable Damage
Damage / Critical Chance / Critical Damage Against Vulnerable Enemies
Lucky Hit: Up to a 5% chance to Restore +X% Primary Resource
Lucky Hit: Up to a 5% chance to Heal +X Life
Damage while Healthy
Fortify Generation
Damage while Fortified
Chance When Struck to Fortify for X Life
Movement Speed
Attack Speed
Higher Priority
Damage vs Injured Enemies
Lucky Hit: Up to a +X% Chance to Execute Injured Non-Elites
Critical Strike Chance Against Injured Enemies
Damage vs Healthy Enemies
Weapon Damage (not sure if there are any bonuses to that as rolls)
Lower Priority

Useful Links (Spreadsheets & more):

For all of my Diablo IV Post-Launch & RDY-4-Launch Theorycrafts/Builds: This Spreadsheet

For my Diablo IV Class Skill Trees (can be used as mini-calculator): This Spreadsheet

For all of my Diablo IV Pre-Launch Theorycrafts/Builds: This Spreadsheet

♦ ◊ ♦ ◊ ♦

This concludes the Hammer Time Barbarian Build for Diablo IV. If you’re interested in the game below are links to the various platforms where one can buy it (you can just click the links to open a new tab):

PC (Battle.Net)

XBOX

PlayStation

Official Website

Mistplosion 2.0 Necromancer Build for Diablo IV [A+ Tier Grade]

Mistplosion 2.0 Necromancer BUILD for Diablo IV [A+ Tier Grade]

(Turn to Mist & turn your fallen foes’ corpses into an explosive bloody spectacle. Death is Your Fuel!)

♦ ◊ ♦ ◊ ♦

Diablo IV launched on June 6th, 2023 for PC (Battle.Net), XBOX, & PlayStation) and I’ve had my fair share of playing and testing done. I’m now ready to start making full Builds/Theorycrafts that work for both ‘fresh-into-endgame’ characters as well as late endgame. I’ll evolve & keep them updated when we get major rebalance updates. This is one such build for the Necromancer Class called Mistplosion 2.0.

I’ve also made spreadsheets for my builds (see the links below) that have shortlisted the active and passive skills + legendary aspect + unique item + gems & sockets + suggested stat rolls + paragon boards that work well with the build which you can use to tinker. Alternatively, I’ve added build calculator links (mostly needed for the paragons)

This build will be updated when needed.

Video Version:

Skill Trees

Below you’ll see ONLY the Active & Passive skills that were selected for this build. For additional skills that can be taken + alternative skill options, you can check my RDY-4-Launch Builds spreadsheet on this link. This build (Mistplosion 2.0) is one of the builds on that spreadsheet.

Basic Skill (Resource Generator/Builder) (Required Points: 0 )

  • (active – ONLY put 1 point here) Reap – Sweep an ethereal scythe in front of you, dealing 12% (X-?) damage. Hitting an enemy with Reap increases your damage Reduction by 15% for 2 seconds.
    Lucky Hit Chance: 17%
    Generates: 4 Essence per enemy hit | Damage: Shadow ; Tags: Basic, Darkness
    • (1st upgrade) Enhanced Reap If an enemy hit by Reap dies within 2 seconds, you gain 30% attack speed for 3 seconds.
    • (2nd upgrade – don’t need any of the 2 but temporary you can use ) Acolyte’s Reap Reap forms a Corpse under the first enemy hit. Can only occur every 5 seconds.

Core Skill(s) (Resource Spender) (Required Points: 2 )

  • (active) Blood Surge Draw blood from enemies, dealing 20% (X-?) damage, and expel a blood nova, dealing 50% (X-?) damage. Blood Surge’s nova damage is increased by 10% (multiplicative) per enemy drained, up to 50% (multiplicative).
    Lucky Hit Chance: 20%
    Essence Cost: 30 | Damage: Physical ; Tags: Core, Blood
    • (1st upgrade) Enhanced Blood Surge Blood Surge heals you for 2.5% of your maximum Life when drawing blood from enemies. If 4 or more enemies are drawn from, then Heal for an additional 1.0% of your Maximum Life.
    • (2nd upgrade – my pick of the 2) Paranormal Blood Surge – If an enemy is damaged by Blood Surge’s nova while you are Healthy, then gain 1 stack of Overwhelming Blood. When you have 5 stacks of Overwhelming Blood, your next Blood Surge Overpowers.
  • (passive) Hewed Flesh Lucky Hit: Your damage has up to a 4%/8%/12% chance to create a corpse at the target’s location.
  • (passive) DID NOT INVEST in other Core passives to save points

Macabre Skills (Required Points: 6 )

  • (active) Corpse Explosion Detonate a Corpse, dealing 75% (X-XX) damage to nearby enemies. Lucky Hit Chance: 40% Damage: Physical ; Tags: Corpse, Corruption
    • (1st upgrade) Enhanced Corpse – Corpse Explosion’s radius is increased by 15%.
    • (2nd upgrade – my pick of the 2) Plagued Corpse Explosion Corpse Explosion deals 8% (multiplicative) increased damage to enemies that are Slowed, Stunned or Vulnerable. These damage bonuses can stack.
  • (active) Blood Mist Disperse into a bloody mist, becoming Immune for 3 seconds. Your Movement Speed is reduced by 20.00% and you periodically deal 2% (X-?) damage to enemies, healing for 0.5% of your Maximum Life.
    Lucky Hit Chance: 9%
    Cooldown: 20 Seconds. | Damage: Physical ; Tags: Macabre, Blood
    • (1st upgrade) Enhanced Blood Mist Casting a Skill that Overpowers reduces the cooldown of Blood Mist by 2 seconds.
    • (2nd upgrade – my pick of the 2) Ghastly Blood Mist Blood Mist leaves behind a Corpse every 1 second.
  • (passive) Grim Harvest Consuming a Corpse generates 3/6/9 Essence.
    • (upgrade) Fueled by Death You deal 4%/8%/12% (multiplicative) increased damage for 4 seconds after consuming a Corpse.
  • (passive) DID NOT INVEST in other Macabre passives to save points

Corruption Skills (Required Points: 11 )

  • (active) DID NOT TAKE a Corruption active due to using 2 minions on the skillbar
    • (1st upgrade)
    • (2nd upgrade – my pick of the 2)
  • (passive) Death’s Embrace Enemies in melee range take 2%/4%/6% (multiplicative) more damage from you and deal 3%/6%/9% less damage to you.
  • (passive) DID NOT INVEST in other Corruption passives to save points

Summoning Skills (Required Points: 16 )

  • (active – ONLY put 1 point here) Corpse Tendrils Veins burst out of a Corpse, pulling in enemies, Stunning them for 3 seconds, and dealing 20% (X-?) damage to them.
    Lucky Hit Chance: 20%
    Cooldown: 11.0 Seconds. | Damage: Physical ; Tags: Corpse, Corruption
    • (1st upgrade) Enhanced Corpse Tendrils Enemies who are in range of Corpse Tendrils are Slowed by 50% before being pulled.
    • (2nd upgrade – my pick of the 2) Plagued Corpse Tendrils Enemies damaged by Corpse Tendrils are made Vulnerable for 3 seconds.
  • (passive – only put 1 point into this) Gruesome Mending While below 50% Life, you receive +10%/+20%/+30% more Healing from all sources.
    • (upgrade) Coalesced Blood While Healthy your Blood Skills deal 6%/12%/18% (multiplicative) increased damage. Note: Need to invest into this node to unlock BOTH Tides of Blood & Drain Vitality
    • (upgrade) Transfusion – DID NOT INVEST in this to save points
    • (upgrade) Drain Vitality Lucky Hit: Hitting enemies with Blood Skills has up to 25% chance to Fortify you for 2%/5%/8% Base Life.
    • (upgrade) Tides of Blood Your Blood Skills deal 5%/10%/15% (multiplicative) increased Overpower damage. This bonus is doubled while you are Healthy.
  • (passive) Necrotic Carapace – When a Corpse is formed from your Skills or your Minions, Fortify for 2%/4%/6% Base Life.
  • (passive) DID NOT INVEST in other Summoning passives to save points

Ultimate Skills (Required Points: 23 )

  • (active) Bone Storm A swirling storm of bones surrounds you and your Golem, dealing 180% (X-?) to surrounding enemies over 10 seconds.
    Lucky Hit Chance: 40%
    Cooldown: 60 Seconds. | Damage: Physical ; Tags: Ultimate, Bone
    • (1st upgrade) Prime Bone Storm Your Damage Reduction is increased by 15% while Bone Storm is active.
    • (2nd upgrade) Supreme Bone Storm Your Critical Strike Chance is increased by +20% while Bone Storm is active.
  • (passive) Stand Alone Increases Damage Reduction by 6%/12%/18%,, reduced by 2% for each active Minion.
    • (upgrade) Memento Mori Sacrificing both Skeletal Warriors and Skeletal Mages increases their Sacrifice bonuses by 20%/40%/60%.
  • (passive) DID NOT INVEST in any other Ultimate passives to save points

Specializations (Required Points: 33 )

  • (passive) Rathma’s Vigor Increase your maximum Life by 10% (multiplicative). After being Healthy for 15 seconds, your next Blood Skill Overpowers.

Book of the Dead (Class Mechanic):

This build is all about creating as many corpses as possible and consuming them with Corpse Explosion directly or with the auto-cast via Blood Mist. For that we don’t need minions. There’s room for a basic skill on the skillbar and many may not want it and might rather prefer to use Decrepify there so it’s up to you to decide on this one. I love using Reap at the beginning of a fight as it’s a guaranteed corpse every (5 seconds) that can be used to start the fight off with a Corpse Tendrils for the crit chance buff & crit damage taken debuff + Vulnerable debuff.

I’d advise taking ZERO Minions for this build. So you’ll & Sacrifice the Skeletal Warriors & Mages + the Golem:

  • Skeletal Skirmishers: Sacrifice so that we get extra Crit Chance
    • Description: Your critical strike chance is increased by 5%, but you can no longer raise Skeletal Warriors.
  • Bone Mages: Sacrifice is amazing to get our Overpower damage multiplied by x40%. This is a HUGE boost as the majority of the Overpower for this build is additive.
    • Description: Your Overpower damage is increased by 40% (multiplicative)
  • Iron Golem: Sacrifice so that we get extra Crit Damage
    • Description: You deal 30% (multiplicative) increased critical strike damage, but you lose the ability to summon a Golem.

Unique Items

In Diablo IV we can equip more than one unique item at the same time (not so ‘unique’ if we can get decked out in full uniques I guess). It seems that the one unique per build idea that Uniques inherited from the Mythical gear they supposedly replaced was scrapped even before the closed beta tests. My top picks will be the following two but check the notes under the Aspects list for more picks:

Black River (Scythe)

[0.06] Life On Kill Corpse Explosion consumes up to 4 additional Corpses around the initial Corpse, dealing x[122-130%] increased damage and with a +[21-25%] larger radius per additional Corpse.

[49 – 63] Intelligence
+[21 – 35]% Damage to Healthy Enemies
+1 Ranks of the Fueled by Death Passive
+[2 – 4] Ranks of Corpse Explosion + X% Damage to Distant Enemies

“The scrolls describe a river of tar that separated the living from the land of the dead. Any unfortunate soul who tried to cross would be dragged down into oblivion.” – Notes of Scholar Kamien

Harlequin Crest (Helm)

Gain [5-8%] Damage Reduction. In addition, gain +[2-4] Ranks to All Skills.

[0.245 – 0.455] Maximum Life
X% Cooldown Reduction
+[42 – 70]% Crafting Material Drop Rate
[14 – 28] All Stats

“This headdress was once worn by an assassin disguised as a court mage. Her treachery was unveiled, but not before she used its magic to curse the king’s entire lineage.” – The Fall of House Aston

Sockets & Gems

There are various possible good/viable choices for the gem slots. I’ve shortlisted what works by slot. I’d recommend picking one of those:

Weps: Ruby.
Armor: Ruby or Saphire (dmg reduction apparently is very needed in high tier NM dungeons).
Jewelry: Skull for Armor until they rework resistances. After the rework: Diamond unless you need specific resistance more than all.

XYZ Diamond (Requires Level XY)

• Weapon: +N% Ultimate Skill Damage
• Armor: +N% Barrier Generation
• Jewelry: N% Resistance to All Elements

+5%/+5%/+5% for chipped (the 2nd grade at lvl 20)

XYZ Skull (Requires Level XY)

• Weapon: +N Life On Kill
• Armor: +N% Healing Received
• Jewelry: +N Armor

+13/+5%/+170 for chipped (the 2nd grade at lvl 20)

XYZ Saphire (Requires Level XY)

• Weapon: +N% Critical Strike Damage to Crowd-Controlled Enemies
• Armor: N% Damage Reduction While Fortified
• Jewelry: N% Cold Resistance

+7.5%/5%/14.3% for chipped (the 2nd grade at lvl 20)

XYZ Ruby (Requires Level XY)

• Weapon: +N% Overpower Damage

• Armor: +N% Maximum Life
• Jewelry: N% Fire Resistance

+15%/+5.5%/14.3% for chipped (the 2nd grade at lvl 20)

XYZ Emerald (Requires Level XY)

• Weapon: +N% Critical Strike Damage to Vulnerable Enemies
• Armor: +N Thorns
• Jewelry: N% Poison Resistance

+7.5%/+39/14.3% for chipped (the 2nd grade at lvl 20)

Legendary Aspects / Powers

I will only list the Legendary Aspects that have been selected for the build and the slots in which I advise putting those. For in-depth information you can check my RDY-4-Launch Builds spreadsheet on this link. This build (Mistplosion 2.0) is one of the builds on that spreadsheet.

  • Helm: Exploiter’s Aspect / Harlequin Crest (see notes below)
  • Amulet: Aspect of Grasping Veins
  • Chest: Aspect of The Protector
  • Pants: Aspect of the Embalmer
  • Gloves: Blood-bathed Aspect
  • Boots: Aspect of Explosive Mist
  • Ring 1: Cadaverous Aspect
  • Ring 2: Sacrificial Aspect
  • 1H Weapon: Smiting Aspect / Black River (see notes below)
  • Off-hand: Aspect of Untimely Death
  • 2-H Weapon: Aspect of Grasping Veins OR Cadaverous Aspect OR Sacrificial Aspect BUT I do NOT recommend using a 2-hander as the whole build is centered around the Black River but until you get it you can use a 2-hander and loose one of the offensive aspects
NOTES: How to re-arrange if using any of the Uniques:

- Smiting Aspect stays in the 1-h Weapon slot ONLY until you get the Black River Unique 1-h Scythe. 
- For Harlequin Crest (Helm): Exploiter’s Aspect gets removed from the Helm slot to make room for the Unique Helm.

ALTERNATIVE PICKS (if you decide to use them): 
- For Temerity (Pants): Aspect of The Protector gets removed from the Chest Slot, then Aspect of the Embalmer goes into the now empty Chest slot to make room for the Unique Pants.
- For Mother's Embrace (Ring) in the build, you will need to sacrifice one more aspect and it may be hurting the build to loose any of the remaining aspects once you have the Helmet and 1-h Weapon slots filled up with Uniques. Up to you to decide which on is okay to sacrifice for that Unique ring.

Paragon Boards:

Use the links below to check the paragon boards selected and the nodes I’ve taken. One link is for what the boards will look like at lvl 91 with 185 paragon points (so more paragon points will be obtained on the way to 100). The other link is what the boards will look like when fully maxed out on paragon points.

Suggested Gear Rolls to look out for (NOT in order of priority):

I’ve shortlisted 42 different affixes that work well with the build of almost 300 total. I’ll highlight in Orange the ones I think should get higher priority. NOTE: I’ve added a new “Top Priority per Slot” list but left the old unsorted list below it.

This is the Sorted by Slot list of Top Priority Affixes/Rolls:

    • Helm:
      • Priority 1: Cooldown Reduction
      • Priority 2: Maximum Life
      • Priority 3: Total Armor or Maximum Essence (both are kind of equal priority)
      • Priority 4: Core Stats (Int, Dex, Wil, All Stats)
    • Amulet:
      • Priority 1: Cooldown Reduction, Movement Speed
      • Priority 2: Maximum Life, +X Ranks of All Corpse/ Macabre Skills, +X% Core Skill Damage, +X% Blood Skill Damage
      • Priority 3: +X% Damage, Damage Reduction from Close or Distant Enemies/While Injured,
      • Priority 4: Essence Cost Reduction
    • Chest:
      • Priority 1: Damage Reduction from Close or Distant Enemies/while Fortified
      • Priority 2: Maximum Life, + X% Damage
      • Priority 3: Blood Skill Damage, Core Stats (Int, Dex, Wil, All Stats), Total Armor
      • Priority 4: Physical Damage, Fortify Generation, Damage Reduction
    • Pants:
      • Priority 1: +X Ranks of Blood Mist/Corpse Explosion, Damage Reduction from Close or Distant Enemies/while Fortified
      • Priority 2: Maximum Life, Damage Reduction while Injured
      • Priority 3: Core Stats (Int, Dex, Wil, All Stats), Total Armor
      • Priority 4: Damage Reduction
    • Gloves:
      • Priority 1: + X ranks to Blood Surge, Critical Strike Chance, Overpower Damage
      • Priority 2: Damage to Injured Enemies, Critical Strike Chance Against Injured Enemies
      • Priority 3: Lucky Hit: Up to a 5% Chance to Restore +X% Primary Resource, Lucky Hit Chance
      • Priority 4: Core Stats (Int, Dex, Wil, All Stats), Lucky Hit: Up to a 5% Chance to Heal +X Life
    • Boots:
      • Priority 1: Movement Speed, Essence Cost Reduction
      • Priority 2: +X Ranks of Corpse Tendrils, Damage Reduction while Injured
      • Priority 3: Core Stats (Int, Dex, Wil, All Stats)
      • Priority 4: Fortify Generation
    • Ring 1:
      • Priority 1: Overpower Damage, Critical Chance
      • Priority 2: Maximum Life, Critical Damage, Vulnerable Damage, Damage to Close/Vulnerable Enemies
      • Priority 3: Damage to Stunned Enemies, X% Damage for 4 Seconds After Picking Up a Blood Orb
      • Priority 4: Physical Damage, Maximum Essence, Lucky Hit Chance
    • Ring 2:
      • Priority 1: Overpower Damage, Critical Chance
      • Priority 2: Maximum Life, Critical Damage, Vulnerable Damage, Damage to Close/Vulnerable Enemies
      • Priority 3: Damage to Stunned Enemies, X% Damage for 4 Seconds After Picking Up a Blood Orb
      • Priority 4: Physical Damage, Maximum Essence, Lucky Hit Chance
    • 1H Weapon: Apparently, weapons can NOT roll two types of Damage mods!!!
      • Priority 1: Damage to Vulnerable Enemies & Vulnerable Damage, Damage to Close Enemies, Overpower Damage
      • Priority 2: Critical Strike Damage, Core Skill Damage
      • Priority 3: Damage to Slowed/Stunned Enemies
      • Priority 4: Core Stats (Int, Dex, Wil, All Stats)
    • Focus Off-hand | When you use a Focus Off-hand:
      • Priority 1: Cooldown Reduction, Essence Cost Reduction
      • Priority 2: Critical Strike Chance
      • Priority 3: Up to a 5% Chance to Restore +[7 – 14]% Primary Resource , Lucky Hit Chance
      • Priority 4: Core Stats (Int, Dex, Wil, All Stats), Damage Reduction while Fortified, Critical Chance Against Injured
    • Shield Off-hand: When you use a Shield Off-hand:
      • Priority 1: Cooldown Reduction, Essence Cost Reduction
      • Priority 2: Critical Strike Chance, Damage Reduction while Fortified/from Close or Distant Enemies
      • Priority 3: Up to a 5% Chance to Restore +[7 – 14]% Primary Resource , Lucky Hit Chance
      • Priority 4: Core Stats (Int, Dex, Wil, All Stats), Critical Chance Against Injured
    • 2-H Weapon: See the 1H Weapon Rolls List
+ X% Damage
Critical Strike Chance/Critical Damage Bonus
Critical Chance / Critical Damage with Physical/Blood Skills
Critical Chance/Critical Damage with Core/Blood/Corpse/Corruption/Macabre Skills
Damage with Core/Blood/Corpse/Corruption/Macabre Skills
Lucky Hit Chance
+ X Ranks to Core/Blood/Corpse/Corruption/Macabre Skills
+ X Ranks to Blood Surge/Corpse Explosion/Corpse Tendrils/Blood Mist
Overpower Damage
+ Wilpower, + Dexterity, + Intelligence
+ All Stats
+ Maximum Life
Essence Generation / Regeneration / On Kill
Resource/Essence Cost Reduction
Cooldown Reduction
Blood/Corpse/Corruption/Macabre Skills Cooldown Reduction
Physical/Blood Damage Bonus
Lucky Hit Chance with Physical/Blood Damage
Resistance to All Elements
+ % Critical Chance / Critical Damage with Physical/Blood Damage
+ % Physical/Blood Damage to Elites
+ % Critical Strike Chance with Physical/Blood Damage Against Elites
+ % Damage for X Seconds After Killing an Elite
Damage Reduction for X Seconds After Killing an Elite
Damage Reduction from Elites
Damage / Critical Chance / Critical Damage Against Close Enemies
Damage / Critical Chance / Critical Damage Against Crowd Controlled Enemies
Vulnerable Damage
Damage / Critical Chance / Critical Damage Against Vulnerable Enemies
Lucky Hit: Up to a 5% chance to Restore +X% Primary Resource
Lucky Hit: Up to a 5% chance to Heal +X Life
Damage while Healthy
Fortify Generation
Damage while Fortified
Chance When Struck to Fortify for X Life
Movement Speed
Higher Priority
Damage vs Injured Enemies
Lucky Hit: Up to a +X% Chance to Execute Injured Non-Elites
Critical Strike Chance Against Injured Enemies
Damage vs Healthy Enemies
Weapon Damage (not sure if there are any bonuses to that as rolls)
Attack Speed
Lower Priority

Useful Links (Spreadsheets & more):

For all of my Diablo IV Post-Launch & RDY-4-Launch Theorycrafts/Builds: This Spreadsheet

For my Diablo IV Class Skill Trees (can be used as mini-calculator): This Spreadsheet

For all of my Diablo IV Pre-Launch Theorycrafts/Builds: This Spreadsheet

♦ ◊ ♦ ◊ ♦

This concludes the Mistplosion 2.0 Necromancer Build for Diablo IV. If you’re interested in the game below are links to the various platforms where one can buy it (you can just click the links to open a new tab):

PC (Battle.Net)

XBOX

PlayStation

Official Website

BIG GRIZZ 3.0 Druid Build for Diablo IV [A Tier Grade]

BIG GRIZZ 3.0 Druid BUILD for Diablo IV [A Tier Grade]

(this build’s got that BIG GRIZZ energy & uses two defensive skills, making it beary tanky)

♦ ◊ ♦ ◊ ♦

Diablo IV launched on June 6th, 2023 for PC (Battle.Net), XBOX, & PlayStation) and I’ve had my fair share of playing and testing done. I’m now ready to start making full Builds/Theorycrafts that work for both ‘fresh-into-endgame’ characters as well as late endgame. I’ll evolve & keep them updated when we get major rebalance updates. This is one such build for the Druid Class called BIG GRIZZ 3.0.

I’ve also made spreadsheets for my builds (see the links below) that have shortlisted the active and passive skills + legendary aspect + unique item + gems & sockets + suggested stat rolls + paragon boards that work well with the build which you can use to tinker. Alternatively, I’ve added build calculator links (mostly needed for the paragons)

This build will be updated when needed.

Video Version:

Skill Trees

Below you’ll see ONLY the Active & Passive skills that were selected for this build. For additional skills that can be taken + alternative skill options, you can check my RDY-4-Launch Builds spreadsheet on this link. This build (BIG GRIZZ 3.0) is one of the builds on that spreadsheet.

Basic Skill (Resource Generator/Builder) (Required Points: 0 )

  • (active – ONLY put 1 point here) Storm Strike – Electricity gathers around your weapon, dealing 20% (X-?) damage to your target and chaining to up to 3 surrounding enemies, dealing 20% less damage each time it chains. You gain 25% Damage Reduction for 3 seconds after dealing damage with Storm Strike.
    Lucky Hit Chance: 25% | Type: Storm Magic ; Damage: Lightning
    Generates: 15 Spirit
    • (1st upgrade) Enhanced Storm Strike – Storm Strike has a 15% chance to Immobilize all enemies hit for 2.5 seconds.
    • (2nd upgrade – my pick of the 2) Fierce Storm Strike – Storm Strike has a 50% chance to make enemies Vulnerable for 3 seconds.

Spirit / Core Skill(s) (Resource Spender) (Required Points: 2 )

  • (active) Pulverize Shapeshift into a Werebear and slam the ground, dealing 50% (X-?) damage to nearby enemies.
    Lucky Hit Chance: 33% | Type: Shapeshifting ; Damage: Physical
    Spirit Cost: 35
  • (1st upgrade) Enhanced Pulverize – Your next Pulverize will Overpower every 12 seconds while you remain Healthy.
  • (2nd upgrade – my pick of the 2) Primal Pulverize – Enemies hit with Pulverize deal 20% reduced damage for 4 seconds.
  • (passive) Predatory Instinct Critical Strike Chance against nearby enemies is increased by +3%/+6%/+9%.
    • (upgrade – did NOT take to save points) Iron Fur
    • (upgrade – did NOT take cuz it’s a Werewolf synergy) Digitigrate Gait
  • (passive) did not pick other Spirit/Core passives to save points

Defensive Skills (Required Points: 6 ) I took both of the Defensive skills listed below

  • (active – ONLY put 1 point here) Earthen Bulwark – Rocks surround you for 3 seconds, granting a Barrier that absorbs 45% of your Base Life in damage.
    Lucky Hit Chance: 50%
    Cooldown: 16 seconds | Type: Earth Magic ; Damage: Physical
  • (1st upgrade) Enhanced Earthen Bulwark Earthen Bulwark makes you Unstoppable while active.
  • (2nd upgrade – my pick of the 2) Preserving Earthen Bulwark – Casting Earthen Bulwark grants 18% Base Life as Fortify.
  • (active – ONLY put 1 point here) Blood Howl – Shapeshift into a Werewolf and howl furiously, Healing you for 20% of your Maximum Life.
    Cooldown: 15 seconds | Type: Shapeshifting
  • (1st upgrade) Enhanced Blood Howl – Kills reduce the Cooldown of Blood Howl by 1 second.
  • (2nd upgrade – my pick of the 2) Innate Blood Howl Blood Howl also generates 20 Spirit.
  • (passive) Ancestral Fortitude Increase your Non-Physical Resistances by 5%/10%/15%.
    • (upgrade – ONLY put 2 points here due to not enough points left) Vigilance – You gain 5%/10%/15% Damage Reduction for 6 seconds after using a Defensive Skill.
  • (passive) did not pick other Defensive passives to save points

Companion Skills (Required Points: 11 ) I did NOT take a companion

  • (active) DID NOT TAKE a Companion active due to using already full skillbar
  • (1st upgrade)
  • (2nd upgrade – my pick of the 2)
  • (passive) did not pick any Companion passives to save points

Wrath Skills (Required Points: 16 )

  • (active – ONLY put 1 point here) Hurricane Form a hurricane around you that deals 97% (X-?) damage to surrounding enemies over 8 seconds.
    Lucky Hit Chance: 33%
    Cooldown: 20 seconds | Type: Storm Magic ; Damage: Physical
  • (1st upgrade) Enhanced Hurricane Enemies who are damaged by Hurricane are Slowed by 25% for 2 seconds.
  • (2nd upgrade – my pick of the 2)Savage Hurricane Enemies affected by Hurricane deal 20% less damage.
  • (passive) Crushing Earth Earth Skills deal 5%/10%/15% (multiplicative) increased damage to Slowed, Stunned, Immobilized or Knocked Back enemies.
    • (upgrade) Stone Guard While Fortified for over 50% of your maximum Life, your Earth Skills deal 4%/8%/12% (multiplicative) increased damage.
    • (upgrade) Safeguard Critical Strikes with Earth Skills Fortifiy you for 2%/4%/7% Base Life.
  • (passive) did not pick any other Wrath passives to save points but there are some worth considering

Ultimate Skills (Required Points: 23 )

  • (active) Petrify Petrify all Nearby enemies in stone, Stunning them for 3 seconds. You deal 25% (multiplicative) increased Critical Strike Damage to enemies affected by Petrify.
    Type: Earth Magic ; Damage: Physical
    Cooldown: 60 seconds
  • (1st upgrade) Prime Petrify Petrify’s duration is increased by 1 seconds.
  • (2nd upgrade) Supreme Petrify Killing an enemy affected by Petrify grants 25 Spirit.
  • (passive) Defiance Nature Magic skills deal 4% (multiplicative) increased damage to Elites.
    • (upgrade) Natural Disaster Your Earth Skills deal 4%/8%/12% (multiplicative) increased damage to Vulnerable enemies. Your Storm Skills deal 4%/8%/12% (multiplicative) increased damage to enemies that are Stunned, Immobilized, or Knocked Back.
    • (upgrade – did NOT pick to save points) Circle of Life Nature Magic skills that consume Spirit restore 1%/2%/3% of your maximum Life.
    • (upgrade) Resonance Nature Magic Skills deal 2%/4%/6% (multiplicative) increased damage. Triple this bonus if an Earth Skill is the next Skill cast after a Storm Skill, or a Storm Skill is the next Skill cast after an Earth Skill.
  • (passive) Defensive Posture – Increases the amount of Fortify you gain from all sources by +5%/+10%/+15%.
    • (upgrade – did NOT pick to save points) Thick Hide
    • (upgrade) Nature’s Resolve – 5%/10%/15% chance when struck to Fortify you for 4% Base Life.
    • (upgrade – did NOT pick to save points) Unrestrained
  • (passive) did not pick other Ultimate passives to save points

Specializations (Required Points: 33 )

  • (passive) Earthen Might – Lucky Hit: Damaging enemies with Earth Skills has up to a 5% chance to grant Earthen Might, which does:
    Restore all of your Spirit
    Cause your attacks to be guaranteed Critical Strikes for 5 seconds

    This chance is increased by: 10% for Critical Strikes 10% if the target is Stunned, Immobilized, or Knocked Back.

Class Mechanic (Spirit Boons):

The Spirit Boons system lets you pick 1 spirit Boon per bond out of 4 categories. Eventually you unlock the option to specialize into a certain bond which will let you get 2 Boons from that category. I advise using the following 2 + 1 +1 +1 for now.

  • Eagle Category: take those two
    • Scythe Talons: +5% Critical Strike Chance.
    • Avian Wrath +30% Critical Strike Damage.
  • Deer Category: take this one
    • Wariness: Take 10% reduced damage from Elites
  • Snake Category: two decent picks here so choose whichever you like based on whether you need more survivability or ultimate CDR
    • option 1) Masochistic: Critical Strikes with Shapeshifting Skills heal you for 3% of your maximum Life.
    • option 2) Calm Before the Storm: Lucky Hit: Nature Magic Skills (Earth & Storm) have up to a 15% chance to reduce the Cooldown of your Ultimate Skill by 2 seconds.
  • Wolf Category: There are also two decent picks here. Pick based on whether you need more spirit generation or more survivability.
    • option 1) Energize: Lucky Hit: Dealing damage has up to a 15% chance to restore 10 Spirit.
    • option 2) Bolster: Fortify for 10% of your Maximum Life when you use a Defensive Skill

Note: Obsidian Slam on the Snake Category is also a very interesting synergy with this build worth considering for mobbing but won’t be great on Boss fights.

Unique Items

In Diablo IV we can equip more than one unique item at the same time (not so ‘unique’ if we can get decked out in full uniques I guess). It seems that the one unique per build idea that Uniques inherited from the Mythical gear they supposedly replaced was scrapped even before the closed beta tests. My top picks will be the following two but check the notes under the Aspects list for more picks:

Insatiable Fury (Chest Armor)

Werebear form is now your true form, and you gain +2 Ranks to all Werebear Skills.

+[0.07 – 0.14] Physical Damage
+[21 – 42]% Overpower Damage
[7 – 14]% Damage Reduction while Fortified
+[0.07 – 0.14] Armor

When the Days of Ash began, the great druid Nafain reminded his disciples that nothing, not even the loss of their humanity, was too great a sacrifice to protect Túr Dúlra from Astaroth’s flames.


Vasily’s Prayer (Helm) This one’s currently broken and the Fortify it gives does not scale with level/item power so it’s only half good/half worth it.

Your Earth Skills are now also Werebear Skills and Fortify you for N.

+[7 – 14]% Damage while Shapeshifted
[24.5 – 45.5]% Lightning Resistance
[0.12 – 0.26] Maximum Life
[12 – 20] Spirit On Kill

“Roots from the Great Oak growing at the seaward statue of Vasily will, on rare occasions, be found twisted back upon themselves, suffused with ferocious magic.” – Barrett’s Book of Implements

Harlequin Crest (Helm) Right now this seems like a very good option considering how broken Vasily’s Prayer is.

Gain [5-8%] Damage Reduction. In addition, gain +[2-4] Ranks to All Skills.

[0.245 – 0.455] Maximum Life
X% Cooldown Reduction
+[42 – 70]% Crafting Material Drop Rate
[14 – 28] All Stats

“This headdress was once worn by an assassin disguised as a court mage. Her treachery was unveiled, but not before she used its magic to curse the king’s entire lineage.” – The Fall of House Aston

Sockets & Gems

There are various possible good/viable choices for the gem slots. I’ve shortlisted what works by slot. I’d recommend picking one of those:

Weps: Ruby, Emerald, Saphire, or Skull.
Armor: Ruby.
Jewelry: Diamond unless you need specific resistance more than all. Alternatively, Skull.

XYZ Diamond (Requires Level XY)

• Weapon: +N% Ultimate Skill Damage
• Armor: +N% Barrier Generation
• Jewelry: N% Resistance to All Elements

+5%/+5%/+5% for chipped (the 2nd grade at lvl 20)

XYZ Skull (Requires Level XY)

• Weapon: +N Life On Kill
• Armor: +N% Healing Received
• Jewelry: +N Armor

+13/+5%/+170 for chipped (the 2nd grade at lvl 20)

XYZ Saphire (Requires Level XY)

• Weapon: +N% Critical Strike Damage to Crowd-Controlled Enemies
• Armor: N% Damage Reduction While Fortified
• Jewelry: N% Cold Resistance

+7.5%/5%/14.3% for chipped (the 2nd grade at lvl 20)

XYZ Ruby (Requires Level XY)

• Weapon: +N% Overpower Damage

• Armor: +N% Maximum Life
• Jewelry: N% Fire Resistance

+15%/+5.5%/14.3% for chipped (the 2nd grade at lvl 20)

XYZ Emerald (Requires Level XY)

• Weapon: +N% Critical Strike Damage to Vulnerable Enemies
• Armor: +N Thorns
• Jewelry: N% Poison Resistance

+7.5%/+39/14.3% for chipped (the 2nd grade at lvl 20)

XYZ Topaz (Requires Level XY)

• Weapon: +N% Basic Skill Damage
• Armor: N% Damage Reduction While Control Impaired
• Jewelry: N% Lightning Resistance

+16.7%/8.2%/14.3% for chipped (the 2nd grade at lvl 20)

Legendary Aspects / Powers

I will only list the Legendary Aspects that have been selected for the build and the slots in which I advise putting those. For in-depth information you can check my RDY-4-Launch Builds spreadsheet on this link. This build (BIG GRIZZ 3.0) is one of the builds on that spreadsheet.

  • Helm: Aspect of Mending Stone / Harlequin Crest OR Vasily’s Prayer (see notes below)
  • Amulet: Ballistic Aspect
  • Chest: Exploiter’s Aspect / Insatiable Fury (see notes below)
  • Pants: Skinwalker’s Aspect
  • Gloves: Aspect of The Ursine Horror
  • Boots: Stormshifter’s Aspect
  • Ring 1: Shockwave Aspect
  • Ring 2: Aspect of Natural Balance
  • 1H Weapon: Nighthowler’s Aspect
  • Off-hand: Aspect of Retaliation
  • 2-H Weapon: Nighthowler’s Aspect OR Aspect of Retaliation OR Aspect of Natural Balance BUT I do NOT recommend using a 2-hander
NOTES: How to re-arrange if using any of the Uniques:

- Exploiter’s Aspect stays in the Chest slot ONLY until you get the Insatiable Fury Unique Chest Armor.  For after that just discard it from the build. 
- For Vasily's Prayer (Helm): Aspect of Mending Stone gets removed from the Helm slot to make room for the Unique Helm.
- For Harlequin Crest (Helm): Aspect of Mending Stone get removed from the Helm to make room for the Unique Helm.
- For Eyes in the Dark (Pants): Aspect of Control gets removed from the Ring 1 slot to make room for the Unique Ring. 

ALTERNATIVE: ALTERNATIVE: If you decide to use Mother's Embrace (Ring) in the build, you will need to sacrifice one more aspect and it may be hurting the build to loose any of the remaining aspects once you have the Helmet and Chest slots filled up with Uniques. Up to you to decide which on is okay to sacrifice for that Unique ring.

Paragon Boards:

Use the links below to check the paragon boards selected and the nodes I’ve taken. One link is for what the boards will look like at lvl 88 with 175 paragon points (so more paragon points will be obtained on the way to 100). The other link is what the boards will look like when fully maxed out on paragon points but i did leave the last 1 up to you to spend.

Suggested Gear Rolls to look out for (NOT in order of priority):

I’ve shortlisted 45 different affixes that work well with the build of almost 300 total. I’ll highlight in Orange the ones I think should get higher priority

Suggested Gear Rolls to look out for
(NOT in order of priority)
+ X% Damage
Critical Strike Chance/Critical Damage Bonus
Critical Chance / Critical Damage with Physical/Earth Skills
Critical Chance/Critical Damage with Core/Werebear/Shapeshifting/Nature/Storm Skills
Damage with Core/Werebear/Shapeshifting/Wrath/Nature Skills
Lucky Hit Chance
+ X Ranks to Core/Werebear/Shapeshifting/Wrath/Defensive/Nature/Storm Skills
+ X Ranks to Pulverize
Overpower Damage
+ Intelligence, + Dexterity, + Willpower
+ All Stats
+ Maximum Life
Spirit Generation / Regeneration / On Kill
Resource/Spirit Cost Reduction
Cooldown Reduction
Earth/Storm Skills Cooldown Reduction
Physical/Earth Damage Bonus
Lucky Hit Chance with Physical/Earth Damage
Resistance to All Elements
+ % Critical Chance / Critical Damage with Physical/Earth Damage
+ % Physical/Earth Damage to Elites
+ % Critical Strike Chance with Physical/Earth Damage Against Elites
+ % Damage for X Seconds After Killing an Elite
Damage Reduction for X Seconds After Killing an Elite
Damage Reduction from Elites
Damage / Critical Chance / Critical Damage Against Close Enemies
Damage / Critical Chance / Critical Damage Against Crowd Controlled Enemies
Vulnerable Damage
Damage / Critical Chance / Critical Damage Against Vulnerable Enemies
Damage while Shapeshifted
Damage while in Werebear Form
Damage while Healthy
Fortify Generation
Damage while Fortified
Chance When Struck to Fortify for X Life
Movement Speed
Higher Priority
Damage vs Injured Enemies
Lucky Hit: Up to a +X% Chance to Execute Injured Non-Elites
Critical Strike Chance Against Injured Enemies
Damage vs Healthy Enemies
Weapon Damage (not sure if there are any bonuses to that as rolls)
Attack Speed
Lower Priority

Useful Links (Spreadsheets & more):

For all of my Diablo IV RDY-4-Launch Theorycrafts/Builds: This Spreadsheet

For my Diablo IV Pre-Launch Class Skill Trees (can be used as mini-calculator): This Spreadsheet

For all of my Diablo IV Pre-Launch Theorycrafts/Builds: This Spreadsheet

♦ ◊ ♦ ◊ ♦

This concludes the BIG GRIZZ 3.0 Druid Build for Diablo IV. If you’re interested in the game below are links to the various platforms where one can buy it (you can just click the links to open a new tab):

PC (Battle.Net)

XBOX

PlayStation

Official Website

Icy Death Rogue Build for Diablo IV [S Tier Grade]

Icy Death Rogue BUILD for Diablo IV [S Tier Grade]

(Emerging from the Shadows & entrapping your foes to a Cold Death)

♦ ◊ ♦ ◊ ♦

Diablo IV launched on June 6th, 2023 for PC (Battle.Net), XBOX, & PlayStation) and I’ve had my fair share of playing and testing done. I’m now ready to start making full Builds/Theorycrafts that work for both ‘fresh-into-endgame’ characters as well as late endgame. I’ll evolve & keep them updated when we get major rebalance updates. This is one such build for the Rogue Class called Icy Death.

I’ve also made spreadsheets for my builds (see the links below) that have shortlisted the active and passive skills + legendary aspect + unique item + gems & sockets + suggested stat rolls + paragon boards that work well with the build which you can use to tinker. Alternatively, I’ve added build calculator links (mostly needed for the paragons)

This build will be updated when needed.

Video Version:

Skill Trees

Below you’ll see ONLY the Active & Passive skills that were selected for this build. For additional skills that can be taken + alternative skill options, you can check my RDY-4-Launch Builds spreadsheet on this link. This build (Icy Death) is one of the builds on that spreadsheet.

Basic Skill (Resource Generator/Builder) (Required Points: 0 )

  • (active – ONLY put 1 point here) Puncture Throw blades a short distance, dealing 21% (X – ?) damage. Every 3rd cast Slows enemies by 2 seconds. Critical Strikes will always Slow.
    Requires Dual Wielded Weapons.
    Lucky Hit Chance: 50% | Damage: Physical ; Tags: Basic, Ranged, Marksman
    • (1st upgrade) Enhanced Puncture Gain 2 Energy when Puncture damages a Crowd Controlled enemy.
    • (2nd upgrade – my pick of the 2) Fundamental Puncture Puncture now throws 3 blades in a spread, each dealing 35% of its Base damage. Hitting an enemy with at least 2 blades at once makes them Vulnerable for 2 seconds.

Core Skill(s) (Resource Spender) (Required Points: 2 )

  • (active) Flurry Unleash a flurry of stabs and slashes, striking enemies in front of you 4 times and dealing a total of 60% (X – ?) damage to each.
    Combo Points increase damage and grant an Attack Speed bonus:
    1: 75% damage, +15% Attack Speed ;
    2: 90% damage, +30% Attack Speed ;
    3: 105% damage, +45% Attack Speed
    Requires Dual Wielded weapons
    Energy Cost: 25 | Lucky Hit Chance: 8% | Damage: Physical ; Tags: Core, Melee, Imbueable, Cutthroat
    • (1st upgrade) Enhanced Flurry Each time Flurry damages a Crowd Controlled or Vulnerable enemy, you are Healed for 1% of your Maximum Life, up to 12% Maximum Life per cast.
    • (2nd upgrade – my pick of the 2) Improved Flurry If Flurry hits any Vulnerable enemy it will make all enemies hit by that cast Vulnerable for 3 seconds.
  • (passive) Sturdy You gain 4%/8%/12% Close Damage Reduction.
    • (upgrade) Siphoning Strikes Heal for 1%/2%/3% of your Maximum Life when you Critically Strike Close enemies.
  • (passive – ONLY put 2 points here) Stutter Step – Critically Striking an enemy grants +5%/+10%/+15% Movement Speed for 4 seconds.
  • (passive) did not pick any other Core passives to save points

Agility Skills (Required Points: 6 )

  • (active)
    • (1st upgrade)
    • (2nd upgrade – my pick of the 2)
  • (passive) Weapon Mastery Gain a bonus when attacking based on weapon type:
    Daggers: 5%/10%/15% (multiplicative) increased damage to Healthy enemies.
    Swords: 3%/6%/9% (multiplicative) increased damage.
    Bows: 4%/8%/12% (multiplicative) increased damage to Vulnerable enemies.
    Crossbows: 5%/10%/15% (multiplicative) increased Critical Strike Damage.
  • (passive) did not pick other Agility passives to save points

Subterfuge Skills (Required Points: 11 ) Not taking an Active Subterfuge skill

  • (active – ONLY put 1 point here) Vanish from sight, gaining an advanced form of Stealth for 4 seconds tat will no be removed by taking damage. Concealment also makes you Unstoppable, grants +30% Movement Speed, and allows you to move freely through enemies for its duration. Using an attack Skill during Concealment will break Concealment .
    Cooldown: 20 seconds. Tags: Subterfuge
    • (1st upgrade) Enhanced Stealth You gain 40 Energy when you enter Stealth.
    • (2nd upgrade – my pick of the 2) Countering Stealth The Skill that breaks Concealment will always be a guaranteed Critical Strike.
  • (active – ONLY put 1 point here) Dark Shroud Surround yourself with up to 5 protective shadows. Gain 8% Damage Reduction per active shadow. Each time you take direct damage, that damage is reduced and a shadow is consumed
    Cooldown: 20 seconds. Tags: Subterfuge
    • (1st upgrade) Enhanced Dark Shroud Dark Shroud’s shadows have a 8% chance to not be consumed
    • (2nd upgrade – my pick of the 2) Countering Dark Shroud While you have at least 2 active shadow from Dark Shroud, gain +10% Critical Strike Chance.
  • (passive) Exploit – You deal 6%/12%/18% (multiplicative) increased damage to Healthy and Injured enemies.
    • (upgrade) Malice – You deal 3%/6%/9% (multiplicative) increased damage to Vulnerable enemies.
  • (passive) did not pick other Subterfuge passives to save points

Imbuements Skills (Required Points: 16 )

  • (active – ONLY put 1 point here) Cold Imbuement Imbue your weapons with frigid energies. Your next 2 Imbueable Skills deal Cold damage and Chill enemies for 25% per hit.
    Cooldown: 9 seconds. Lucky Hit Chance: 33% | Damage: Shadow ; Tags: Imbuements
    • (1st upgrade) Enhanced Cold Imbuement Cold Imbued Skills have up to a 30% chance to make enemies Vulnerable for 3 seconds.
    • (2nd upgrade – my pick of the 2) Mixed Cold Imbuement Cold Imbued Skills deal 20% (multiplicative) damage to Crowd Controlled enemies. Double this bonus against Frozen enemies.
  • (passive) Precision Imbuement – Imbued Skills gain +5%/+10%/+15% increased Critical Strike Chance.
  • (passive) Frigid Finesse You deal 5%/10%/15% (multiplicative) increased damage to Chilled enemies. This bonus increases to 10%/20%/30% (multiplicative) against Frozen enemies.
    • (upgrade – did NOT put points here) Chilling Weight
  • (passive) did not pick other Imbuements passives to save points

Ultimate Skills (Required Points: 23 )

  • (active) Death Trap Place a trap that arms after 1.25 seconds. It activates when an enemy moves near, dealing 250% (X – ?) damage to enemies in the area.
    Cooldown: 50 seconds. Lucky Hit Chance: 4% | Damage: Shadow ; Tags: Ultimate, Trap
    • (1st upgrade) Prime Death Trap Enemies are Pulled into Death Trap when it activates.
    • (2nd upgrade – my pick of the 2) Supreme Death Trap If Death Trap kills an enemy, its Cooldown is reduced by 10 seconds.
  • (passive) Innervation – Lucky Hit: Up to a 10%/20%/30% chance to gain 8 Energy.
    • (upgrade) Second Wind did NOT put point into this
    • (upgrade) Alchemist’s FortuneNon-Physical damage you deal has a +5%/+10%/+15% increased Lucky Hit Chance.
  • (passive) Aftermath – After using an Ultimate Skill, restore 25/50/75 Energy.
  • (passive) Trap Mastery When Poison Trap or Death Trap activates, you gain +4%/+8%/+12% increased Critical Strike Chance against Vulnerable and Crowd Controlled enemies for 4 seconds.
  • (passive) did not pick other Ultimate passives to save points

Key Passive (Required Points: 33 )

  • (passive) Momentum – Cutthroat Skills grant a stack of Momentum for 8 seconds if they either:
    Hit a Stunned, Dazed, or Frozen enemy
    Hit any enemy from behind

    While at 3 stacks of Momentum, you gain:
    20% increased Damage Reduction
    30% (multiplicative) increased Energy Regeneration
    +15% increased Movement Speed

Class Mechanic (Specializations):

I don’t have much information about the 3rd Specialization of the Rogue. The 3 Specializations are the Rogues’ Class Mechanics:

  • Combo Points – Your Basic Skills now generate Combo Points. Core Skills consume Combo Points for additional effects.
  • Inner Sight – Attack marked enemies to fill up your Inner Sight gauge. When it’s full, gain unlimited Energy for 4 seconds.
  • Preparation – Every 100 Energy you spend reduces your Ultimate Skill’s Cooldown by 4 seconds. Using an Ultimate Skill resets the Cooldowns of your other Skills..

I prefer and advise using Preparation for this build. However, Combo Points is an amazing syenrgy with Flurry, especially if you take the Cunning Stratagem Paragon Node.

Unique Items

In Diablo IV apparently (I have multiple sources that confirmed this) we can equip more than one unique item at the same time (not so ‘unique’ if we can get decked out in full uniques I guess). It seems that the one unique per build idea that Unique inherited from the Mythical gear they supposedly replaced was scrapped even before the closed beta tests. My top picks will be the following two but check the notes under the Aspects list for more picks:

Eyes in the Dark (Pants)

While Injured, Your Potion Also Grants [30%] Movement Speed for 2 Seconds

Unless it hits a Boss or Player, Death Trap will continue to re-arm itself until it kills an enemy. However, Death Trap‘s Cooldown is increased by [15 – 30]%.

[3.1 – 7.3]% Dodge Chance
+[0.07 – 0.14] Shadow Damage
+[16.5 – 23.5]% Damage to Elites
+[7 – 14]% Damage to Trapped Enemies

“And so, when the sun dipped behind the hills each night, he knew that Ashen Jack would soon be near. Watching, and waiting.” – Greenslade’s Tales, Chapter 2: “Each Long Night”

Harlequin Crest (Helm)

Gain [5-8%] Damage Reduction. In addition, gain +2 Ranks to All Skills.

[0.245 – 0.455] Maximum Life
X% Cooldown Reduction
+[42 – 70]% Crafting Material Drop Rate
[14 – 28] All Stats

“This headdress was once worn by an assassin disguised as a court mage. Her treachery was unveiled, but not before she used its magic to curse the king’s entire lineage.” – The Fall of House Aston

Sockets & Gems

There are various possible good/viable choices for the gem slots. I’ve shortlisted what works by slot. I’d recommend picking one of those:

Weps: Emerald, Saphire, Ruby, Diamond, or Skull.
Armor: Ruby.
Jewelry: Diamond unless you need specific resistance more than all.

XYZ Diamond (Requires Level XY)

• Weapon: +N% Ultimate Skill Damage
• Armor: +N% Barrier Generation
• Jewelry: N% Resistance to All Elements

+5%/+5%/+5% for chipped (the 2nd grade at lvl 20)

XYZ Skull (Requires Level XY)

• Weapon: +N Life On Kill
• Armor: +N% Healing Received
• Jewelry: +N Armor

+13/+5%/+170 for chipped (the 2nd grade at lvl 20)

XYZ Saphire (Requires Level XY)

• Weapon: +N% Critical Strike Damage to Crowd-Controlled Enemies
• Armor: N% Damage Reduction While Fortified
• Jewelry: N% Cold Resistance

+7.5%/5%/14.3% for chipped (the 2nd grade at lvl 20)

XYZ Ruby (Requires Level XY)

• Weapon: +N% Overpower Damage

• Armor: +N% Maximum Life
• Jewelry: N% Fire Resistance

+15%/+5.5%/14.3% for chipped (the 2nd grade at lvl 20)

XYZ Emerald (Requires Level XY)

• Weapon: +N% Critical Strike Damage to Vulnerable Enemies
• Armor: +N Thorns
• Jewelry: N% Poison Resistance

+7.5%/+39/14.3% for chipped (the 2nd grade at lvl 20)

XYZ Topaz (Requires Level XY)

• Weapon: +N% Basic Skill Damage
• Armor: N% Damage Reduction While Control Impaired
• Jewelry: N% Lightning Resistance

+16.7%/8.2%/14.3% for chipped (the 2nd grade at lvl 20)

Legendary Aspects / Powers

I will only list the Legendary Aspects that have been selected for the build and the slots in which I advise putting those. For in-depth information you can check my RDY-4-Launch Builds spreadsheet on this link. This build (Icy Death) is one of the builds on that spreadsheet.

  • Helm: Exploiter’s Aspect / Harlequin Crest (see notes below)
  • Amulet: Aspect of Stolen Vigor OR Aspect of the Crowded Sage
  • Chest: Aspect of Stolen Vigor OR Aspect of the Crowded Sage
  • Pants: Aspect of The Protector* / Eyes in the Dark (see notes below)
  • Gloves: Conceited Aspect* (only use while you have Aspect of the Protector for Barriers) / Frostburn (see notes below)
  • Boots: Ghostwalker Aspect / Exploiter’s Aspect
  • Ring 1: Aspect of Volatile Shadows
  • Ring 2: Accelerating Aspect
  • 1H Weapon: Aspect of Encircling Blades
  • Off-hand: Vengeful Aspect
  • 2-H Weapon: Smiting Aspect
NOTES: How to re-arrange if using any of the Uniques:

- Aspect of the Protector stays in the Pants slot ONLY until you get the Eyes in the Dark Unique Pants.  For after that just discard it from the build or move it to the Helm slot. If you also have the Unique Helm you're better off removing this Aspect from the build.  
- For Frostburn (Gloves): Conceited Aspect gets removed from the Gloves slot to make room for the Unique Gloves. Many (me including) may prefer Legendary Gloves for the +4 Ranks to Flurry they give but Frostburn is a pretty good synergy with the build too, especially for mobbing.
- For Harlequin Crest (Helm): Ghostwalker Aspect get removed from the Boots slot & replaced by Exploiter’s Aspect, this makes room for the Unique Helm.
- For Eyes in the Dark (Pants): Aspect of Control gets removed from the Ring 1 slot to make room for the Unique Ring. 

ALTERNATIVE: If you decide to use Doombringer (Sword) in the build, you may wanna sacrifice one of the Ring Aspects (Accelerating Aspect OR Aspect of Volatile Shadows) and move the Aspect of the weapon/off-hand that Doombringer Replaces on that Ring slot.

Paragon Boards:

Use the links below to check the paragon boards selected and the nodes I’ve taken. One link is for what the boards will look like at lvl 89 with 179 paragon points (so more paragon points will be obtained on the way to 100). The other link is what the boards will look like when fully maxed out on paragon points but i did leave the last 1 up to you to spend.

Suggested Gear Rolls to look out for (NOT in order of priority):

I’ve shortlisted 45 different affixes that work well with the build of almost 300 total. I’ll highlight in Orange the ones I think should get higher priority

Bonus to All Damage
Critical Strike Chance/Critical Damage Bonus
Critical Chance / Critical Damage with Physical/Shadow/Cold Skills
Critical Chance/Critical Damage with Core/Imbuements/Ultimate Skills
Damage with Core/Imbuements/Ultimate Skills
Lucky Hit Chance
+ X Ranks to Core/Imbuements/Ultimate Skills or to Flurry
Lucky Hit Chance with Physical/Shadow/Cold Damage
Physical/Shadow/Cold Damage Bonus
+ % Critical Chance / Critical Damage with Physical/Shadow/Cold Damage
Resistance to All Elements
Damage to Enemies Affected by Trap Skills
+ % Physical/Shadow/Cold Damage to Elites
+ % Critical Strike Chance with Physical/Shadow/Cold Damage Against Elites
+ % Damage for X Seconds After Killing an Elite
Damage Reduction for X Seconds After Killing an Elite
Damage Reduction from Elites
Damage to Close Enemies
Critical Strike Chance Against Close Enemies
Critical Strike Damage to Close Enemies
Critical Strike Chance Against Crowd Controlled Enemies
Critical Strike Damage to Crowd Controlled Enemies
Damage to Crowd Controlled Enemies
Critical Strike Chance Against Vulnerable Enemies
Critical Strike Damage to Vulnerable Enemies
Vulnerable Damage
Damage while Healthy
Damage to Vulnerable Enemies with Imbued Skills
Critical Strike Damage with Imbued Skills
Shadow Imbued Skill Damage
Imbued Skill Damage
Imbuement Potency
Higher Priority
Damage for X Seconds After Dodging an Attack
Attack Speed for X Seconds After Dodging an Attack
Dodge Chance (both +% and x% exist)
Dodge Chance Against Close Enemies
+ All Stats
Damage vs Injured Enemies
Damage vs Healthy Enemies
Weapon Damage (not sure if there are any bonuses to that as rolls)
Energy Generation / Regeneration/ On Kill
Movement Speed
Attack Speed
Dexterity
Resource Cost Reduction
Lower Priority

Useful Links (Spreadsheets & more):

For all of my Diablo IV RDY-4-Launch Theorycrafts/Builds: This Spreadsheet

For my Diablo IV Pre-Launch Class Skill Trees (can be used as mini-calculator): This Spreadsheet

For all of my Diablo IV Pre-Launch Theorycrafts/Builds: This Spreadsheet

♦ ◊ ♦ ◊ ♦

This concludes the Icy Death Rogue Build for Diablo IV. If you’re interested in the game below are links to the various platforms where one can buy it (you can just click the links to open a new tab):

PC (Battle.Net)

XBOX

PlayStation

Official Website

Shatterer Sorcerer Build for Diablo IV [S Tier Grade]

Shatterer Sorcerer BUILD for Diablo IV [S Tier Grade]

(Freeze then Shatter your foes, along with their hopes, into an Elemental Explosion of Fire & Ice)

♦ ◊ ♦ ◊ ♦

Diablo IV launched on June 6th, 2023 for PC (Battle.Net), XBOX, & PlayStation) and I’ve had my fair share of playing and testing done. I’m now ready to start making full Builds/Theorycrafts that work for both ‘fresh-into-endgame’ characters as well as late endgame. I’ll evolve & keep them updated when we get major rebalance updates. This is one such build for the Sorcerer Class called Shatterer.

I’ve also made spreadsheets for my builds (see the links below) that have shortlisted the active and passive skills + legendary aspect + unique item + gems & sockets + suggested stat rolls + paragon boards that work well with the build which you can use to tinker. Alternatively, I’ve added build calculator links (mostly needed for the paragons)

This build will be updated when needed.

Video Version:

Skill Trees

Below you’ll see ONLY the Active & Passive skills that were selected for this build. For additional skills that can be taken + alternative skill options, you can check my RDY-4-Launch Builds spreadsheet on this link. This build (Shatterer) is one of the builds on that spreadsheet.

Minor Destruction / Basic Skill (Resource Generator/Builder) (Required Points: 0 )

  • (active) Frost Bolt – Throw a bolt of frost at an enemy, dealing 35.00% (X- ?) damage and Chilling them for 15%.
    Lucky Hit Chance: 30%
    Damage: Cold ; Tags: Basic, Frost
    Enchantment Effect: Direct damage from Skills applies up to 15% Chill.
    • (1st upgrade) Enhanced Frost Bolt Frost Bolt has a 15% chance to explode on Chilled targets, hitting nearby enemies. Chance increased by 100% against Frozen targets.
    • (2nd upgrade) Glinting Frost Bolt – Frost Bolt generates 4 Mana when hitting Chilled or Frozen.

Major Destruction / Core Skill(s) (Resource Spender) (Required Points: 2 )

  • (active) Ice Shards – Launch 5 shards that deal 25% (X-?) damage each. Deals 25% (Multiplicative) increased damage to Frozen enemies.
    Lucky Hit Chance: 25%
    Mana Cost: 30 | Damage: Cold ; Tags: Core, Frost
    Enchantment Effect: Ice Shards automatically conjure and fly towards Frozen enemies.
    • (1st upgrade) Enhanced Frozen Orb When cast above 50 Mana, Frozen Orb’s explosion damage is increased by 30% (multiplicative).
    • (2nd upgrade – my pick of the 2) Destructive Frozen Orb – Frozen Orb’s explosion restores 5 Mana when hitting a Frozen enemy.
  • (passive) did not pick any Core passives to save points

Defensive Skills (Required Points: 6 )

  • (active – ONLY put 1 point here) Teleport Transform into lightning becoming Unstoppable and surging to the target location dealing 25% (X -?) damage around you upon arrival.
    Lucky Hit Chance: 40%
    Cooldown: 11 | Damage: Lightning ; Tags: Defensive, Shock
    Enchantment Effect: Evade is replaced with a short range Teleport on a 17.0 second Cooldown.
    • (1st upgrade) Enhanced Teleport Teleport’s cooldown is decreased by 0.5 seconds per enemy hit, up to 3 seconds.
    • (2nd upgrade – my pick of the 2) Shimmering Teleport After Teleporting, you gain 30% Damage Reduction for 5 seconds.
  • (active – ONLY put 1 point here) Frost Nova Unleash a torrent of frost, Freezing enemies around you for 2 seconds. Cooldown: 15 Tags: Defensive, Frost
    Enchantment Effect Lucky Hit: Your Conjuration Skills have a 30% chance to unleash a Frost Nova when hitting enemies.
    • (1st upgrade) Enhanced Frost Nova Killing enemies Frozen by Frost Nova reduces its Cooldown by 2 seconds, up to 6 seconds per cast.
    • (2nd upgrade – my pick of the 2) Mystical Frost Nova Frost Nova makes enemies Vulnerable for 4 seconds, increased to 8 seconds against Bosses.
  • (active – ONLY put 1 point here) Flame Shield Engulf yourself in flames for 2 seconds, Burning nearby enemies for 23% (X) damage per second. While Flame Shield is active, you are Immune.
    Lucky Hit Chance: 50%
    Cooldown: 20 | Damage: Fire ; Tags: Defensive, Pyromancy
    Enchantment Effect: Flame Shield automatically activates when you take fatal damage. Can only happen once every 120 seconds.
    • (1st upgrade) Enhanced Flame Shield Flame Shield grants 25% Movement Speed while active.
    • (2nd upgrade – my pick of the 2) Shimmering Flame Shield Flame Shield Heals you for 50% of your missing Life.
  • (passive) Elemental Attunement Elemental Critical Strikes have a 5%/10%/15% chance to reset the Cooldown of one of your Defensive Skills. Can only happen once every 10 seconds.
  • (passive) did not pick any other Defensive passives to save points

Conjuration Skills (Required Points: 11 ) Not Taking any Active summons

  • (active)
    • (1st upgrade)
    • (2nd upgrade – my pick of the 2)
  • (passive – ONLY 1 point here) Align the Elements You gain 5%/10%/15% Damage reduction against Elites for each second you don’t take damage from any of these sources, up to 50%.  
    • (1st upgrade) Mana Shield did NOT take this one
    • (2nd upgrade – TOP TIER PASSIVE & MUST HAVE) Protection Using a cooldown grants 10%/20%/30% of your maximum Life as a Barrier for 5 seconds.
  • (passive) Precision Magic Your Lucky Hit Effect Chance is increased by up to 5%/10%/15%.
  • (passive) did not pick any more Conjuration passives to save points

Mastery Skills (Required Points: 16 ) Not taking an Active Mastery skill

  • (active)
    • (1st upgrade)
    • (2nd upgrade – my pick of the 2)
  • (passive) Ice Veil Your Barriers have a +5%/+10%/+15% increased duration. (Barriers absorb damage from all sources up to a specified amount.)
    • (upgrade) Snap Freeze Lucky Hit: Frost Skills have a 3%/6%/9% chance to instantly Freeze.
    • (upgrade) Cold front While you have a Barrier active, you apply 8%/16%/24% (multiplicative) more Chill.

Ultimate Skills (Required Points: 23 )

  • (active) Inferno Summon a fiery serpent that continually constricts the target area, Burning enemies for 295% damage over 8 seconds.
    Lucky Hit Chance: 38%
    Cooldown: 45 | Damage: Fire ; Tags: Ultimate, Pyromancy
    • (1st upgrade) Prime Inferno Inferno repeatedly Pulls enemies to its center.
    • (2nd upgrade) NOT TAKING THIS AS IT’S USELESS TO US!!!
  • (passive) Permafrost Frost Skills deal 5%/10%/15% (multiplicative) increased damage to Elites.
    • (upgrade) Icy Touch You deal 4%/8%/12% (multiplicative) increased damage to Vulnerable enemies.
    • (upgrade) Hoarfrost You deal 3%/6%/9% (multiplicative) increased damage to Chilled enemies, and 6%/12%/18% (multiplicative) increased damage to Frozen enemies.
    • (upgrade) Frigid Breeze Lucky Hit: Cold Damage against Vulnerable enemies has a 20%/40%/60% chance to generate 5 Mana.
  • (passive) did not pick any more Ultimate passives

Key Passive (Required Points: 33 )

  • (passive) Shatter After Freeze expires, enemies explode for 25% of the damage you dealt to them while Frozen.

Enchantment (Class Mechanic):

I’d recommend mix-and matching two of the following Enchantments (you’ll need at least 1 point invested or from gear in the skills):

  • My MUST HAVE Picks
    • Fireball – When you kill an enemy, they explode in a Fireball for 50% of its damage. (my ideal 1st pick @ lvl 15) NOTE that you’ll need to invest 2 points into it and its first Upgrade to get the most out of this. Ideally getting some extra ranks from gear will help too but is not as important. The skill points allocation has accounted for this so no need to worry about downgrading anything.
    • Ice Shards – Ice Shards automatically conjure and fly toward Frozen enemies. (my ideal 2nd pick @ lvl 30)
  • Good to use For Bosses:
    • Flame Shield – Flame Shield automatically activates when you take fatal damage, Can only happen once every 120 Seconds.
    • Frozen Orb – Whenever you cast a non-basic skill, you have a 20% chance to launch a Frozen Orb at a nearby enemy.
    • Frost Bolt – Direct Damage from Skills applies up to an additional 15% Chill.

Unique Items

In Diablo IV apparently (I have multiple sources that confirmed this) we can equip more than one unique item at the same time (not so ‘unique’ if we can get decked out in full uniques I guess). It seems that the one unique per build idea that Unique inherited from the Mythical gear they supposedly replaced was scrapped even before the closed beta tests. My top pick will be the following two but check the notes under the Aspects list for more picks:

Iceheart Brais (Pants)

While Injured, Your Potion Also Restores [30%] Resource Enemies that die while Frozen have a [11 – 20]% chance to unleash a Frost Nova.

[28 – 42] Intelligence
+[7 – 14]% Damage to Frozen Enemies
+[21 – 35]% Damage to Injured Enemies
+[7 – 14]% Freeze Duration


The mad artisan saw his fingers turn black from frostbite as he worked the cloth, but refused to stay the needle and thread for even a moment.

Frostburn (Gloves)

Lucky Hit: Up to a [15 – 25]% chance to Freeze enemies for 2 seconds.

+[3 – 8]% Critical Strike Chance
+[0.07 – 0.14] Cold Damage
+[7 – 14]% Freeze Duration
Lucky Hit: Up to a 5% Chance to Restore +[14 – 28]% Primary Resource

A touch so frigid it stops the heart and chills the very soul.

Sockets & Gems

There are various possible good/viable choices for the gem slots. I’ve shortlisted what works by slot. I’d recommend picking one of those:

Weps: Emerald, Saphire, Ruby, Diamond, or Skull.
Armor: Ruby, Diamond, or Skull.
Jewelry: Diamond unless you need specific resistance more than all.

XYZ Diamond (Requires Level XY)

• Weapon: +N% Ultimate Skill Damage
• Armor: +N% Barrier Generation
• Jewelry: N% Resistance to All Elements

+5%/+5%/+5% for chipped (the 2nd grade at lvl 20)

XYZ Skull (Requires Level XY)

• Weapon: +N Life On Kill
• Armor: +N% Healing Received
• Jewelry: +N Armor

+13/+5%/+170 for chipped (the 2nd grade at lvl 20)

XYZ Saphire (Requires Level XY)

• Weapon: +N% Critical Strike Damage to Crowd-Controlled Enemies
• Armor: N% Damage Reduction While Fortified
• Jewelry: N% Cold Resistance

+7.5%/5%/14.3% for chipped (the 2nd grade at lvl 20)

XYZ Ruby (Requires Level XY)

• Weapon: +N% Overpower Damage

• Armor: +N% Maximum Life
• Jewelry: N% Fire Resistance

+15%/+5.5%/14.3% for chipped (the 2nd grade at lvl 20)

XYZ Emerald (Requires Level XY)

• Weapon: +N% Critical Strike Damage to Vulnerable Enemies
• Armor: +N Thorns
• Jewelry: N% Poison Resistance

+7.5%/+39/14.3% for chipped (the 2nd grade at lvl 20)

XYZ Topaz (Requires Level XY)

• Weapon: +N% Basic Skill Damage
• Armor: N% Damage Reduction While Control Impaired
• Jewelry: N% Lightning Resistance

+16.7%/8.2%/14.3% for chipped (the 2nd grade at lvl 20)

Legendary Aspects / Powers

I will only list the Legendary Aspects that have been selected for the build and the slots in which I advise putting those. For in-depth information you can check my RDY-4-Launch Builds spreadsheet on this link. This build (Shatterer) is one of the builds on that spreadsheet.

  • Helm: Exploiter’s Aspect / Harlequin Crest (see notes below)
  • Amulet: Unwavering Aspect
  • Chest: Frostblitz Aspect
  • Pants: Aspect of the Protector Until the Iceheart Brais Unique goes here (see notes below)
  • Gloves: Conceited Aspect / Frostburn (see notes below)
  • Boots: Aspect of Fortune
  • Ring 1: Aspect of Control / Ring of Starless Skies (see notes below)
  • Ring 2: Prodigy’s Aspect (not a must have but surely will help with spamming/bursting)
  • 1H Weapon: Aspect of Piercing Cold
  • Off-hand: Shattered Aspect
  • 2-H Weapon (if you decide to use one): I don’t recommend using a 2h weapon as the final setup with all 3 uniques as you’ll have to loose 1 more aspect slot + the CRUCIAL cooldown reduction an off-hand Focus gives and the little bit of extra dps + 100% efficiency of the aspect you put there won’t make up for it.
NOTES: How to re-arrange if using any of the Uniques:

- Aspect of the Protector stays in the Pants slot ONLY until you get the Iceheart Brais Unique Pants.  For after that just discard it from the build. 
- For Frostburn (Gloves): Conceited Aspect gets removed from the Gloves slot to make room for the Unique Gloves
- For Harlequin Crest (Helm): Exploiter’s Aspect gets removed from the Helm slot to make room for the Unique Helm.
- For Ring of Starless Skies (Ring): Aspect of Control gets removed from the Ring 1 slot to make room for the Unique Ring. ALTERNATIVE: Prodigy's Aspect from the Ring 2 slot could be the one getting replaced and you could keep Aspect of Control + Ring of Starless Skies.

Paragon Boards:

Use the links below to check the paragon boards selected and the nodes I’ve taken. One link is for what the boards will look like at lvl 92 with 184 paragon points (so more paragon points will be obtained on the way to 100). The other link is what the boards will look like when fully maxed out on paragon points but i did leave the last 12 up to you to spend on MAYBE the Icefall Legendary Node.

Suggested Gear Rolls to look out for (NOT in order of priority):

I’ve shortlisted 42 different affixes that work well with the build of almost 300 total. I’ll highlight in Orange the ones I think should get higher priority

Bonus to All Damage
Critical Strike Chance / Critical Damage Bonus
Critical Chance / Critical Damage with Frost/Cold Skills
Critical Chance / Critical Damage with Core/Ultimate/Basic/Defensive Skills
Damage with Core/Ultimate/Basic/Defensive Skills
Lucky Hit Chance
+ Ranks to Core/Ultimate/Basic/Defensive Skills
+ Ranks to Ice Shards/Frost Nova/Flame Shield/Teleport Skills
Lucky Hit Chance with Frost/Cold Damage
Frost/Cold Damage Bonus
+ % Critical Chance / Critical Damage with Frost/Cold Damage
Resistance to All Elements
+ % Chill Application
+ % Frost/Cold Damage to Elites
+ % Critical Strike Chance with Frost/Cold Damage Against Elites
+ % Damage for X Seconds After Killing an Elite
Damage Reduction for X Seconds After Killing an Elite
Damage Reduction from Elites
Damage to Close Enemies
Critical Chance / Damage Against Close Enemies
Damage to Crowd Controlled Enemies
Critical Chance / Damage Against Crowd Controlled Enemies
Damage to Vulnerable Enemies
Critical Chance / Damage Against Vulnerable Enemies
Vulnerable Damage
Damage while Healthy
Barrier Generation
Chance When Struck to Gain N Life as Barrier for X Seconds
Lucky Hit Chance while You Have a Barrier
Damage Reduction while You Have a Barrier
Life as Barrier On Kill
Critical Strike Chance Against Chilled/Frozen Enemies
Damage to Chilled/Frozen Enemies
Higher Priority
+ All Stats
Damage vs Injured Enemies
Damage vs Healthy Enemies
Weapon Damage (not sure if there are any bonuses to that as rolls)
Mana Generation / Regeneration/ On Kill
Movement Speed
Attack Speed
Intelligence
Resource Cost Reduction
Lower Priority

Useful Links (Spreadsheets & more):

For all of my Diablo IV RDY-4-Launch Theorycrafts/Builds: This Spreadsheet

For my Diablo IV Pre-Launch Class Skill Trees (can be used as mini-calculator): This Spreadsheet

For all of my Diablo IV Pre-Launch Theorycrafts/Builds: This Spreadsheet

♦ ◊ ♦ ◊ ♦

This concludes the Shatterer Sorcerer Build for Diablo IV. If you’re interested in the game below are links to the various platforms where one can buy it (you can just click the links to open a new tab):

PC (Battle.Net)

XBOX

PlayStation

Official Website

Quake Stomp Diablo IV Barbarian Build [RDY-4-Launch]

Quake Stomp Barbarian BUILD for Diablo IV [RDY-4-Launch]

(It’s HAMMER TIME! Do the Sanctuary Shake® with constant Stomps and Leaps that make the ground Quake.)

♦ ◊ ♦ ◊ ♦

Diablo IV launches on June 6th, 2023 for PC (Battle.Net), XBOX, & PlayStation with a 4 days Early Access (no wipe) for pre-orders (so kind of really launching June 2nd).

Diablo IV‘s Launch in less a week and I’m bringing you my 25th Ready-For-Launch full Builds/Theorycrafts that should be good for both ‘fresh-into-endgame’ characters as well as late endgame. I also plan to evolve them further when the game is released & keep them updated when we get rebalance updates. This is one such build for the Barbarian Class called Quake Stomp.

I’ve also made spreadsheets for those builds (see the links below) that have shortlisted the active and passive skills + legendary aspects + unique gear + gems & sockets + suggested stat rolls + paragon boards that work well with the build which you can use to tinker. Alternatively, I’ve added build calculator links (mostly needed for the paragons)

This build will be updated post-launch to a new & expanded version when I have more in-game information as reference.

Video Version:

Skill Trees:

Below you’ll see ONLY the Active & Passive skills that were selected for this build. For additional skills that can be taken + alternative skill options, you can check my RDY-4-Launch Builds spreadsheet on this link. This build (Quake Stomp) is one of the builds on that spreadsheet.

Basic Skill (Resource Generator/Builder) (Required Points: 0 )

  • (active – ONLY put 1 point here) Bash Bash the enemy with your weapon, dealing 30% (X – ?) damage. After bashing enemies 4 times, your next Bash will Stun for 1.25 seconds, this increases to 2 seconds if using a Two-Handed weapon.
    Requires bludgeoning weapon. Generate Fury: 10
    Lucky Hit Chance: 50% | Damage: Physical ; Tags: Basic,
    • (1st upgrade) Enhanced Bash Damaging a Stunned enemy with Bash grants you 5% Base Life as Fortify. Double this amount when using a Two-Handed weapon.
    • (2nd upgrade – my pick of the 2) Combat Bash After Critically Striking 4 times with Bash using a Two-Handed weapon, your next Core or Weapon Mastery Skill will Overpower.

Core Skill(s) (Resource Spender) (Required Points: 2 )

  • (active) Hammer of the Ancients Slam your hammer down with the fury of the Ancients, dealing 50% X – ?) damage to a concentrated area.
    Requires a two-handed bludgeoning weapon. Fury Cost: 35
    Lucky Hit Chance: 40% | Damage: Physical ; Tags: Core,
    • (1st upgrade) Enhanced Hammer of the Ancients Gain 3% (multiplicative) more Fury for 5 seconds for each enemy damaged by Hammer of the Ancients, stacking up to 10 times.
    • (2nd upgrade – my pick of the 2) Furious Hammer of the Ancients Hammer of the Ancients deals 1% (multiplicative) additional damage for each point of Fury you had when using it.
  • (passive) Pressure Point Lucky Hit: Your Core Skills have up to a 10%/20%/30% to make enemies Vulnerable for 2 seconds.
  • (passive) did not pick any other Core passives to save points

Defensive Skills (Required Points: 6 )

  • (active – ONLY put 1 point here) Ground Stomp Smash the ground, dealing 10% (X – ?) damage and Stunning surrounding enemies for 3 seconds.
    Cooldown: 16 seconds | Damage: Physical ; Tags: Defensive,
    • (1st upgrade) Enhanced Ground Stomp Increase Ground Stomp’s duration by 1 second.
    • (2nd upgrade – my pick of the 2) Tactical Ground Stomp Ground Stomp generates 25 Fury.
  • (active – ONLY put 1 point here) Rallying Cry Bellow a rallying cry, increasing your Movement Speed by +30% and Resource Generation by 50% (multiplicative) for 6 seconds, and Nearby allies for 3 seconds.
    Cooldown: 25 seconds | Tags: Defensive, Shout
    • (1st upgrade) Enhanced Rallying Cry Rallying Cry grants you Unstoppable while active.
    • (2nd upgrade – my pick of the 2) Tactical Rallying Cry Rallying Cry generates 25 Fury and grants you an additional 50% (multiplicative) Resource Generation.
  • (passive) Imposing Presence Gain 5%/10%/15% (multiplicative) additional Maximum Life.
    • (upgrade) Martial Vigor Damage Reduction against Elites, is increased by 4%/8%/12% (multiplicative).
  • (passive) did not pick any other Defensive passives to save points

Brawling Skills (Required Points: 11 )

  • (active – ONLY put 1 point here) Leap Leap forward and then slam down, dealing 33% (X – ?) damage and Knocking Back surrounding enemies on impact. Cooldown: 17 seconds Lucky Hit Chance: 33% Damage: Physical ; Tags: Brawling,
    • (1st upgrade) Enhanced Leap If Leap doesn’t damage any enemies, its Cooldown is reduced by 4 seconds.
    • (2nd upgrade – my pick of the 2) Power Leap If Leap damages at least one enemy, gain 40 Fury.
  • (passive) Booming Voice Shout Skill effect durations are increased by 10%/20%/30% (multiplicative).
    • (upgrade) Raid Leader – did NOT take this one
    • (upgrade) Guttural Yelldid NOT take this one
  • (passive – ONLY put 1 point here) Aggressive Resistance Gain 4%/8%/12% Damage Reduction while Berserking.
    • (upgrade) Battle Fervor When a Brawling Skill damages at least one enemy, gain Berserking for 1/2/3 second(s).
    • (upgrade) Prolific Fury While Berserking, Fury Generation is increased by 6%/12%/18% (multiplicative).
  • (passive) did not pick any other Brawling passives to save points

Weapon Mastery Skills (Required Points: 16 ) Not taking an active Weapon Mastery skill

  • (active)
    • (1st upgrade)
    • (2nd upgrade – my pick of the 2)
  • (passive) Pit Fighter You deal 3%/6%/9% (multiplicative) increased damage to Close enemies and gain 2%/4%/6% Distant Damage Reduction.
    • (upgrade) No Mercy did NOT take this one
    • (upgrade) Slaying Strike You deal 8%/15%/23% increased damage against Injured enemies.
    • (upgrade) Expose Vulnerability – did NOT take this one
  • (passive) did not pick any other Weapon Mastery passives to save points

Ultimate Skills (Required Points: 23 )

  • (active) Wrath of the Berserker Gain Berserking and Unstoppable for 5 seconds. For the next 10 seconds, dealing direct damage with Basic Skills grants Berserking for 25 seconds Cooldown: 60 seconds Lucky Hit Chance: 40% Tags: Ultimate,
    • (1st upgrade) Supreme Wrath of the Berserker While Wrath of the Berserker is active, gain +20% increased Movement Speed and increase Fury Generation by 30% (multiplicative)
    • (2nd upgrade) Prime Wrath of the Berserker While Wrath of the Berserker is active, every 50 Fury spend increases Berserk’s damage bonus by 25% (multiplicative)
  • (passive) Wallop did NOT take this one
    • (upgrade) Concussion did NOT take this one
  • (passive ) Heavy Handed While using Two-Handed weapons you deal 5%/10%/15% (multiplicative) increased Critical Strike Damage.seconds.
    • (upgrade) Brute Force – Your Overpower deals 15%/30%/45% (multiplicative) increased damage when using a Two-Handed weapon *NOTE: Unlocking this skill upgrade requires investing into either Wallop OR Heavy Handed (can still get both if you want)
  • (passive) Tempered Fury Increase your Maximum Fury by 3/6/9.
    • (upgrade) Furious Impulse did NOT take this one
    • (upgrade) Invigorating Fury – did NOT take this one
  • (passive) did not pick other Ultimate passives to save points

Specializations (Required Points: 33 )

  • (passive) Unbridled Rage Core Skills deal 135% (multiplicative) increased damage, but cost 100% (multiplicative) more Fury.

Class Mechanic:

The Barbarian class mechanics is called Arsenal and this is how I believe it works:

The Barbarian class can equip 4 weapons at the same time: a Dual-wielding set of 2x One-Handed weps + two separate Two-Handed weapons (not dual-wielding those). They switch in combat between those based on what weapon is assigned to specific skills via the class unique Arsenal System. So each skill can have its own weapon assigned to it as long as it’s one of the 4 weapons equipped. The weps you don’t actually use work as ‘stat sticks’, even any aspects slotted on them. Here are the types:

  • Dual Wielded 1-Handed Weapons on Barbarians can be either Slashing or Bludgeoning such as: Swords, Axes, or Maces. The game seems to clump all 1-Handed weapons together under the “Dual-Wielding” as far as Barbarians and their skill tags are concerned so regardless of Slashing or Bludgeoning type, a 1-Handed weapon will apparently not count as either.
  • The two slots of Two-Handed Weapons can be occupied by Slashing type weps like Swords, Axes, & Polearms and/or by Bludgeoning Maces
  • Ideally 1x 2h Slashing, 1x 2h Bludgeoning and a Dual-Wield 1h combo for the 4 weps if you go for a swap-centric build

Unique Gear:

In Diablo IV apparently (I have multiple sources that confirmed this) we can equip more than one unique item at the same time (not so ‘unique’ if we can get decked out in full uniques I guess). It seems that the one unique per build idea that Unique inherited from the Mythical gear they supposedly replaced was scrapped even before the closed beta tests. My top pick will be the following one but check the notes under the Aspects List for some additional picks:

The Grandfather (Two-Handed Sword)

+[17.5%] Critical Strike Damage

Increases your Critical Strike Damage by x[60 – 100]%. The other properties on this weapon can roll higher than normal.

+[14 – 28]% Damage
[0.245 – 0.455] Maximum Life
[20 – 36] All Stats
Ignores Durability Loss


An unbroken lineage of unwavering strength.

Sockets & Gems:

There are various possible good/viable choices for the gem slots. I’ve shortlisted what works by slot. I’d recommend picking one of those:

Weps: Emerald, Saphire, Ruby, or Skull.
Armor: Ruby, Emerald, Saphire, or Skull.
Jewelry: Diamond unless you need specific resistance more than all.

XYZ Diamond (Requires Level XY)

• Weapon: +N% Ultimate Skill Damage
• Armor: +N% Barrier Generation
• Jewelry: N% Resistance to All Elements

+5%/+5%/5% for chipped (the 2nd grade at lvl 20)

XYZ Skull (Requires Level XY)

• Weapon: +N Life On Kill
• Armor: +N% Healing Received
• Jewelry: +N Armor

+13/+5%/+170 for chipped (the 2nd grade at lvl 20)

XYZ Saphire (Requires Level XY)

• Weapon: +N% Critical Strike Damage to Crowd-Controlled Enemies
• Armor: N% Damage Reduction While Fortified
• Jewelry: N% Cold Resistance

+7.5%/5%/14.3% for chipped (the 2nd grade at lvl 20)

XYZ Ruby (Requires Level XY)

• Weapon: +N% Overpower Damage

• Armor: +N% Maximum Life
• Jewelry: N% Fire Resistance

+15%/+5.5%/14.3% for chipped (the 2nd grade at lvl 20)

XYZ Emerald (Requires Level XY)

• Weapon: +N% Critical Strike Damage to Vulnerable Enemies
• Armor: +N Thorns
• Jewelry: N% Poison Resistance

+7.5%/39/14.3% for chipped (the 2nd grade at lvl 20)

Legendary Aspects / Powers:

I will only list the Legendary Aspects that have been selected for the build and the slots in which I advise putting those. For in-depth information you can check my RDY-4-Launch Builds spreadsheet on this link. This build (Quake Stomp) is one of the builds on that spreadsheet.

  • Helm: Steadfast Berserker’s Aspect / Harlequin Crest (see notes below)
  • Amulet: Relentless Berserker’s Apect / Melted Heart of Selig (see notes below)
  • Chest: Aspect of Numbing Wrath / Exploiter’s Aspect (see notes below)
  • Pants: Aspect of Bul-Kathos
  • Gloves: Exploiter’s Aspect / Aspect of Veteran Brawler (see notes below)
  • Boots: Aspect of Perpetual Stomping
  • Ring 1: Aspect of Giant Strides
  • Ring 2: Aspect of Berserk Fury / Mother’s Embrace (see notes below)
  • 1H Weapon: Earthquake Aspect
  • Off-hand: Aspect of Limitless Rage / Ramaladni’s Magnum Opus (see notes below)
  • 2-H Weapon 1: Aspect of Ancestral Force
  • 2-H Weapon 2: Aspect of Veteran Brawler / The Grandfather (see notes below)
NOTE 1: Aspect of Veteran Brawler goes in the 2h Weapon 2 slot ONLY until you get The Grandfather Unique Two-Handed Sword. After that: Aspect of Numbing Wrath gets removed from the Chest slot & discarded. Exploiter's Aspect gets moved from the Gloves slot to the, now empty, Chest slot. Aspect of Veteran Brawler goes in the, now empty, Gloves slot to make room for the Unique Two-Handed Sword. 
There are four other alternative picks for Uniques you could use if you get those: Melted Heart of Selig (Amulet), Harlequin Crest (Helm), Mother's Embrace (Ring) & Ramaladni's Magnum Opus (Sword)
See the 2nd note below:

NOTE 2: How to re-arrange if using any of the alternative Uniques:
- For Melted Heart of Selig (Amulet): Relentless Berserker's Apect gets removed from the Amulet slot to make room for the Unique Amulet.
- For Harlequin Crest (Helm): Steadfast Berserker’s Aspect gets removed from the Helm slot to make room for the Unique Helm.
- For Mother's Embrace (Ring): Aspect of Berserk Fury gets removed from the Ring slot to make room for the Unique Ring.
- For Ramaladni's Magnum Opus (Sword): Aspect of Limitless Rage gets removed from the Off-hand slot & to make room for the Unique Sword.

Paragon Boards:

Use the links below to check the paragon boards selected and the nodes I’ve taken. One link is for what the boards will look like at lvl 83 without any paragon points from renown (so more paragon points will be obtained on the way to 100 as well as from renown. The other link will be what the boards will look like when fully maxed out on paragon points.

Suggested Gear Rolls to look out for (NOT in order of priority):

I’ve shortlisted 41 different affixes that work well with the build of almost 300 total. I’ll highlight in Orange the ones I think should get higher priority

Bonus to All Damage
Critical Strike Chance/Critical Damage Bonus
Critical Chance / Critical Damage with Physical/Slashing/Bludgeoning Skills
Critical Chance/Critical Damage with Core/Brawling/Basic/Defensive Skills
Damage with Core/Brawling/Basic/Defensive Skills
Lucky Hit Chance
+ X Ranks to Core/Brawling/Ultimate/Basic/Defensive/Shout Skills
+ X Ranks to Hammer of the Ancients/Leap/Ground Stomp/Rallying Cry/Bash
Lucky Hit Chance withPhysical/Slashing/Bludgeoning Damage
Physical/Slashing/Bludgeoning Damage Bonus
+ % Critical Chance / Critical Damage with Physical/Slashing/Bludgeoning Damage
Resistance to All Elements
Overpower Damage
+ % Physical/Slashing/Bludgeoning Damage to Elites
+ % Critical Strike Chance with Physical/Slashing/Bludgeoning Damage Against Elites
+ % Damage for X Seconds After Killing an Elite
Damage Reduction for X Seconds After Killing an Elite
Damage Reduction from Elites
Damage to Close Enemies
Critical Chance / Critical Damage Against Close Enemies
Critical Chance / Critical Damage Against Crowd Controlled Enemies
Damage to Crowd Controlled Enemies
Critical Chance / Critical Damage Against Vulnerable Enemies
Vulnerable Damage
Damage while Healthy
Fortify Generation
Damage while Fortified
Chance When Struck to Fortify for X Life
Overpower Chance
Overpower Damage with Hammer of the Ancients/Leap/Ground Stomp/Bash
Overpower Damage with Core/Brawling/Basic Skills
Overpower Damage with Slashing/2-handed/Sword/Bludgeoning/etc. Weapon
Higher Priority
+ All Stats
Damage vs Injured Enemies
Damage vs Healthy Enemies
Weapon Damage (not sure if there are any bonuses to that as rolls)
Fury Generation / Regeneration/ On Kill
Movement Speed
Attack Speed
Strength
Resource Cost Reduction
Lower Priority

Useful Links (Spreadsheets & more):

For all of my Diablo IV RDY-4-Launch Theorycrafts/Builds: This Spreadsheet

For my Diablo IV Pre-Launch Class Skill Trees (can be used as mini-calculator): This Spreadsheet

For all of my Diablo IV Pre-Launch Theorycrafts/Builds: This Spreadsheet

♦ ◊ ♦ ◊ ♦

This concludes the Quake Stomp Barbarian Build for Diablo IV. If you’re interested in the game below are links to the various platforms where one can buy it (you can just click the links to open a new tab):

PC (Battle.Net)

XBOX

PlayStation

Official Website.