Mistplosion Diablo IV Necromancer Build [RDY-4-Launch]

Mistplosion Necromancer BUILD for Diablo IV [RDY-4-Launch]

(Turn to Mist & turn your fallen foes’ corpses into an explosive bloody spectacle. Death is Your Fuel!)

♦ ◊ ♦ ◊ ♦

Diablo IV launches on June 6th, 2023 for PC (Battle.Net), XBOX, & PlayStation with a 4 days Early Access (no wipe) for pre-orders (so kind of really launching June 2nd).

Diablo IV‘s Launch is getting closer and it’s time to make some Ready-For-Launch full Builds/Theorycrafts that should be good for both ‘fresh-into-endgame’ characters as well as late endgame. I’ also plan to evolve them further when the game is released & keep them updated when we get rebalance updates. This is one such build for the Necromancer Class called Mistplosion.

I’ve also made spreadsheets for those builds (see the links below) that have shortlisted the active and passive skills + legendary aspect + unique item + gems & sockets + suggested stat rolls + paragon boards that work well with the build which you can use to tinker. Alternatively, i’ve added build calculator links (mostly needed for the paragons)

This build will be updated post-launch to a new & expanded version when I have more in-game information as reference.

Video Version:

Skill Trees

Below you’ll see ONLY the Active & Passive skills that were selected for this build. For additional skills that can be taken + alternative skill options, you can check my RDY-4-Launch Builds spreadsheet on this link. This build (Mistplosion) is one of the builds on that spreadsheet.

Basic Skill (Resource Generator/Builder) (Required Points: 0 ) Only used temporarily

  • (active) Hemorrhage – Burst an enemy’s blood, dealing 25% (X-XX) damage. Hemorrhage has 20% chance to form a Blood Orb. Lucky Hit Chance: 40% Generates: 7 Essence Damage: Physical ; Tags: Basic, Blood
    • (1st upgrade) Enhanced Hemorrhage After picking up a Blood Orb, your next Hemorrhage also hits nearby enemies and grants 2 additional essence per enemy hit
    • (2nd upgrade – don’t need any of the 2 but temporary you can use ) Initiate’s Hemorrhage Hemorrhage grants 1.6% Base Life as Fortify each time it hits an enemy, and has a 1.5% chance per enemy hit to Fortify you for 100% Base Life.

Core Skill(s) (Resource Spender) (Required Points: 2 )

  • (active) Blood Surge Draw blood from enemies, dealing 20% (X-?) damage, and expel a blood nova, dealing 50% (X-?) damage. Blood Surge’s nova damage is increased by 10% (multiplicative) per enemy drained, up to 50% (multiplicative). Lucky Hit Chance: 20% Essence Cost: 30 Damage: Physical ; Tags: Core, Blood
    • (1st upgrade) Enhanced Blood Surge Blood Surge heals you for 1% of your maximum Life when drawing blood from enemies. If 4 or more enemies are drawn from, then Heal for an additional 1.0% of your Maximum Life.
    • (2nd upgrade – my pick of the 2) Supernatural Blood Surge Each time an enemy is hit by Blood Surge’s nova, you are Fortified for 1% Base Life. While you have Fortify for over 50% of your Maximum Life, Blood Surge deals 20% (multiplicative) increased damage.
  • (passive) Hewed Flesh Lucky Hit: Your damage has up to a 4%/8%/12% chance to create a corpse at the target’s location.
  • (passive) DID NOT INVEST in other Core passives to save points

Macabre Skills (Required Points: 6 )

  • (active) Corpse Explosion Detonate a Corpse, dealing 75% (X-XX) damage to nearby enemies. Lucky Hit Chance: 40% Damage: Physical ; Tags: Corpse, Corruption
    • (1st upgrade) Enhanced Corpse – Corpse Explosion’s radius is increased by 15%.
    • (2nd upgrade – my pick of the 2) Plagued Corpse Explosion Corpse Explosion deals 10% (multiplicative) increased damage to enemies that are Slowed, Stunned or Vulnerable. These damage bonuses can stack.
  • (active) Blood Mist Disperse into a bloody mist, becoming Immune for 3 seconds. Your Movement Speed is reduced by 20.00% and you periodically deal 2% (X-?) damage to enemies, healing for 0.5% of your Maximum Life. Lucky Hit Chance: 9% Cooldown: 20 Seconds. Damage: Physical ; Tags: Macabre, Blood
    • (1st upgrade) Enhanced Blood Mist Casting a Skill that Overpowers reduces the cooldown of Blood Mist by 2 seconds.
    • (2nd upgrade – my pick of the 2) Ghastly Blood Mist Blood Mist leaves behind a Corpse every 0.95 seconds.
  • (passive) Grim Harvest Consuming a Corpse generates 3/6/9 Essence.
    • (upgrade) Fueled by Death You deal 4%/8%/12% (multiplicative) increased damage for 4 seconds after consuming a Corpse.
  • (passive) DID NOT INVEST in other Macabre passives to save points

Corruption Skills (Required Points: 11 )

  • (active) DID NOT TAKE a Corruption active due to using 2 minions on the skillbar
    • (1st upgrade)
    • (2nd upgrade – my pick of the 2)
  • (passive) Death’s Embrace Enemies in melee range take 2%/4%/6% (multiplicative) more damage from you and deal 3%/6%/9% less damage to you.
  • (passive) Skeletal Mage Mastery – Increase the damage and Health of your Skeletal Mages by 15%/30%/45% (multiplicative).
  • (passive) DID NOT INVEST in other Corruption passives to save points

Summoning Skills (Required Points: 16 )
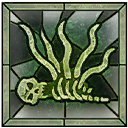
  • (active) Corpse Tendrils Veins burst out of a Corpse, pulling in enemies, Stunning them for 3 seconds, and dealing 20% (X-?) damage to them. Lucky Hit Chance: 20% Cooldown: 11.0 Seconds. Damage: Physical ; Tags: Corpse, Corruption
    • (1st upgrade) Enhanced Corpse Tendrils Enemies who are in range of Corpse Tendrils are Slowed by 50% before being pulled.
    • (2nd upgrade – my pick of the 2) Horrid Corpse Tendrils Enemies damaged by Corpse Tendrils are made Vulnerable for 3 seconds.
  • (passive – only put 1 point into this) Gruesome Mending While below 50% Life, you receive +10%/+20%/+30% more Healing from all sources.
    • (upgrade) Coalesced Blood While Healthy your Blood Skills deal 6%/12%/18% (multiplicative) increased damage. Note: Need to invest into this node to unlock BOTH Tides of Blood & Drain Vitality
    • (upgrade) Transfusion – DID NOT INVEST in this to save points
    • (upgrade) Drain Vitality Lucky Hit: Hitting enemies with Blood Skills has up to 25% chance to Fortify you for 2%/5%/8% Base Life.
    • (upgrade) Tides of Blood Your Blood Skills deal 5%/10%/15% (multiplicative) increased Overpower damage. This bonus is doubled while you are Healthy.
  • (passive) Necrotic Carapace – When a Corpse is formed from your Skills or your Minions, Fortify for 2%/4%/6% Base Life.
  • (passive) DID NOT INVEST in other Summoning passives to save points

Ultimate Skills (Required Points: 23 )

  • (active) Blood Wave Conjure a tidal wave of blood that deals 90% (X-?) damage and knocks enemies back. Lucky Hit Chance: 30% Cooldown: 50 Seconds. Damage: Physical ; Tags: Ultimate, Blood
    • (1st upgrade) Prime Blood Wave Blood Wave Slows enemies by 50% for 4 seconds.
    • (2nd upgrade) Supreme Blood Wave Blood Wave leaves behind 3 Blood Orbs as it travels.
  • (passive) DID NOT INVEST in any Ultimate passives to save points

Specializations (Required Points: 33 )

  • (passive) Rathma’s Vigor Increase your maximum Life by 10%. After being Healthy for 15 seconds, your next Blood Skill Overpowers.

Book of the Dead (Class Mechanic):

This build is all about creating as many corpses as possible and consuming them with Corpse Explosion directly or with the auto-cast via Blood Mist. For that we don’t need minions as much. However, there’s no room for a basics kill on the skillbar so we’ll use Cold Mages to generate essence in case there are no corpses nearby to consume for essence.

I’d advise taking only Cold Skeletal Mages for this build & Sacrifice the Skeletal Warriors & Golem. The types + upgrades/sacrifices are:

  • Skeletal Skirmishers: Sacrifice so that we get extra Crit Chance
    • Description: Your critical strike chance is increased by 5%, but you can no longer raise Skeletal Warriors.
  • Cold Mages: Upgrade 1 is amazing to get our Essence generation going even if we don’t have a corpse to consume to trigger the Grim Harvest passive
    • Description: Each time your Cold Mages damage enemies with their primary attack, you gain 2 essence.
  • Iron Golem: Sacrifice so that we get extra Crit Damage
    • Description: You deal 30% (multiplicative) increased critical strike damage, but you lose the ability to summon a Golem.

Unique Item

In Diablo IV apparently (I have multiple sources that confirmed this) we can equip more than one unique item at the same time (not so ‘unique’ if we can get decked out in full uniques I guess). It seems that the one unique per build idea that Unique inherited from the Mythical gear they supposedly replaced was scrapped even before the closed beta tests. My top pick will be the following one but check the notes under the Aspects list for some additional picks:

Black River (Scythe)

[0.06] Life On Kill

Corpse Explosion consumes up to 4 additional Corpses around the initial Corpse, dealing x[N] increased damage and with a +[X%] larger radius per additional Corpse.

[49 – 63] Intelligence
+[21 – 35]% Damage to Healthy Enemies
+1 Ranks of the Fueled by Death Passive
+[2 – 4] Ranks of Corpse Explosion

“The scrolls describe a river of tar that separated the living from the land of the dead. Any unfortunate soul who tried to cross would be dragged down into oblivion.” – Notes of Scholar Kamien

Sockets & Gems

There are various possible good/viable choices for the gem slots. I’ve shortlisted what works by slot. I’d recommend picking one of those:

Weps: Ruby, Saphire, Skull or Emerald.
Armor: Skull, or Saphire.
Jewelry: Diamond unless you need specific resistance more than all.

XYZ Diamond (Requires Level XY)

• Weapon: +N% Ultimate Skill Damage
• Armor: +N% Barrier Generation
• Jewelry: N% Resistance to All Elements

+5%/+5%/5 for chipped (the 2nd grade at lvl 20)

XYZ Skull (Requires Level XY)

• Weapon: +N Life On Kill
• Armor: +N% Healing Received
• Jewelry: +N Armor

+13/+5%/+170 for chipped (the 2nd grade at lvl 20)

XYZ Ruby (Requires Level XY)

• Weapon: +N% Overpower Damage
• Armor: +N% Maximum Life
• Jewelry: N% Fire Resistance

+15%/+5.5%/14.3% for chipped (the 2nd grade at lvl 20)

XYZ Emerald (Requires Level XY)

• Weapon: +N% Critical Strike Damage to Vulnerable Enemies
• Armor: +N Thorns
• Jewelry: N% Poison Resistance

+7.5%/39/14.3% for chipped (the 2nd grade at lvl 20)

XYZ Saphire (Requires Level XY)

• Weapon: +N% Critical Strike Damage to Crowd-Controlled Enemies
• Armor: N% Damage Reduction While Fortified
• Jewelry: N% Cold Resistance

+7.5%/5%/14.3% for chipped (the 2nd grade at lvl 20)

Legendary Aspects / Powers

I will only list the Legendary Aspects that have been selected for the build and the slots in which I advise putting those. For in-depth information you can check my RDY-4-Launch Builds spreadsheet on this link. This build (Mistplosion) is one of the builds on that spreadsheet.

  • Helm: Exploiter’s Aspect
  • Amulet: Aspect of Grasping Veins
  • Chest: Viscous Aspect
  • Pants: Aspect of the Embalmer
  • Gloves: Blood-bathed Aspect
  • Boots: Coldbringer’s Aspect
  • Ring 1: Aspect of Explosive Mist
  • Ring 2: Blood-soaked Aspect
  • 1H Weapon: *Edgemaster’s Aspect Until The Unique goes here (see notes below)
  • Off-hand: Cadaverous Aspect
  • 2-H Weapon (if you decide to use one): *see notes below
NOTE: Edgemaster's Aspect is a great choice to use Until The Unique goes on that 1-handed weapon slot.

NOTE 2: If you temporarily use a 2-handed weapon before you get the 1-h unique Scythe, then priority goes to Cadaverous Aspect over Edgemaster's Aspect

Paragon Boards:

Use the links below to check the paragon boards selected and the nodes I’ve taken. One link is for what the boards will look like at lvl 96 without any paragon points from renown (so more paragon points will be obtained on the way to 100 as well as from renown. The other link will be what the boards will look like when fully maxed out on paragon points.

Suggested Gear Rolls to look out for (NOT in complete order of priority):

I’ve shortlisted 33 different affixes that work well with the build of almost 300 total. I’ll highlight in Orange the ones I think should get higher priority

Bonus to All Damage
Critical Strike Chance/Critical Strike Damage Bonus
Critical Chance / Critical Damage with Blood Skills
Critical Strike Chance/Critical Strike Damage with Core/Macabre Skills
Damage with Core/Macabre Skills
Lucky Hit Chance
+ X Ranks to Core/Macabre Skills
Overpower Damage
Blood Damage Bonus
Lucky Hit Chance with Blood Damage
Resistance to All Elements
Cooldown Reduction
+ % Critical Chance / Critical Damage with Blood Damage
+ % Damage to Elites
+ % Blood Damage to Elites
Damage Upon Killing an Elite
+ % Critical Strike Chance with Blood Damage Against Elites
Damage Reduction for X Seconds After Killing an Elite
+ % Damage for X Seconds After Killing an Elite
Damage Reduction from Elites
Higher Priority
+ % Minion Damage
+ % Damage to Enemies affected by Blood DoT
+ % Minion Resistance to All Elements
+ % Minion Attack Speed
+ % Maximum Minion Life
Lucky Hit: Critical Strikes From Your Minions Have up to a 5% Chance to Reduce Enemy Damage Dealt by X% for N Seconds
Bonus: Only worth it If the minions are not nerfed too much.
+ All Stats
Damage while Healthy
Damage vs Healthy Enemies
Damage vs Injured Enemies
Damage vs Close Enemies
Weapon Damage (not sure if there are any bonuses to that as rolls)
Essence Generation
Essence Regeneration
Essence On Kill
Movement Speed
Attack Speed
Intelligence
Resource Cost Reduction
Lower Priority

Useful Links (Spreadsheets & more):

For all of my Diablo IV RDY-4-Launch Theorycrafts/Builds: This Spreadsheet

For my Diablo IV Pre-Launch Class Skill Trees (can be used as mini-calculator): This Spreadsheet

For all of my Diablo IV Pre-Launch Theorycrafts/Builds: This Spreadsheet

♦ ◊ ♦ ◊ ♦

This concludes the Mistplosion Necromancer Build for Diablo IV. If you’re interested in the game below are links to the various platforms where one can buy it (you can just click the links to open a new tab):

PC (Battle.Net)

XBOX

PlayStation

Official Website

Starfall 2.0 Diablo IV Sorcerer Build [RDY-4-Launch]

Starfall 2.0 Sorcerer BUILD for Diablo IV [RDY-4-Launch]

(make the Stars fall to scorch the earth, setting your enemies ablaze, while Hydras help finish them off)

♦ ◊ ♦ ◊ ♦

Diablo IV launches on June 6th, 2023 for PC (Battle.Net), XBOX, & PlayStation with a 4 days Early Access (no wipe) for pre-orders (so kind of really launching June 2nd).

Diablo IV‘s Launch is getting closer and it’s time to make some Ready-For-Launch full Builds/Theorycrafts that should be good for both ‘fresh-into-endgame’ characters as well as late endgame. I’ also plan to evolve them further when the game is released & keep them updated when we get rebalance updates. This is one such build for the Sorcerer Class called Starfall 2.0.

I’ve also made spreadsheets for those builds (see the links below) that have shortlisted the active and passive skills + legendary aspect + unique item + gems & sockets + suggested stat rolls + paragon boards that work well with the build which you can use to tinker. Alternatively i’ve added build calculator links (mostly needed for the paragons)

This build will be updated post-launch to a new & expanded version when I have more in-game information as reference.

Video Version:

Skill Trees

Below you’ll see ONLY the Active & Passive skills that were selected for this build. For additional skills that can be taken + alternative skill options, you can check my RDY-4-Launch Builds spreadsheet on this link. This build (Starfall 2.0) is one of the builds on that spreadsheet.

Minor Destruction / Basic Skill (Resource Generator/Builder) (Required Points: 0 )

  • (active) Fire Bolt – Hurl a flaming bolt, dealing 10.00% (X – ?) damage and Burning for 40.00% (X-?) over 8 seconds. Lucky Hit Chance: 20% Damage: Fire ; Tags: Basic, Pyromancy Enchantment Effect Direct damage from Skills applies up to an additional 23% (X – ?) Burning damage over 8 seconds.
    • (1st upgrade) Enhanced Fire Bolt Fire Bolt pierces Burning enemies
    • (2nd upgrade) Flickering Fire Bolt Fire Bolt generates 2 Mana when hitting a Burning enemy.

Major Destruction / Core Skill(s) (Resource Spender) (Required Points: 2 ) Remove Fireball after you get Meteor

  • (active – only use this until Meteor unlocks) Fireball Hurl an exploding ball of fire, dealing 60% (X- ?) damage to surrounding enemies. Lucky Hit Chance: 33% Mana Cost: 40 Damage: Fire ; Tags: Core, Pyromancy Enchantment Effect When you kill an enemy, they explode in a Fireball for 50% of its damage.
    • (1st upgrade) Enhanced Fireball Fireball’s radius is increased based on distance traveled, up to 50%.
    • (2nd upgrade – my pick of the 2) Greater Fireball Fireball deals 10% of the Burning damage you’ve applied to enemies as additional direct damage.
  • (passive) Devastation Your Maximum Mana is increased by 3/6/9.
    • (upgrade) Elemental Dominance Your Core Skills deal 4%/8%/12% (multiplicative) increased damage when case above 50 Mana
  • (passive) did not pick any other Core passives to save points

Defensive Skills (Required Points: 6 )

  • (active) Teleport Transform into lightning becoming Unstoppable and surging to the target location dealing 25% (X -?) damage around you upon arrival. Lucky Hit Chance: 40% Cooldown: 11 Damage: Lightning ; Tags: Defensive, Shock
    • (1st upgrade) Enhanced Teleport Teleport’s cooldown is decreased by 0.5 seconds per enemy hit, up to 3 seconds.
    • (2nd upgrade – my pick of the 2) Shimmering Teleport After Teleporting, you gain 30% Damage Reduction for 5 seconds.
  • (active) Flame Shield Engulf yourself in flames for 2 seconds, Burning nearby enemies for 23% (X) damage per second. While Flame Shield is active, you are Immune. Lucky Hit Chance: 50% Cooldown: 20 Damage: Fire ; Tags: Defensive, Pyromancy Enchantment Effect Flame Shield automatically activates when you take fatal damage. Can only happen once every 120 seconds.
    • (1st upgrade) Enhanced Flame Shield Flame Shield grants 25% Movement Speed while active.
    • (2nd upgrade – my pick of the 2) Shimmering Flame Shield Flame Shield Heals you for 50% of your missing Life.
  • (passive) Elemental Attunement Elemental Critical Strikes have a 5%/10%/15% chance to reset the Cooldown of one of your Defensive Skills. Can only happen once every 10 seconds.
  • (passive) did not pick any other Defensive passives to save points

Conjuration Skills (Required Points: 11 )

  • (active) Hydra Summon a 3 headed hydra for 12 seconds. Each head spits fire at a nearby enemy, dealing 30% (X – ?) damage. Lucky Hit Chance: 40% Mana Cost: 20 Damage: Fire ; Tags: Conjuration, Pyromancy Enchantment Effect After spending 300 Mana, a 5-headed Hydra spawns for 5 seconds.
    • (1st upgrade) Enhanced Hydra While Healthy, your casts of Hydra gain 1 additional head.
    • (2nd upgrade – my pick of the 2) Invoked Hydra After you Critically Strike, your Hydras gain +30% Critical Strike Chance for 3 seconds.
  • (passive – i only put 1 point here to unlock the next passives) Align the Elements You gain 5%/10%/15% Damage reduction against Elites for each second you don’t take damage from any of these sources, up to 50%.  
    • (1st upgrade) Mana Shield did NOT take this one
    • (2nd upgrade – TOP TIER PASSIVE & MUST HAVE) Protection Using a cooldown grants 10%/20%/30% of your maximum Life as a Barrier for 5 seconds.
  • (passive) Precision Magic Your Lucky Hit Effect Chance is increased by up to 5%/10%/15%.
  • (passive) did not pick any more Conjuration passives to save points

Mastery Skills (Required Points: 16 )

  • (active) Meteor Summon a meteor that strikes the target location, dealing 50% (X – ?) damage and Burning the ground for 35% (X) damage over 3 seconds. Lucky Hit Chance: 40% Mana Cost: 40 Damage: Fire ; Tags: Mastery, Pyromancy Enchantment Effect Lucky Hit: 3% (pre-launch patch: this % will be increased) chance for a Meteor to fall on enemies.
    • (1st upgrade) Enhanced Meteor If Meteor hits 3 or more enemies, there is a 30% chance an additional Meteor falls on the same location.
    • (2nd upgrade – my pick of the 2) Mage’s Meteor Meteor falls 30% faster.
  • (passive) Inner Flames Your Pyromancy Skills deal 3%/6%/9% (multiplicative) increased damage while you are Healthy.
    • (upgrade) Crippling Flames Lucky Hit: Your Pyromancy Skills have a 5%/10%/15% chance to Immobilize enemies for 2 seconds. This chance is doubled while you are Healthy.
    • (upgrade) Devouring Blaze You deal 10%/20%/30% (multiplicative) increased Critical Strike Damage against Burning enemies. If they are also Immobilized, this bonus is increased to 25%/50%/75% (multiplicative).
  • (passive) Ice Veil Your Barriers have a +5%/+10%/+15% increased duration. (Barriers absorb damage from all sources up to a specified amount.)
    • (upgrade) Snap Freezedid NOT take this one
    • (upgrade) Cold frontdid NOT take this one

Ultimate Skills (Required Points: 23 )

  • (active) Inferno Summon a fiery serpent that continually constricts the target area, Burning enemies for 295% damage over 8 seconds. Lucky Hit Chance: 38% Cooldown: 45 Damage: Fire ; Tags: Ultimate, Pyromancy
    • (1st upgrade) Prime Inferno Inferno repeatedly Pulls enemies to its center.
    • (2nd upgrade) Supreme Inferno While Inferno is active, your Pyromancy Skills cost no Mana.
  • (passive) Fiery Surge Killing a Burning enemy increases your Mana Regeneration by +10%/+20%/+30% for 3 seconds.
    • (upgrade – only put 2 point into this one) Soulfire After standing still for 1.5 seconds, your Pyromancy Skills cost 5%/10%/15% less Mana.
    • (upgrade – did NOT take to save points) Endless Pyre You deal increased Burning damage to enemies for each second they remain Burning, up to 5%/10%/15% (multiplicative) after 5 seconds.
    • (upgrade) Warmth Every 1 second, you Heal for 0.3%/0.6%/0.9% of your Maximum Life for each Nearby Burning enemy. Healing increased to 0.6%/1.2%/1.8% from Bosses.

Specializations (Required Points: 33 )

  • (passive) Esu’s Ferocity Your Fire Critical Strike Damage is increased by 25% (multiplicative) against enemies above 50% Life. Your Fire Critical Strike Chance is increased by +5% against enemies below 50% Life. Killing an enemy with a Critical Strike grants both bonuses against all enemies for 3 seconds.

Enchantment (Class Mechanic):

I’d recommend mix-and matching two of the following Enchantments (you’ll need at least 1 point invested or from gear in the skills):

  • Obvious Synergies
    • Meteor – Lucky Hit: 3% chance for a Meteor to fall on enemies. (my pick)
    • Hydra – After spending 300 mana, a 5-headed Hydra appears for 5 seconds. (my pick)
    • Flame Shield – Flame Shield automatically activates when you take fatal damage, Can only happen once every 120 Seconds.
    • Fire Bolt – Direct Damage from Skills applies up to an additional 99 burning damage over 8 seconds.
  • Still good to try
    • Frost Nova – Lucky Hit: Your Conjuration Skills have a 30% chance to unleash a Frost Nova when hitting enemies. (you’ll need to put at least 1 point into this as it’s not part of the build)
    • Frozen Orb – Whenever you cast a non-basic skill, you have a 20% chance to launch a Frozen Orb at a nearby enemy.

Unique Item

In Diablo IV apparently (I have multiple sources that confirmed this) we can equip more than one unique item at the same time (not so ‘unique’ if we can get decked out in full uniques I guess). It seems that the one unique per build idea that Unique inherited from the Mythical gear they supposedly replaced was scrapped even before the closed beta tests. My top pick will be the following one but check the notes under the Aspects list for some additional picks:

Harlequin Crest (Helm)

Gain [5-8%] Damage Reduction. In addition, gain +2 Ranks to all Skills.

[0.245 – 0.455] Maximum Life
X% Cooldown Reduction
+[42 – 70]% Crafting Material Drop Rate
[14 – 28] All Stats

“This headdress was once worn by an assassin disguised as a court mage. Her treachery was unveiled, but not before she used its magic to curse the king’s entire lineage.” – The Fall of House Aston

Sockets & Gems

Full Diamonds is a good fit for most Sorc builds, including this one, and I’d recommend doing this. Alternatively, here’s the full list I’d recommend for Weps: Diamond, Skull, Saphire, Amethyst . For Armor: Diamond or Skull (or in rare cases even Ruby). For Jewelry: Diamond unless you need specific resistance more than all.

XYZ Diamond (Requires Level XY)

• Weapon: +N% Ultimate Skill Damage
• Armor: +N% Barrier Generation
• Jewelry: N% Resistance to All Elements

+5%/+5%/5 for chipped (the 2nd grade at lvl 20)

XYZ Skull (Requires Level XY)

• Weapon: +N Life On Kill
• Armor: +N% Healing Received
• Jewelry: +N Armor

+13/+5%/+170 for chipped (the 2nd grade at lvl 20)

XYZ Saphire (Requires Level XY)

• Weapon: +N% Critical Strike Damage to Crowd-Controlled Enemies
• Armor: N% Damage Reduction While Fortified
• Jewelry: N% Cold Resistance

+7.5%/5%/14.3% for chipped (the 2nd grade at lvl 20)

XYZ Amethyst (Requires Level XY)

• Weapon: +N% Damage Over Time
• Armor: N% Damage Taken Over Time Reduction
• Jewelry: N% Shadow Resistance

+5%/+8.2%/+14.3% for chipped (the 2nd grade at lvl 20)

Legendary Aspects / Powers

I will only list the Legendary Aspects that have been selected for the build and the slots in which I advise putting those. For in-depth information you can check my RDY-4-Launch Builds spreadsheet on this link. This build (Starfall 2.0) is one of the builds on that spreadsheet.

  • Helm: *Aspect of The Protector Until The Unique goes here (see note below)
  • Amulet: Aspect of Three Curses
  • Chest: Exploiter’s Aspect
  • Pants: Aspect of The Unwavering
  • Gloves: Elementalist’s Aspect
  • Boots: Aspect of Fortune
  • Ring 1: Aspect of Shattered Stars
  • Ring 2: Incendiary Aspect
  • 1H Weapon: Aspect of Ancient Flame
  • Off-hand: Aspect of Armageddon
  • 2-H Weapon (if you decide to use one): Aspect of Ancient Flame
NOTE: Use Aspect of the Protector or another Defensive / Utility aspect to your liking as a "filler" until the Harlequin Crest (a.k.a. Shako) Unique Helm drops.

Paragon Boards:

Use the links below to check the paragon boards selected and the nodes i’ve taken. One link is for what the boards will look like at lvl 90 without any paragon points from renown (so more paragon points will be obtained on the way to 100 as well as from renown). The other link will be what the boards will look like when fully maxed out on paragon points.

Suggested Gear Rolls to look out for (NOT in order of priority):

I’ve shortlisted 36 different affixes that work well with the build of almost 300 total. I’ll highlight in Orange the ones I think should get higher priority

Bonus to All Damage
Critical Strike Damage Bonus
Critical Strike Chance
Crit Chance / Critical Strike Damage with Mastery Skills
Lucky Hit Chance
Fire Damage Bonus
Fire Damage Crit Chance / Critical Strike Damage Bonus
Resistance to All Elements
Cooldown Reduction
Mastery Skill Damage
+ % Damage to Elites
+ % Fire Damage to Elites
Damage Upon Killing an Elite
+ % Critical Chance / Crit Damage with Fire Damage Against Elites
Damage Reduction for X Seconds After Killing an Elite
+ % Damage for X Seconds After Killing an Elite
Damage Reduction from Elites
Damage to Burning Enemies with Mastery Skills
Crit Chance / Critical Strike Damage to Close Enemies
Crit Chance / Critical Strike Damage to Burning Enemies
Crit Chance / Critical Strike Damage to Crowd Controlled Enemies
Damage while Healthy
Damage to Burning Enemies
Damage to Close Enemies
Damage to Crowd Controlled Enemies
High Priority
Damage vs Injured Enemies
Damage vs Healthy Enemies
Weapon Damage (not sure if there are any bonuses to that as rolls)
Energy Generation / Regeneration/ On Kill
Movement Speed
Attack Speed
Intelligence
Resource Cost Reduction
Burning Damage
Low Priority

Useful Links (Spreadsheets & more):

For all of my Diablo IV RDY-4-Launch Theorycrafts/Builds: This Spreadsheet

For my Diablo IV Pre-Launch Class Skill Trees (can be used as mini-calculator): This Spreadsheet

For all of my Diablo IV Pre-Launch Theorycrafts/Builds: This Spreadsheet

♦ ◊ ♦ ◊ ♦

This concludes the Starfall 2.0 Sorcerer Build for Diablo IV. If you’re interested in the game below are links to the various platforms where one can buy it (you can just click the links to open a new tab):

PC (Battle.Net)

XBOX

PlayStation

Official Website

Reaping Army 2.0 Diablo IV Necromancer Build [RDY-4-Launch]

Reaping Army 2.0 Necromancer BUILD for Diablo IV [RDY-4-Launch]

(control an Army of Undead and get bonuses based on the number of summoned Minions)

♦ ◊ ♦ ◊ ♦

Diablo IV launches on June 6th, 2023 for PC (Battle.Net), XBOX, & PlayStation with a 4 days Early Access (no wipe) for pre-orders (so kind of really launching June 2nd).

Diablo IV‘s Launch is getting closer and it’s time to make some Ready-For-Launch full Builds/Theorycrafts that should be good for both ‘fresh-into-endgame’ characters as well as late endgame. I’ also plan to evolve them further when the game is released & keep them updated when we get rebalance updates. This is one such build for the Necromancer Class called Reaping Army 2.0.

I’ve also made spreadsheets for those builds (see the links below) that have shortlisted the active and passive skills + legendary aspect + unique item + gems & sockets + suggested stat rolls + paragon boards that work well with the build which you can use to tinker. Alternatively i’ve added build calculator links (mostly needed for the paragons)

This build will be updated post-launch to a new & expanded version when I have more in-game information as reference.

Video Version:

Skill Trees

Below you’ll see ONLY the Active & Passive skills that were selected for this build. For additional skills that can be taken + alternative skill options, you can check my RDY-4-Launch Builds spreadsheet on this link. This build (Reaping Army 2.0) is one of the builds on that spreadsheet.

Basic Skill (Resource Generator/Builder) (Required Points: 0 )

  • (active) DecomposeTear the flesh from the enemy, dealing 30% (X) damage per second and forming a usable corpse with the flesh every 2.5 seconds. Lucky Hit Chance: 40% Generates: 7 Essence per second Damage: X ; Tags:
    • (1st upgrade) Enhanced Decompose – If an enemy dies while being Decomposed, you gain 10 Essence.
    • (2nd upgrade – my pick of the 2) Acolyte’s Decompose – You and your Minions deal 10% (multiplicative) increased damage to enemies who are being Decomposed.

Core Skill(s) (Resource Spender) (Required Points: 2 )

  • (active) Sever – A spectre of you charges forward and attacks with its scythe for 42% (X) damage then returns to you and attacks again for 21% (X-?) damage. Lucky Hit Chance: 20% Essence Cost: 20 Damage: X ; Tags:
    • (1st upgrade) Enhanced Sever – Sever damages enemies along its path for 25% of its damage.
    • (2nd upgrade – my pick of the 2) Supernatural Sever – Sever deals 2% (multiplicative) increased damage for each Minion you have upon cast.
  • (passive) Hewed Flesh Lucky Hit: Your damage has up to a 4%/8%/12% chance to create a corpse at the target’s location.
  • (passive) DID NOT INVEST in other Core passives to save points

Macabre Skills (Required Points: 6 )

  • (active) Corpse Explosion – Detonate a Corpse, dealing 75% (X-XX) damage to nearby enemies. Lucky Hit Chance: 40% Damage: X ; Tags:
    • (1st upgrade) Enhanced Corpse – Corpse Explosion’s radius is increased by 15%.
    • (2nd upgrade – my pick of the 2) Blighted Corpse Explosion – Corpse Explosion becomes a Darkness Skill and, instead of exploding, releases a vile miasma dealing 110% (X-?) Shadow Damage over 6 seconds.
  • (passive) Grim Harvest Consuming a Corpse generates 3/6/9 Essence.
    • (upgrade) Fueled by Death You deal 4%/8%/12% (multiplicative) increased damage for 4 seconds after consuming a Corpse.
  • (passive) Skeletal Warrior Mastery Increase the damage and Life of your Skeletal Warriors by 15%/30%/45% (multiplicative).
  • (passive) DID NOT INVEST in other Macabre passives to save points

Corruption Skills (Required Points: 11 )

  • (active) DID NOT TAKE a Corruption active due to using 2 minions on the skillbar
    • (1st upgrade)
    • (2nd upgrade – my pick of the 2)
  • (passive) Skeletal Mage Mastery – Increase the damage and Health of your Skeletal Mages by 15%/30%/45% (multiplicative).
  • (passive) DID NOT INVEST in other Corruption passives to save points

Summoning Skills (Required Points: 16 )

  • (active) DID NOT TAKE a Summoning active due to using 2 minions on the skillbar
    • (1st upgrade)
    • (2nd upgrade – my pick of the 2)
  • (passive) Reaper’s Pursuit – Damaging enemies with Darkness Skills increases your Movement Speed by +5%/+10%/+15% for 3 seconds.
    • (upgrade) Crippling Darkness – DID NOT INVEST in this to save points
    • (upgrade) Gloom – When you damage enemies with Darkness Skills, they take 2%/4%/6% (multiplicative) increased Shadow Damage from you and your Minions for 2 seconds, stacking up to 3 times.
    • (upgrade) Terror – Darkness Skills deal 3%/6%/9% (multiplicative) bonus damage to enemies who are Slowed, and 3%/6%/9% (multiplicative) bonus damage to enemies who are Stunned or Immobilized. These bonuses stack and apply to Shadow Damage dealt by your Minions.
  • (passive) Necrotic Carapace – When a Corpse is formed from your Skills or your Minions, Fortify for 2%/4%/6% Base Life.
  • (passive) DID NOT INVEST in other Summoning passives to save points

Ultimate Skills (Required Points: 23 )

  • (active) Army of the Dead – Call forth the deep buried dead. Volatile Skeletons emerge over the next 7 seconds that explode when around enemies, dealing 30% (X-?) damage. Lucky Hit Chance: 54% Cooldown: 90 Seconds. Damage: X ; Tags:
    • (1st upgrade) Prime Army of the Dead – When Army of the Dead’s Volatile Skeletons explode, they have 15% chance to leave behind a Corpse.
    • (2nd upgrade) Supreme Army of the Dead – Army of the Dead also raises your Skeletal Warriors and Skeletal Mages.
  • (passive) Bonded in Essence Every 5 seconds, your Skeletal Priest’s Healing will Heal your skeletons for 20%/40%/60% of their Maximum Life.
    • (upgrade) Death’s Defense Your Minions can’t lose more than 75%/50%/25% of their maximum Life from a single damage instance.
  • (passive) Golem Mastery Increase the damage and Life of your Golem by 15%/30%/45% (multiplicative).
  • (passive) Inspiring Leader After you have been Healthy for at least 4 seconds, you and your Minions gain +4%/+8%/+12% Attack Speed. (seems to need a point in Death’s Defene to unlock this)
    • (upgrade) Hellbent Commander Your Minions deal 10%/20%/30% (multiplicative) increased damage while you are near them.
  • (passive) DID NOT INVEST in other Ultimate passives to save points

Specializations (Required Points: 33 )

  • (passive) Kalan’s EdictAfter you have not taken damage in the last 3 seconds, your Minions gain +15% Attack Speed. While you have at least 7 Minions, this bonus is doubled.

Book of the Dead (Class Mechanic):

This build is all about taking as many summons as possible without sacrificing any of them for passive bonuses. I’d advise taking all minions for this build and the types + upgrades are: Skeletal Skirmishers: Upgrade 1 + Shadow Mages: Upgrade 2 + Bone Golem: Upgrade 2 (OR Iron Golem – Sacrifice):

  • Skeletal Skirmishers + Upgrade 1 so that we get and extra minion to boost the damage of Sever and other things that scale from the number of minions
    • Description: You can raise an additional Skirmisher
  • Shadow Mages + Upgrade 2 is a good dps increase & goes especially well with Minion Attack Speed bonuses
    • Description: Shadow Mages fire an additional shadow bolt every 6th attack.
  • Bone Golem + Upgrade 2 will let big boi tank for us and keep the aggro away from us oftentimes. Alternatively, if you want even more DPS, Iron Golem – Sacrifice can help
    • Description: Your Golem gains 10% maximum Life and the amount of Thorns they inherit from you is increased from 30% to 50%.

Unique Item

In Diablo IV apparently (I have multiple sources that confirmed this) we can equip more than one unique item at the same time (not so ‘unique’ if we can get decked out in full uniques I guess). It seems that the one unique per build idea that Unique inherited from the Mythical gear they supposedly replaced was scrapped even before the closed beta tests. My top pick will be the following one but check the notes under the Aspects list for some additional picks:

Ring of Mendeln (Ring)

[6 – 35]% Cold Resistance
[6 – 35]% Shadow Resistance

While you have 7 or more Minions you gain: Lucky Hit: Up to a 10% chance to empower all of your Minions, causing the next attack from each to explode for N Physical damage.

+[4 – 10]% Lucky Hit Chance
+[7 – 14]% Minion Attack Speed
[17.5 – 31.5]% Maximum Minion Life
+[0.14 – 0.28] Thorns

The signet of Mendeln ul-Diomed, the founder of the Priests of Rathma and the first Necromancer, was lost for over 3,000 years. The immense power over death held within, however, has not diminished.

Sockets & Gems

Full Diamonds is a good fit for many builds, but this one doesn’t do much barrier. I’d recommend doing for Weps: Diamond, Skull, Amethyst or Emerald. For Armor: Skull, Amethyst or Emerald. For Jewelry: Diamond unless you need specific resistance more than all.

XYZ Diamond (Requires Level XY)

• Weapon: +N% Ultimate Skill Damage
• Armor: +N% Barrier Generation
• Jewelry: N% Resistance to All Elements

+5%/+5%/5 for chipped (the 2nd grade at lvl 20)

XYZ Skull (Requires Level XY)

• Weapon: +N Life On Kill
• Armor: +N% Healing Received
• Jewelry: +N Armor

+13/+5%/+170 for chipped (the 2nd grade at lvl 20)

XYZ Amethyst (Requires Level XY)

• Weapon: +N% Damage Over Time

• Armor: N% Damage Taken Over Time Reduction
• Jewelry: N% Shadow Resistance

+5%/+8.2%/+14.3% for chipped (the 2nd grade at lvl 20)

XYZ Emerald (Requires Level XY)

• Weapon: +N% Critical Strike Damage to Vulnerable Enemies
• Armor: +N Thorns
• Jewelry: N% Poison Resistance

+7.5%/39/14.3% for chipped (the 2nd grade at lvl 20)

Legendary Aspects / Powers

I will only list the Legendary Aspects that have been selected for the build and the slots in which I advise putting those. For in-depth information you can check my RDY-4-Launch Builds spreadsheet on this link. This build (Reaping Army 2.0) is one of the builds on that spreadsheet.

  • Helm: Viscous Aspect
  • Amulet: Aspect of Empowering Reaper
  • Chest: Blood Getter’s Aspect
  • Pants: Aspect of Hardened Bones
  • Gloves: Cadaverous Aspect
  • Boots: Exploiter’s Aspect
  • Ring 1: Aspect of Frenzied Dead
  • Ring 2: *Aspect of Reanimation Until *The Unique goes here
  • 1H Weapon: Unyielding Commander’s Aspect
  • Off-hand: Rotting Aspect
  • 2-H Weapon (if you decide to use one):Unyielding Commander’s Aspect
NOTE: Aspect of Reanimation is a great choice for Until The Unique goes on that 2nd ring slot. Alternatively, you can put another Resource generation or Offensive Aspect such as: Aspect of Flesh-Rending, Requiem Aspect, Hulking Aspect, Edgemaster's Aspect, Aspect of Inner Calm 

Paragon Boards:

Use the links below to check the paragon boards selected and the nodes I’ve taken. One link is for what the boards will look like at lvl 99 without any paragon points from renown (so more paragon points will be obtained on the way to 100 as well as from renown. The other link will be what the boards will look like when fully maxed out on paragon points.

Suggested Gear Rolls to look out for (NOT in order of priority):

I’ve shortlisted 38 different affixes that work well with the build of almost 300 total. I’ll highlight in Orange the ones I think should get higher priority

Bonus to All Damage
Critical Strike Damage Bonus
Critical Strike Chance
Critical Strike Damage with Core Skills
Damage with Core Skills
Lucky Hit Chance
Shadow Damage Bonus
Shadow Critical Strike Damage Bonus
Resistance to All Elements
Cooldown Reduction
+ % Critical Strike Chance with Shadow Damage
+ % Damage to Elites
+ % Shadow Damage to Elites
Damage Upon Killing an Elite
+ % Critical Strike Chance with Shadow Damage Against Elites
Damage Reduction for X Seconds After Killing an Elite
+ % Damage for X Seconds After Killing an Elite
Damage Reduction from Elites
+ % Minion Damage
+ % Damage to Enemies affected by Shadow DoT
+ % Minion Resistance to All Elements
+ % Minion Attack Speed
+ % Maximum Minion Life
High Priority
Amplify_Damage_From_Pets_Per_Player_Percent
(Struck’s note: my guess is this is + % Minion Damage based on the player’s % Damage)
Lucky Hit: Critical Strikes From Your Minions Have up to a 5% Chance to Reduce Enemy Damage Dealt by X% for N Seconds
+ All Stats
Damage while Healthy
Damage vs Healthy Enemies
Damage vs Injured Enemies
Damage vs Close Enemies
Weapon Damage (not sure if there are any bonuses to that as rolls)
Essence Generation
Essence Regeneration
Essence On Kill
Movement Speed
Attack Speed
Intelligence
Resource Cost Reduction
Low Priority

Useful Links (Spreadsheets & more):

For all of my Diablo IV RDY-4-Launch Theorycrafts/Builds: This Spreadsheet

For my Diablo IV Pre-Launch Class Skill Trees (can be used as mini-calculator): This Spreadsheet

For all of my Diablo IV Pre-Launch Theorycrafts/Builds: This Spreadsheet

♦ ◊ ♦ ◊ ♦

This concludes the Reaping Army 2.0 Necromancer Build for Diablo IV. If you’re interested in the game below are links to the various platforms where one can buy it (you can just click the links to open a new tab):

PC (Battle.Net)

XBOX

PlayStation

Official Website

Chaining Thunder 2.0 Diablo IV Sorcerer Build [RDY-4-Launch]

Chaining Thunder 2.0 Sorcerer BUILD for Diablo IV [RDY-4-Launch]

(be the Master of Thunder & Storms that shocks & electrifies enemies while zapping around the map)

♦ ◊ ♦ ◊ ♦

Diablo IV launches on June 6th, 2023 for PC (Battle.Net), XBOX, & PlayStation with a 4 days Early Access (no wipe) for pre-orders (so kind of really launching June 2nd).

Diablo IV‘s Launch is getting closer and it’s time to make some Ready-For-Launch full Builds/Theorycrafts that should be good for both ‘fresh-into-endgame’ characters as well as late endgame. I’ also plan to evolve them further when the game is released & keep them updated when we get rebalance updates. This is one such build for the Sorcerer Class called Chaining Thunder 2.0.

I’ve also made spreadsheets for those builds (see the links below) that have shortlisted the active and passive skills + legendary aspect + unique item + gems & sockets + suggested stat rolls + paragon boards that work well with the build which you can use to tinker. Alternatively i’ve added build calculator links (mostly needed for the paragons)

This build will be updated post-launch to a new & expanded version when I have more in-game information as reference.

Video Version:

Skill Trees

Below you’ll see ONLY the Active & Passive skills that were selected for this build. For additional skills that can be taken + alternative skill options, you can check my RDY-4-Launch Builds spreadsheet on this link. This build (Chaining Thunder 2.0) is one of the builds on that spreadsheet.

Minor Destruction / Basic Skill (Resource Generator/Builder) (Required Points: 0 )

  • (active) Arc Lash – Unleash arcing lightning that shocks enemies in front of you for 42.00% (X- ?). Every 10 times Arc Lash swipes, it Stuns all enemies hit for 2 seconds. Lucky Hit Chance: 30% Damage: Lightning ; Tags: Basic, Shock
    • (1st upgrade) Enhanced Arc Lash If Arc Lash’s initial swipe Critically Strikes, it swipes and additional time.
    • (2nd upgrade – no point invested here but it’s my pick of the 2) Glinting Arc Lash Hitting a Stunned enemy with Arc Lash reduces your Cooldowns by 0.25 seconds.

Major Destruction / Core Skill(s) (Resource Spender) (Required Points: 2 )

  • (active) Chain Lightning Unleash lightning that deals 42% (X-?) damage and chains and chains between Nearby enemies and you up to 6 times. Lucky Hit Chance: 25% Mana Cost: 35 Damage: Lightning ; Tags: Core, Shock
  • (1st upgrade) Enhanced Chain Lightning Chain Lightning gains a +3% increased Critical Strike Chance per bounce.
  • (2nd upgrade – my pick of the 2) Greater Chain Lightning When Chain Lightning Critically Strikes, it has a 25% chance to form a Crackling Energy.
  • (passive) did not pick any Core passives to save points

Defensive Skills (Required Points: 6 )

  • (active) Teleport Transform into lightning becoming Unstoppable and surging to the target location dealing 25% (X -?) damage around you upon arrival. Lucky Hit Chance: 40% Cooldown: 11 Damage: Lightning ; Tags: Defensive, Shock
  • (1st upgrade) Enhanced Teleport Teleport’s cooldown is decreased by 0.5 seconds per enemy hit, up to 3 seconds.
  • (2nd upgrade – my pick of the 2) Mystical Teleport For 4 seconds after Teleporting, Crackling Energy deals 40% (multiplicative) more damage.
  • (passive) Elemental Attunement Elemental Critical Strikes have a 5%/10%/15% chance to reset the Cooldown of one of your Defensive Skills. Can only happen once every 10 seconds.
  • (passive) did not pick any other Defensive passives to save points

Conjuration Skills (Required Points: 11 )

  • (active) Lightning Spear Conjure a crackling spear of lightning that seeks out enemies for 6 seconds, dealing 15% (X – ?) damage per hit. Lucky Hit Chance: 35% Cooldown: 20 Damage: Lightning ; Tags: Conjuration, Shock
  • (1st upgrade) Enhanced Lightning Spear After Critically Striking, Lightning Spear has a 5% increased stacking Critical Strike Chance for its duration.
  • (2nd upgrade – my pick of the 2) Invoked Lightning Spear Lightning Spear Stuns enemies for 2 seconds when Critically Striking.
  • (passive – i only put 1 point here to unlock the next passives) Align the Elements You gain 5%/10%/15% Damage reduction against Elites for each second you don’t take damage from any of these sources, up to 50%.  
    • (1st upgrade – not a must have but I maxed it) Mana Shield – Every time you spend 100 Mana, you gain 5%/10%/15% Damage Reduction for 5 seconds.
    • (2nd upgrade – TOP TIER PASSIVE & MUST HAVE) Protection Using a cooldown grants 10%/20%/30% of your maximum Life as a Barrier for 5 seconds.
  • (passive) Precision Magic Your Lucky Hit Effect Chance is increased by up to 5%/10%/15%.
  • (passive) did not pick any more Conjuration passives to save points

Mastery Skills (Required Points: 16 )

  • (active – did not invest points into it but good to consider) Ball Lightning – Conjure a ball of lightning that slowly moves forward, continually zapping enemies for 18% (X -?) damage. Lucky Hit Chance: 20% Mana Cost: 50 Damage: Lightning ; Tags: Mastery, Shock
  • (1st upgrade – no need to get upgrades if only getting it for the Enchantment) Enhanced Ball Lightning Ball Lightning’s damage rate is increased by 200% of your Attack Speed Bonus.
  • (2nd upgrade – my pick of the 2) Wizard’s Ball Lightning If an enemy is hit at least 4 times by a cast of Ball Lightning, a Crackling Energy is formed. Can only happen once per cast.
  • (passive) Static Discharge Critical Strikes with Shock Skills have a 5% chance to form a Crackling Energy.
    • (upgrade) Shocking ImpactEvery time you Stun an enemy, you deal 15%/30%/45% Lightning Damage to them. [this is further boosted by the Unique Item]
    • (upgrade) Regenerative ConduitCrackling Energy restores 4/8/12 Mana upon pickup.
  • (passive) Ice Veil Your Barriers have a +5%/+10%/+15% increased duration. (Barriers absorb damage from all sources up to a specified amount.)
    • (upgrade) Snap Freezedid NOT take this one
    • (upgrade) Cold frontdid NOT take this one

Ultimate Skills (Required Points: 23 )

  • (active) Unstable Currents Lightning surges within you for 10 seconds. Whenever you cast a Shock Skill, a random Core, Conjuration, or Mastery Shock Skill is also cast. Cooldown: 70 Damage: Lightning ; Tags: Ultimate, Shock
  • (1st upgrade) Prime Unstable Currents – Unstable Currents increases your Attack Speed by +25% while active.
  • (2nd upgrade) Supreme Unstable Currents While Unstable Currents is active, Crackling Energy continually pulses and consumes no charges.
  • (passive) Coursing Currents – Hitting enemies with Shock Skills increases your Critical Strike Chance by +1%/+2%/+3%. Resets upon getting a Critical Strike.
    • (upgrade- did NOT take to save points) Conduction – Critical Strikes with Shock Skills increase your Movement Speed by +3%/+6%/+9% for 3 seconds.
    • (upgrade) Electrocution – Enemies deal 5%/10%/15% less damage for 5 seconds after being Critically Struck by your Shock Skills.
    • (upgrade) Convulsions – Lucky Hit: Shock Skills have a 3%/6%/9% chance to Stun enemies for 3 seconds.

Specializations (Required Points: 33 )

  • (passive) Overflowing Energy Crackling Energy hits 1 additional enemy. Each time Crackling Energy hits an enemy, your Shock Skill Cooldowns are reduced by 0.1 seconds, increased to 0.25 seconds against Elites.

Enchantment (Class Mechanic):

I’d recommend mix-and matching two of the following Enchantments (you’ll need at least 1 point invested or from gear in the skills):

  • Obvious Synergies
    • Chain Lightning – Chain Lightning forms automatically after spending 100 Mana. (my pick)
    • Lightning Spear – Absorbing Crackling Energy has a 10% chance to conjure a Lightning Spear. (my pick)
    • Arc Lash – When you use a Cooldown (skill with cooldown), enemies around you are Stunned for 0.5 seconds.
    • Ball Lightning – Lucky Hit: Critical Strikes have a 25% chance to spawn a static Ball Lightning. (you’ll need to put at least 1 point into this as it’s not part of the build)
  • Still good to try
    • Frost Nova – Lucky Hit: Your Conjuration Skills have a 30% chance to unleash a Frost Nova when hitting enemies. (you’ll need to put at least 1 point into this as it’s not part of the build)
    • Hydra – After spending 300 Mana, a 5-headed Hydra spawns for 5 seconds. (you’ll need to put at least 1 point into this as it’s not part of the build)

Unique Item

In Diablo IV apparently (I have multiple sources that confirmed this) we can equip more than one unique item at the same time (not so ‘unique’ if we can get decked out in full uniques I guess). It seems that the one unique per build idea that Unique inherited from the Mythical gear they supposedly replaced was scrapped even before the closed beta tests. My top pick will be the following one but check the notes under the Aspects list for some additional picks:

Esadora’s Overflowing Cameo (Amulet)

[4 – 25]% Resistance to All Elements Upon collecting Crackling Energy, there’s a 10% chance to release a lightning nova, dealing N Lightning Damage.
+[7 – 14]% Non-Physical Damage
Damage_CracklingEnergy (Struck’s note: I’m 99% sure this is +X% Damage With Crackling Energy)
+[1 – 2] Ranks of the Shocking Impact Passive
+[16.5 – 23.5]% Movement Speed

The only thing more potent than Esadora’s magic was her endless hatred of humanity. As she lay dying, the pale amulet around her neck drank in both.

Sockets & Gems

Full Diamonds is a good fit for most builds, including this one, and I’d recommend doing this. For this build some people may prefer Skulls or Saphires in the weapons or even Skull in Jewelry.

XYZ Diamond (Requires Level XY)

• Weapon: +N% Ultimate Skill Damage
• Armor: +N% Barrier Generation
• Jewelry: N% Resistance to All Elements

+5%/+5%/5 for chipped (the 2nd grade at lvl 20)

XYZ Skull (Requires Level XY)

• Weapon: +N Life On Kill
• Armor: +N% Healing Received • Jewelry: +N Armor

+13/+5%/+170 for chipped (the 2nd grade at lvl 20)

XYZ Saphire (Requires Level XY)

• Weapon: +N% Critical Strike Damage to Crowd-Controlled Enemies
• Armor: N% Damage Reduction While Fortified
• Jewelry: N% Cold Resistance

+7.5%/5%/14.3% for chipped (the 2nd grade at lvl 20)

Legendary Aspects / Powers

I will only list the Legendary Aspects that have been selected for the build and the slots in which I advise putting those. For in-depth information you can check my RDY-4-Launch Builds spreadsheet on this link. This build (Chaining Thunder 2.0) is one of the builds on that spreadsheet.

  • Helm: Exploiter’s Aspect
  • Amulet: *Aspect of Shared Misery Until The Unique goes here (see note below)
  • Chest: Aspect of Fortune
  • Pants: Aspect of The Unwavering
  • Gloves: Aspect of the Unbroken Tether
  • Boots: *Aspect of Shared Misery (see note below)
  • Ring 1: Aspect of Splintering Energy
  • Ring 2: Prodigy’s Aspect OR Aspect of The Umbral is a great alternative but only REALLY good with Aspect of Shared Misery in the builds
  • 1H Weapon: Aspect of Overwhelming Currents
  • Off-hand: Stable Aspect
  • 2-H Weapon (if you decide to use one): Aspect of Overwhelming Currents
NOTE: After the unique goes on the Amulet slot, Shared Misery goes in the Boots slot. Before that use a filler in the Boots. My choice will be Charged Aspect. OR keep Shared Misery in the Boots then in the Amulet put Accelerating Aspect if you can manage the mana drain all that attack speed will cause. Alternatively, for the Amulet move the Splintering Energy there and use Aspect of The Umbral in the 1st Ring instead of it.

Paragon Boards:

Use the links below to check the paragon boards selected and the nodes i’ve taken. One link is for what the boards will look like at lvl 97 without any paragon points from renown (so more paragon points will be obtained on the way to 100 as well as from renown. The other link will be what the boards will look like when fully maxed out on paragon points.

Suggested Gear Rolls to look out for (NOT in order of priority):

I’ve shortlisted 39 different affixes that work well with the build of almost 300 total. I’ll highlight in Orange the ones I think should get higher priority

Bonus to All Damage
Critical Strike Damage Bonus
Critical Strike Chance
Critical Strike Damage with Core Skills
Damage with Core Skills
Damage with Crackling Energy
Lightning Damage Bonus
Lightning Critical Strike Damage Bonus
Critical Strike Damage vs Crowd Controlled Enemies
Cooldown Reduction
+ % Critical Strike Chance with Lightning Damage
+ % Damage to Elites
+ % Lightning Damage to Elites
Damage Upon Killing an Elite
+ % Critical Strike Chance with Lightning Damage Against Elites
Damage Reduction for X Seconds After Killing an Elite
+ % Damage for X Seconds After Killing an Elite
Damage Reduction from Elites
Resistance to All Elements
Attack Speed
Higher Priority
+ All Stats
Damage while Healthy
Damage vs Healthy Enemies
Damage vs Injured Enemies
Damage vs Close Enemies
Weapon Damage (not sure if there are any bonuses to that as rolls)
Damage vs Stunned Enemies
Damage vs Slowed Enemies
Damage vs Immobilized Enemies
Mana On Kill
Mana Generation
Mana Regeneration
Barrier Generation Bonus
Damage Reduction with an Active Barrier
Lucky Hit Chance with an Active Barrier
Lucky Hit Chance
Movement Speed
Intelligence
Resource Cost Reduction
Lower Priority

Useful Links (Spreadsheets & more):

For all of my Diablo IV RDY-4-Launch Theorycrafts/Builds: This Spreadsheet

For my Diablo IV Pre-Launch Class Skill Trees (can be used as mini-calculator): This Spreadsheet

For all of my Diablo IV Pre-Launch Theorycrafts/Builds: This Spreadsheet

♦ ◊ ♦ ◊ ♦

This concludes the Chaining Thunder 2.0 Sorcerer Build for Diablo IV. If you’re interested in the game below are links to the various platforms where one can buy it (you can just click the links to open a new tab):

PC (Battle.Net)

XBOX

PlayStation

Official Website